Introdução
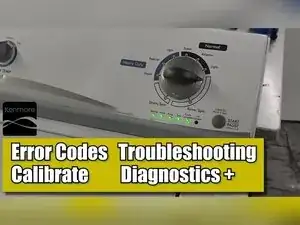
Use the washer’s built-in service modes to pull error codes, run automatic or manual tests, and perform the factory recalibration that fixes many no-spin or no-drain complaints. These steps help you identify faults without replacing parts or doing electrical tests. These steps can be done on many other styles of VMW washers (which all have the green oval lights and go under brand names like Maytag, Kenmore, Roper, Whirlpool, Inglis, Admiral and others).
-
-
Remove the harness plate screw and the two top screws on the rear panel with a quarter inch hex head screwdriver.
-
Pull the lid toward you, lift it up, then push it back so the top pivots on the rear hinge tabs.
-
-
-
Lift the taped lid and locate the folded technician’s service sheet on the front left corner under the top panel.
-
Remove the sheet and keep it nearby for model-specific code definitions.
-
-
-
With the washer plugged in, rotate the cycle selector counterclockwise until it is at the 12 o’clock position after one full turn.
-
-
-
Turn the dial right three clicks, left one click, then right one click, pausing about half a second between moves.
-
Verify successful entry when all green lights flash together.
-
Rotate the dial clockwise to scroll through the diagnostic submenus.
-
-
-
Stop turning when only the Cycle Complete lamp is lit.
-
Press Start to enter error-code recall; all indicator lamps will flash once.
-
-
-
Rotate the dial clockwise to view up to four stored fault codes one at a time.
-
Add the numbers shown by the remaining lamps to complete the code, such as F0E5 for an unbalanced load.
-
Press and hold Start for roughly five seconds on the fifth position to erase all stored codes when needed.
-
-
-
Remove the two Torx screws securing the lid striker and slide the striker off the lid.
-
Insert the striker into the lid lock to trick the control into thinking the lid is closed.
-
-
-
Rotate the dial to Manual Test, press Start, then turn the dial to select a specific component.
-
Choose Lid Lock first when you need to test agitation or spin functions.
-
Press Start to begin and press Start again to stop each selected action.
-
-
-
Hold the Start button for about four seconds to cancel manual testing and return the washer to standby.
-
-
-
From the diagnostic menu, rotate the dial four clicks clockwise until only the Rinse lamp is lit.
-
Press Start to begin recalibration; the washer resets sensors and runs a short verification lasting about two and a half minutes.
-
Wait until all indicator lamps turn off before returning the machine to normal use.
-
-
-
Reattach the lid striker to the lid with the Torx screws.
-
Lower the top panel, slide it forward into place, and reinstall the two rear screws and harness plate screw.
-
Remove the tape and ensure the lid opens and closes smoothly.
-
You now have the washer’s fault codes cleared, components tested, and control system recalibrated. Use the information gathered to decide on any needed repairs and repeat diagnostics after fixes to confirm the issue is resolved.
