Introdução
We will show you how to replace a broken rivet button on a ski jacket using simple tools. You will learn how to remove the damaged piece, set the new button correctly, and make sure it stays secure without harming the fabric. Let’s get your jacket ready for the slopes again!
➡️Before you get started, please check the safety disclaimer at the bottom of the page.
Ferramentas
Peças
-
-
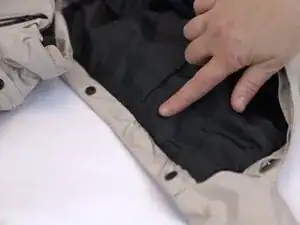
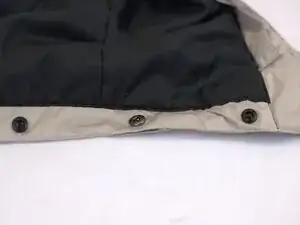
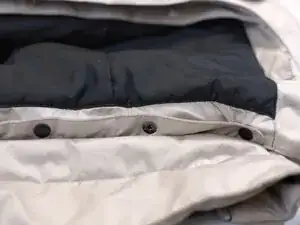
Identify where the button fell off.
-
Prepare the tools needed for the repair.
-
Tip: Many garments come with a spare button on the inside, sewn to the care label. Check there, before buying a new button.
-
-
-
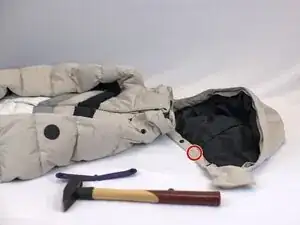
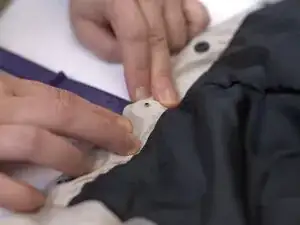
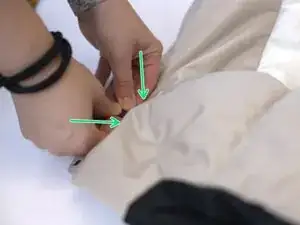
Locate the area where the new button will be placed
-
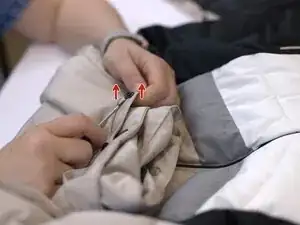
Make a small cut on the seam (green circle) to allow space for the "punch tool" to be inserted.
-
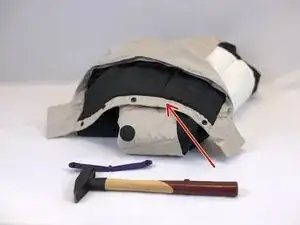
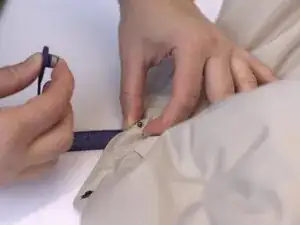
Gently insert the "punch tool" and prepare for next steps.
-
-
-
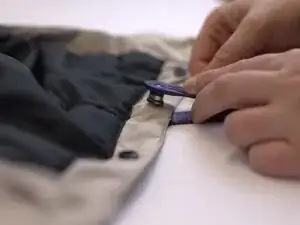
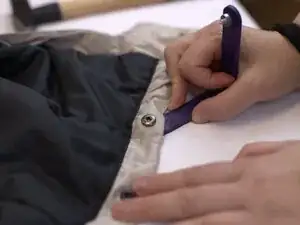
Position the button in the right direction.
-
Note: Take time to understand the punch tool and match the appropriate halves of the new button to the matching sides of the punch tool. One half is for the inside; the other is for the outside.
-
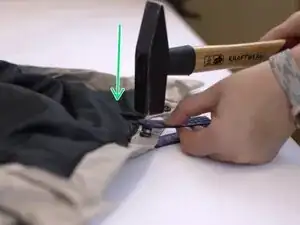
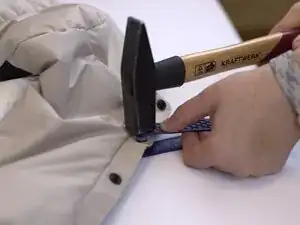
Close the punch tool, to keep the two halves securely together. Make sure this is in a comfortable orientation, to make the hammering easier
-
Use the hammer to give 3 gentle taps following the direction of the green arrow.
-
Tip: When hammering we advise protecting your work surface. A wooden/plastic chopping board, or an old piece of wood, will work well for this. In this example, we used a hard table base.
-
-
-
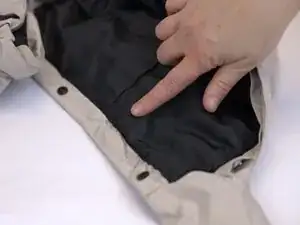
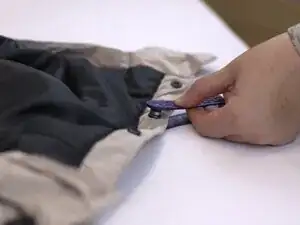
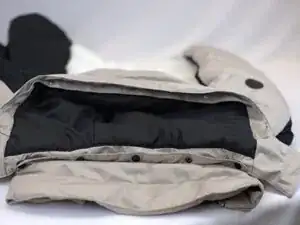
Inspect the button and check if it has been secured safely. If needed, you can give it an additional "tap" with the hammer.
-
-
-
This repair has two buttons to replace. The first one was a missing one while this one is a damaged one that first needs to be removed.
-
Use a pair of pliers to remove the old button.
-
Repeat the previous steps to set the "punch tool" in the correct position and align the button (follow the green arrows).
-
-
-
Repeat previous steps by using a hammer to give 3 gentle taps.
-
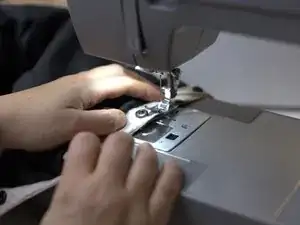
Use a sewing machine to close the open seam.
-

In need of another repair? Don't worry! Check out our other guides to find quick solutions for your favourite clothing, footwear and equipment!
----------------------------------------
🚨🛠️🩹 IMPORTANT SAFETY NOTICE:
The repair guides provided on this site are intended to help you repair products on your own. While we have put a lot of care into them, all repair work carries some risk:
- Safety Precautions: When repairing your product, take all necessary precautions to ensure your safety. Use appropriate tools and follow the instructions carefully.
- Product Condition: Once your product has been repaired, it may not meet original compliance guidelines anymore and could potentially have issues.
- Liability: We are not responsible for any damage or injury that may occur during the repair process or as a result of using a repaired product. You, as the repairer, assume all risks and responsibilities associated with the repair.
By using these repair guides, you fully acknowledge and accept the potential risks and responsibilities involved.