Introdução
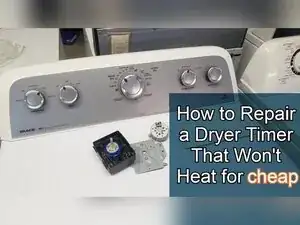
If a Whirlpool-built dryer runs but won’t heat even after the heating parts have been replaced or tested, a worn timer can be the cause. Many Whirlpool, Kenmore, Amana, Estate, Roper, and Maytag dryers from about 2012–2019 that use a top-mounted lint filter use similar timers, including the Whirlpool timer W10186032 and many similar-looking variants.
This guide shows how to safely access the timer, check it for an open (no-continuity) heating contact, open the timer, clean the charred contacts with a nail file, retest it, and reinstall it. This refurbish is a “get more life out of it” fix and won’t always work, especially if the timer’s gear case or shaft is damaged.
-
-
Use a screwdriver or nut driver to remove the six screws securing the rear cover plate.
-
Lift off the black rear cover plate and set it aside.
-
-
-
Slide a putty knife under one end of the console to find the hidden spring clip.
-
Press the spring clip inward, then lift up on the console edge to release it.
-
Repeat on the other side of the console.
-
-
-
Push the console forward while wiggling it until it moves into a service position.
-
Confirm the timer and its wiring are fully accessible from the front.
-
-
-
Pull off the timer’s wire harness connectors from the timer terminals.
-
Use a putty knife or flat tool to press a locking tab on stubborn connectors while pulling the plug straight out.
-
Use a putty knife edge or flathead screwdriver to release the frustrating motor-style harness tab if it won’t budge by hand.
-
-
-
Set a multimeter to continuity mode.
-
Turn the timer to a high heat portion of the dial and probe terminals A and C on the timer.
-
-
-
Remove the timer mounting hardware securing the timer to the console.
-
Remove the ground screw attached to the timer bracket if present.
-
Pull the timer knob off the timer shaft.
-
Lower the timer out of the console once it’s free.
-
-
-
Place the timer on a table with the black side facing down.
-
Use a Phillips screwdriver to remove the two screws holding the timer assembly together.
-
Lift off the motor assembly and set it somewhere safe so it won’t get lost.
-
-
-
Inspect the three lower contact points inside the timer for corrosion, charring, or heat damage.
-
Inspect the gear case and shaft for damage or stripping, especially if the timer won’t turn normally.
-
-
-
Rotate the gear shaft from a high heat mode into a low or no heat mode to separate the contacts.
-
Remove the cam located between C and D if it blocks access to the contact area.
-
-
-
Use an emery board or nail file to polish the contact surfaces until they’re clean and shiny.
-
Continue filing for five to ten minutes or longer if the contacts are badly burned.
-
-
-
Rotate the gear shaft clockwise to a high heat mode where contacts A through C should touch.
-
Use a multimeter in continuity mode to check for continuity between A and C.
-
-
-
Repeat polishing if continuity still isn’t reliable, since sanding removes metal and can increase the contact gap.
-
Sand the plastic stop area near the A contact to give it more room to move toward the neighboring contact if needed.
-
-
-
Reinstall the cams and shafts in their original positions, then reinstall the metal face onto the timer body.
-
Flip the timer over and reinstall the motor assembly.
-
Reinstall and tighten the two Phillips screws.
-
-
-
Reinstall the knob on the timer shaft and rotate it until it clicks firmly through the modes.
-
Set the dial to a high heat position and recheck continuity between A and C.
-
Advance the dial and verify continuity again on another high heat area, such as auto dry around the 10 o’clock position.
-
-
-
Place the timer back into the console, then reinstall the timer mounting hardware and the ground screw.
-
Push the console back into position until both spring clips snap into place.
-
Reinstall the rear cover plate and its six screws.
-
If continuity between A and C is restored on the high heat portions of the dial and remains stable after reassembly, the timer is likely able to pass power for heat again. If the contacts won’t polish cleanly, the shaft can’t be turned, or the gears bind and won’t advance, replace the timer rather than forcing it.
