Introdução

Follow this guide to open your Logitech Pebble Keys 2 K380s wireless keyboard.

Opening your keyboard gives you access to clean its internals, troubleshoot mechanical problems, or replace a part.

Note: Opening the keyboard requires removing the feet. While it’s possible to cleanly remove the feet, you may need replacements if one gets damaged.

  1. 14moEONJfymGb5jE
    14moEONJfymGb5jE
    HyhDQZmgsVEBJKZs
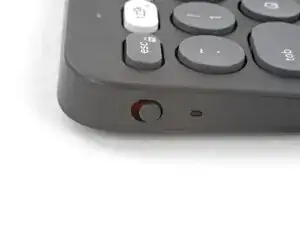
    • Slide the power switch to the OFF position.

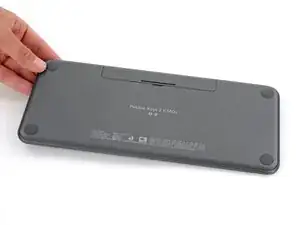
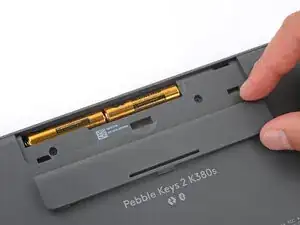
    • Flip your keyboard over and lay it down so the feet are facing up.

    • If your work surface might scratch the keyboard, place a soft towel under it.

  2. rtWNowRCVfm5Apxf
    rtWNowRCVfm5Apxf
    LWI4eUja6luIjgNv
    eZeF2PutGYASYLRQ
    • Push the battery cover's center tab in and up to remove the cover.

  3. UYxhOZ3WAXJGcxJJ
    UYxhOZ3WAXJGcxJJ
    dmwLwQRHngXGfMwj
    EHLRP4vseNd5HaML
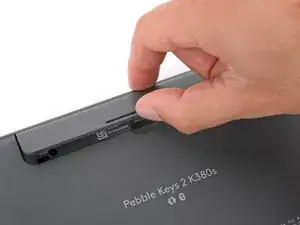
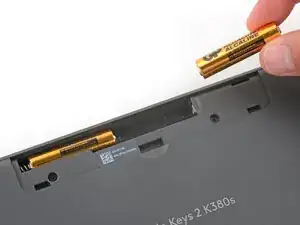
    • Use your finger to lift the edge of the first battery and remove it.

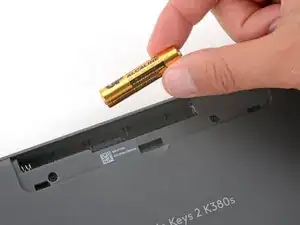
    • Slide the second battery out of its recess and remove it.

    • During reassembly, slide the AAA batteries in negative (-) end first, as shown in the recess.

  4. 6wmPPcFKYHjUBIj2
    • While you can remove the feet without heating them, doing so gives you a better chance of a clean removal.

    • Heat an iOpener and lay it on one of the feet for one minute.

    • Alternatively, you can use a hair dryer on Low to heat the feet.

    • If using a hair dryer, only heat the feet a few seconds at a time to avoid warping the plastic.

  5. YkWS5PLJoVKhW1xF
    YkWS5PLJoVKhW1xF
    S1yZIJIsgCCkZmB6
    tViESlurfr3NHtaW
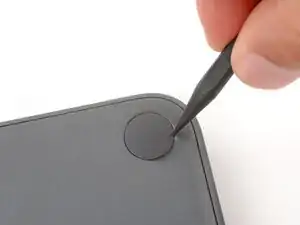
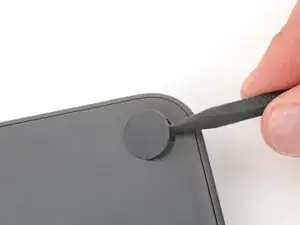
    • Slide the point of a spudger under the foot and lift until you can grip the foot with your fingers.

    • Insert your tool near the top edge of each foot and slide it towards the bottom edge, so it goes into the screw recess under the foot.

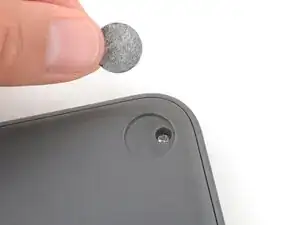
    • Use your fingers to slowly peel up and remove the foot.

    • Repeat the heating and removal process on the three remaining feet.

    • During reassembly, use a spudger to scrape up and remove any leftover bits of adhesive from the foot recesses before pressing the feet firmly into place.

  6. 1361dNnOCNBUmLmV
    1361dNnOCNBUmLmV
    wmYSkqNpK4pOQuEp
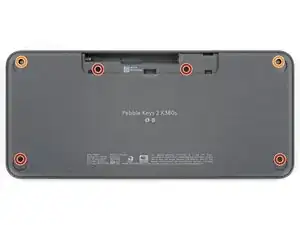
    • Use a Phillips screwdriver to remove the six screws securing the keyboard together:

    • Four 3.1 mm‑long black screws

    • Two 7.2 mm‑long silver screws

  7. LLNAdBU1iKOfDVPy
    LLNAdBU1iKOfDVPy
    WZSqJ5sCLKdbsPsq
    ASkiDOPRcyWtVtOS
    • Strong plastic clips around the perimeter of the keyboard secure the two halves together. Separating them is tricky and will require some force.

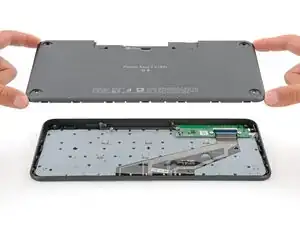
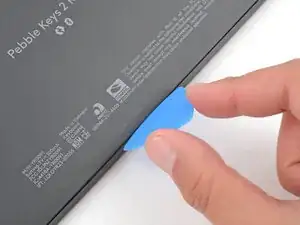
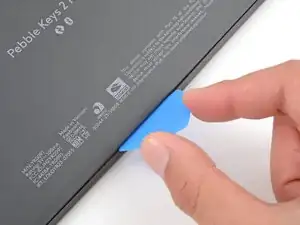
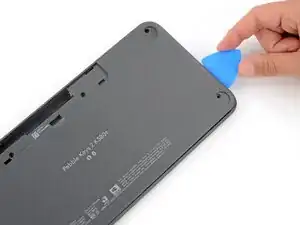
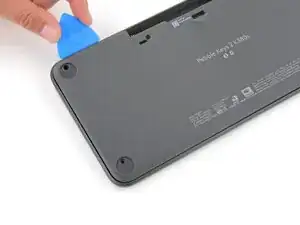
    • Insert the flat edge of an opening pick in the seam between the two halves of the keyboard, near the center of the bottom edge.

    • Use the pick to pry up the two halves apart, releasing the clips.

    • You should feel and hear the clips release. If you don't, remove the pick and try again.

    • Leave the pick inserted for the next step.

  8. jURcOkLKsdUNVEGd
    jURcOkLKsdUNVEGd
    uSISPk5ERFgR4JD3
    4CFLt2PrkrnOEp6Q
    • Keep the pick angled flat to the keyboard to help release the clips.

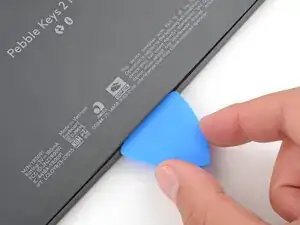
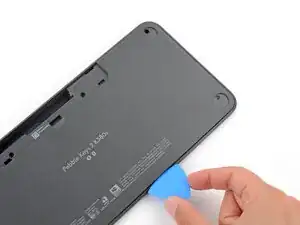
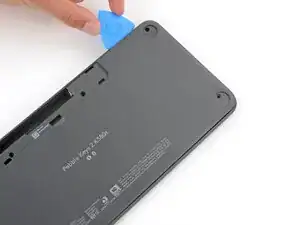
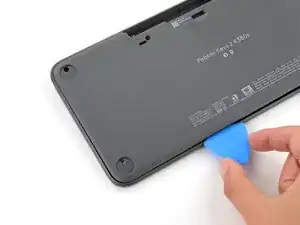
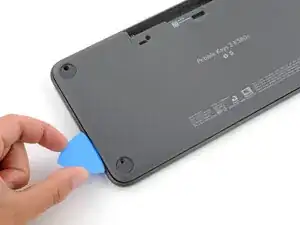
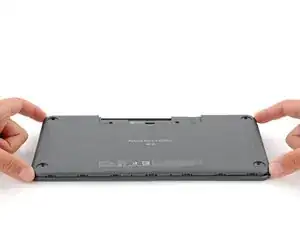
    • Slide the opening pick towards the bottom right corner, up the right edge, and along the top edge to release the clips.

    • You should feel and hear the clips release. If you don't, slide the pick along the section again and pry until the clips release. The top edge clips are particularly tricky to release.

  9. ap6dD63CVFFDrBNq
    ap6dD63CVFFDrBNq
    v4y1OCSSIicsUqkW
    Wn5DiWQX2udxODjf
    • Repeat the process on the other side of the keyboard to release the remaining clips.

  10. V4ap4dTf4RQIySp5
    V4ap4dTf4RQIySp5
    UwPLBoYiQfS6Waqd
    • Remove the bottom of the keyboard.

    • During reassembly, put the bottom of the keyboard into place and press firmly around the perimeter to engage all the clips.

    • It may take significant force to engage all the clips. There should be no gap around the perimeter of the keyboard.

Conclusão

To reassemble your device, follow these instructions in reverse order.

Repair didn’t go as planned? Try some basic troubleshooting, or ask our Answers community for help.

Reuse or Recycle—Never put discarded electronic parts in household waste. Visit Logitech Recycling to find your nearest recycling points, including the option to mail back old devices to Logitech for free if there’s no convenient solution in your area. You can also take your e-waste to any R2 or e-Stewards certified recycler. And don’t let good working parts or repaired devices die a slow death in your sock drawer—pass them along to someone who can use them.

Share your experience—Leave a comment here or send your feedback directly to Logitech at repair@logitech.com to help shape future repair guides and product design.

Spencer Day

Membro desde: 14/09/22

165254 Reputação

0 comentários