Introdução

Follow this guide to open your Logitech C920 webcam.

Open your webcam to clean its internals, troubleshoot mechanical problems, or replace a part.

  1. ahYRbZQmT3sIVMbk
    ahYRbZQmT3sIVMbk
    BXuR6cOdNMWTeYHb
    mCSG6re1XxyFodrR
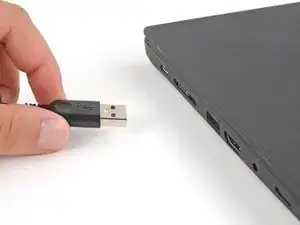
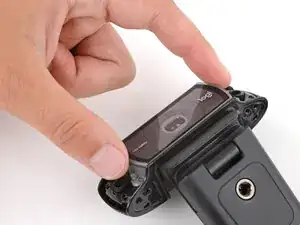
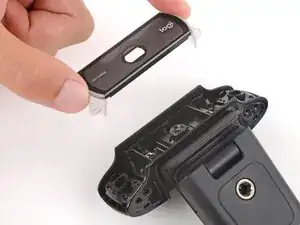
    • Before you begin, unplug your webcam, close the mounting clip, and remove the privacy shutter.

  2. NyMJEKQ5HeRSUI1I
    NyMJEKQ5HeRSUI1I
    dS1LTHRTgQKVIToI
    gFxU43BHqDTfDBZB
    • Be careful not to damage the rubber pads or plastic case during this step. Work slowly and don't push hard against the webcam.

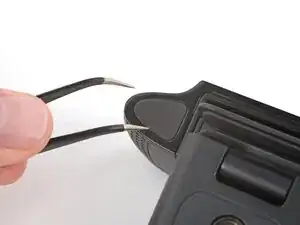
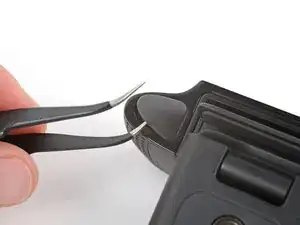
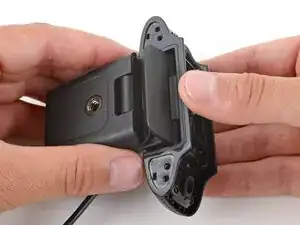
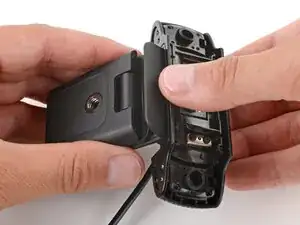
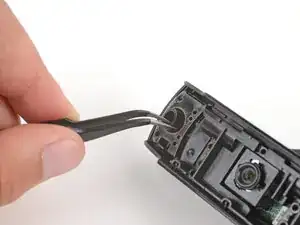
    • Push an arm of a pair of angled tweezers under one of the rubber pads on the underside of the webcam.

    • There's a small hole near the center of the back edge (farthest from the lens). Try inserting your tweezers here to prevent damaging the pad.

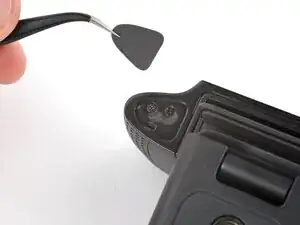
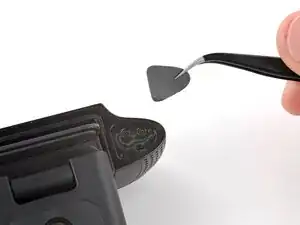
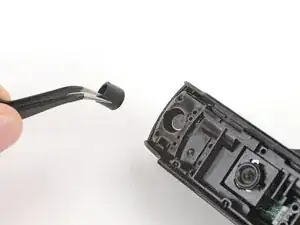
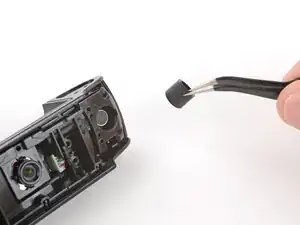
    • Slide the tweezers farther under the pad and lift to remove it.

  3. 6HKVIIeACUZSVSZ6
    • Repeat the previous step to remove the other pad.

  4. CsA1TGofWqePGMAI
    CsA1TGofWqePGMAI
    oiOIktVwcGNmUgLl
    EGUJlQAjMqjM6ysL
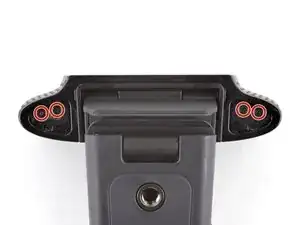
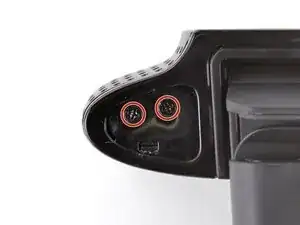
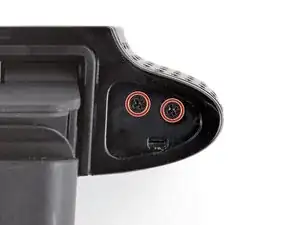
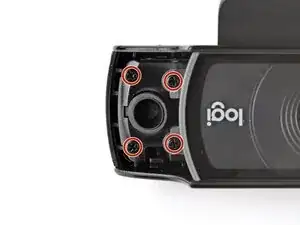
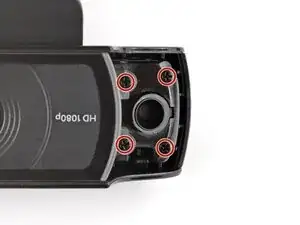
    • Use a Phillips screwdriver to remove the four 4.5 mm‑long screws securing the microphone grilles.

  5. cj3OCfYpx3gpTI1A
    cj3OCfYpx3gpTI1A
    mqnkpGe4JfkYUyFI
    jfiIlGBPa6ApQ3e2
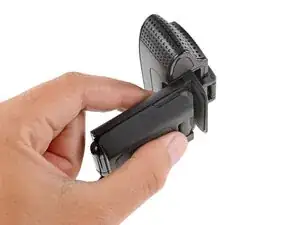
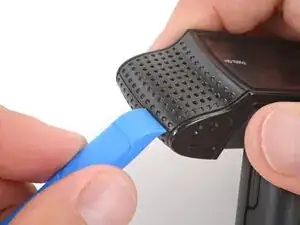
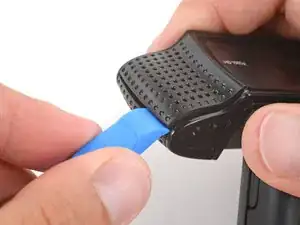
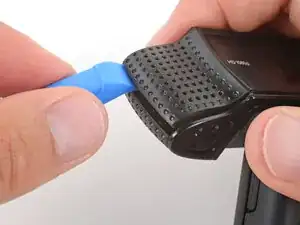
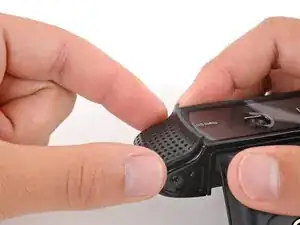
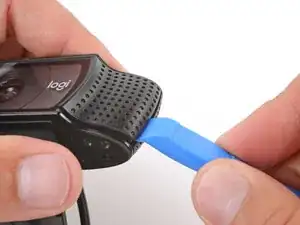
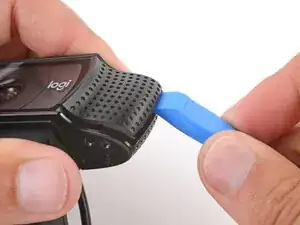
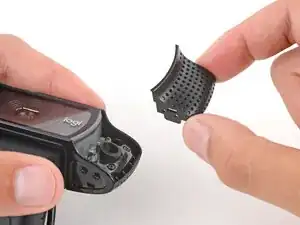
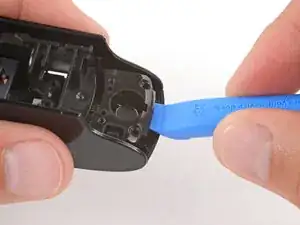
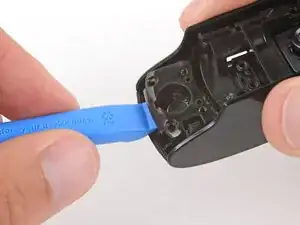
    • Insert an opening tool in the microphone grille seam on the outer edge of the webcam.

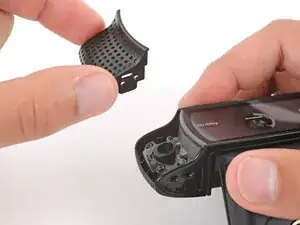
    • Slide the opening tool along the seam to release the clips.

    • If you don't feel and hear the clips release, remove the opening tool and try again.

  6. AAUoAXGatgbXY5i3
    AAUoAXGatgbXY5i3
    BVCVTbgROPH2Ir1I
    • Use your fingers to remove the microphone grille.

  7. MPD5xaE41ypEpfL6
    MPD5xaE41ypEpfL6
    2kDarHR3qendSsrl
    kOfmj62CO1gBCCGM
    • Repeat the process to remove the microphone grille on the other side.

    • During reassembly, put the grille covers in place and squeeze firmly to engage the clips.

  8. NCvyfSDTcT2dlAfY
    NCvyfSDTcT2dlAfY
    gm1DdKFYUa2LtynX
    e2bd1i15wUVFlv3C
    • Use a Phillips screwdriver to remove the eight 8.0 mm‑long screws on the outer edges securing the lens cover.

  9. FIatDAsVxAHBVIWw
    FIatDAsVxAHBVIWw
    4auhMKA4DpdM1ODQ
    • Use your fingers to lift and remove the lens cover.

  10. WUKDUvRsIRm6VLNe
    WUKDUvRsIRm6VLNe
    PB3ZrBDeOZoiTF2L
    • Tilt the main body of the webcam so its hinges are fully open.

  11. 1nIbSSMGQslCX4Eh
    1nIbSSMGQslCX4Eh
    SAZE5QX42GKIBeZa
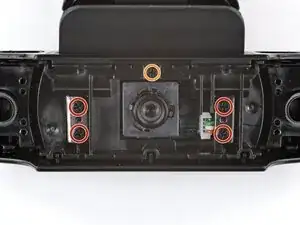
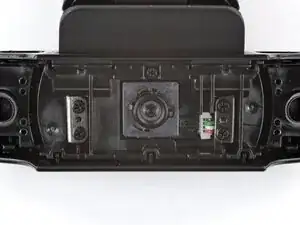
    • Use a Phillips screwdriver to remove the five screws securing the hinge mechanism:

    • Four 4.8 mm‑long screws

    • One 6.0 mm‑long screw

  12. PTpAKUhhdLU4nwJw
    PTpAKUhhdLU4nwJw
    krtsyMSBearsb5tN
    FmW3soMG15QKjBBn
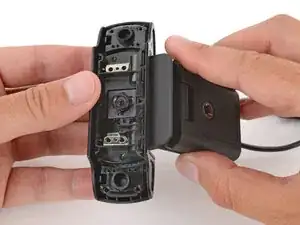
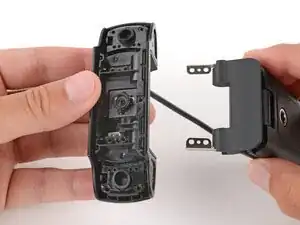
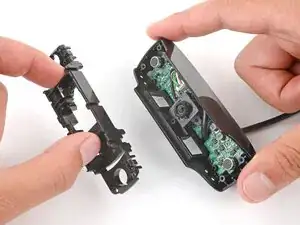
    • Tilt the mounting clip so the hinges lift away from the webcam.

    • Slide the hinges out of their recess and remove the mounting clip.

    • During reassembly, make sure both hinges are fully open before sliding them into place.

  13. SwOvSrrDlpEKaonE
    SwOvSrrDlpEKaonE
    r3PUaj6KfNZ1WXCO
    EyfRyEAfE5FGgRVj
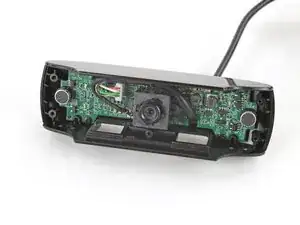
    • Use tweezers or your fingers to remove the two circular rubber spacers from the outer edges of the webcam.

  14. QL5wmaFUyntRNqQO
    QL5wmaFUyntRNqQO
    UGUmWZRZW32hQgck
    fbGFUvqaJilBaGAI
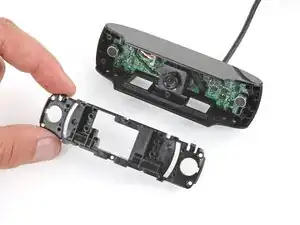
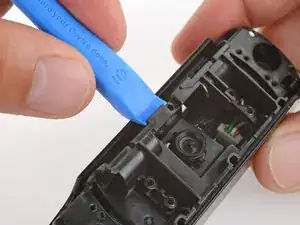
    • Use an opening tool to gently pry up and unclip the left, right, and bottom edges of the plastic inner housing.

    • During reassembly, slide the housing into place and press gently around the perimeter to engage the clips.

  15. 5hwWrpCGFmBhtHVW
    5hwWrpCGFmBhtHVW
    cOOMSkYJwugdXEd2
    • Remove the inner housing.

  16. SOWfud5NjvBxhdYG
    • Your webcam is now open, with the internals accessible.

Conclusão

To reassemble your device, follow these instructions in reverse order.

Repair didn’t go as planned? Try some basic troubleshooting, or ask our Answers Community for troubleshooting help.

Reuse or Recycle—Never put discarded electronic parts in household waste. Visit Logitech Recycling to find your nearest recycling points, including the option to mail back old devices to Logitech for free if there’s no convenient solution in your area. You can also take your e-waste to any R2 or e-Stewards certified recycler. And don’t let good working parts or repaired devices die a slow death in your sock drawer—pass them along to someone who can use them.

Share your experience—Leave a comment here or send your feedback directly to Logitech at repair@logitech.com to help shape future repair guides and product design.

Spencer Day

Membro desde: 14/09/22

165254 Reputação

0 comentários