Introdução
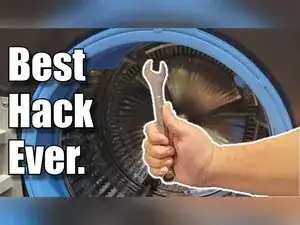
If the door boot seal (also called a door gasket or bellow) on a front-load washer is leaking, loose, or keeps popping out of its groove, the outer spring clamp may be difficult to reinstall by hand. This guide shows how to make a simple door boot spreader from a standard wrench and heavy-duty cable ties, then use it to reinstall the spring clamp on many front-load washer designs, including GE, LG, and Samsung.
Ferramentas
Peças
-
-
Get a standard wrench that gives you enough leverage and width for the clamp, such as a 5/8-inch wrench or slightly larger.
-
Get two heavy-duty cable ties that are wide and strong, but still fit through the clamp’s eyelets.
-
Get needle-nose pliers to tighten the ties and help press the clamp into place.
-
Get side cutters, scissors, or another sharp cutter to remove the ties after the clamp is installed.
-
-
-
Thread a cable tie through the box end (socket end) of the wrench.
-
Thread that cable tie through one eyelet of the door boot spring clamp.
-
Loosely latch the cable tie so the wrench and spring eyelet stay connected but can still shift.
-
-
-
Thread the second cable tie through the other eyelet of the spring clamp.
-
Loosely latch that tie around the open end (mouth) of the wrench on the opposite side.
-
Work both ties tighter to begin spreading the spring clamp while keeping the spring mostly on the same side of the wrench.
-
Hand-tighten as far as you can, then use needle-nose pliers to pull the ties tighter for more leverage.
-
-
-
Grab the flat tail of the tie on the wrench mouth side with needle-nose pliers.
-
Use the tip of the wrench as a pivot point and lever the pliers to ratchet the tie tighter and spread the spring wider.
-
Stop tightening once the spring clamp is spread wide enough to attempt installation without forcing the boot out of its groove.
-
-
-
Press the door boot seal fully onto the washer’s front lip so it sits snug and even all the way around.
-
Lay the wire clamp around the boot seal and seat it into the same groove it came out of.
-
Aim the spring and wrench inward toward the washer housing as you work the clamp into the groove.
-
-
-
At the spring area, press the wire and spring into the groove by hand to start it.
-
Use needle-nose pliers to press against the boot seal and push the spring and wrench inward until the clamp drops into the groove.
-
-
-
Cut both cable ties.
-
Use needle-nose pliers to pull the cut ties out of the wire clamp and away from the boot.
-
Check that the boot seal is fully seated on the washer’s front lip and that the wire clamp sits in the groove all the way around, especially near the spring. If the clamp won’t seat, the most common fixes are tightening the ties to spread the spring more, re-centering the boot so it isn’t riding out of the groove, and keeping the spring mostly on one side of the wrench so it doesn’t twist. If the pliers or a screwdriver could scratch the rubber or the cabinet, add masking tape to the tool tip and press lightly. Spring location and access vary by brand and model, so place the spring where it was originally installed (often near the bottom, sometimes offset) and work the clamp into the groove as you go.
