Introdução
Use this guide to pull stored error codes and run built-in tests on a Samsung front-load washer with the WF42H* style control panel. These diagnostic features can help you narrow problems down to areas like wiring, the door lock, the drain pump, the water valves, or the control board before you start replacing parts.
The code list starts around the five minute mark, and includes:
- Samsung Washer 1E Code
- Samsung Washer 3E Code
- Samsung Washer E3 Code
- Samsung Washer NF Code
- Samsung Washer ND Code
- Samsung Washer AE Code
- Samsung Washer DS Code
- Samsung Washer DL Code
- Samsung Washer LO Code
- Samsung Washer HR Code
- Samsung Washer OE Code
Ferramentas
-
-
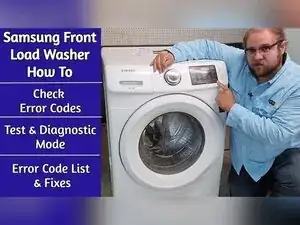
Confirm the washer is plugged in, and the control panel matches the WF42H* style layout shown in the video.
-
Leave the washer powered off at the console when you plan to enter quick test mode.
-
Turn the washer on at the console when you plan to enter the service mode used to read error codes.
-
-
-
Power on the washer.
-
Press and hold the Delay Start button and a Soil Level button at the same time.
-
Release the buttons after you hear a chime and the display shows all zeros.
-
-
-
Press the Soil Level button once to start the error code display.
-
Confirm the letter "D" appears on the screen to show the washer is in the error code diagnostic process.
-
Turn the jog dial either direction to cycle through stored codes.
-
Keep scrolling until the display returns to the letter "D" to confirm all stored codes have been shown.
-
Press the Spin button to exit the error code mode and return to the broader service mode.
-
-
-
Press the Soil Level button to display the washer's software version.
-
Use the cycle count function to show how many times the washer has been run since it was purchased.
-
Press Start while in error code mode to display how many cycles have run since the displayed error code occurred.
-
Press the Power button to power down and exit service mode.
-
-
-
Press and hold the Delay Start button and the Temperature button until the door locks and the washer begins to spin.
-
Watch the digital display as a tachometer that shows drum speed in rpm.
-
Expect heavy shaking between 300 and 400 rpm until the counterweights align, and the spin smooths out.
-
Cancel the spin test by pressing the Temperature button and the Delay Start button at the same time.
-
-
-
Confirm the washer is off at the console and the display is dark.
-
Press and hold the Spin button, the Soil Level button, and the Power button together for about five seconds.
-
Release the buttons after quick test mode activates.
-
-
-
Use the door lock test to check whether the door lock mechanism responds.
-
Use the drain pump test to check whether the drain pump runs.
-
Use the water valve test after locking the door by pressing the Spin button.
-
Run the memory clear test by pressing and holding the Delay End button and the Power button together.
-
Press the Power button to exit quick test mode.
-
-
-
Check wiring and connectors related to the failing system, such as the drain pump, door lock, or water valves.
-
Use a multimeter to test the involved component for continuity or resistance (ohms) as needed.
-
-
-
Repeat the diagnostic mode entry procedure two or three times if the washer doesn't respond to commands.
-
Turn the washer off, turn it back on, and try entering the mode again if the error code scroll feature doesn't work.
-
Use service mode to read stored codes, and use quick test mode to force specific functions like the door lock, drain pump, and water valves. If service mode doesn’t respond, power the washer off and back on, and try entering diagnostics again. Unplug the washer before touching wiring, and use a multimeter and voltage checks to confirm whether a component or the control board is failing.
