Introdução
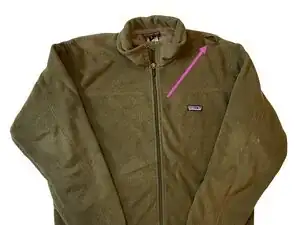
This guide demonstrates how to do a hand sewn herringbone stitch to repair a split seam on a Patagonia® fleece jacket. The herringbone stitch is ideal for reinforcing seams on stretch fabrics or creating flexible, decorative finishes with its crisscross design.
Hand sewn repairs are a fun and effective way to extend the life of gear at home. DIYs repair won't void the Patagonia warranty—they're actually encouraged!
Patagonia items can also be taken in to a local retail store for repair evaluation or sent in to Patagonia through their mail-in repair service.
Let's get fixing!
Related Articles
-
-
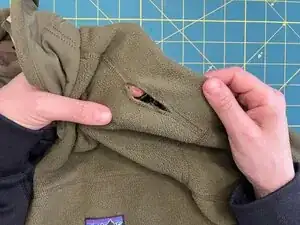
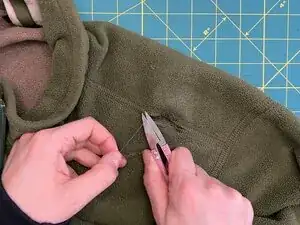
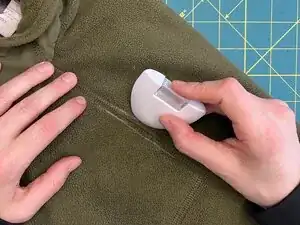
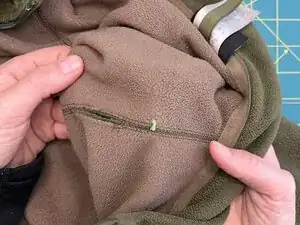
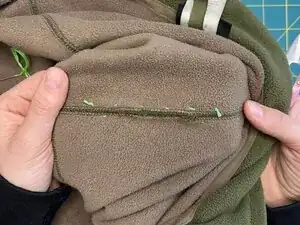
Locate the damaged area and trim away any loose or hanging threads.
-
If necessary, pin the seam together so that it stays in place during stitching.
-
-
-
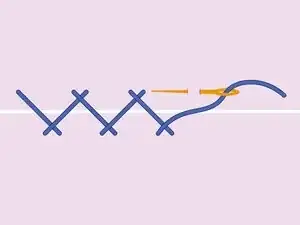
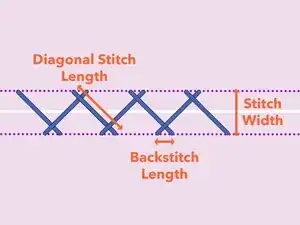
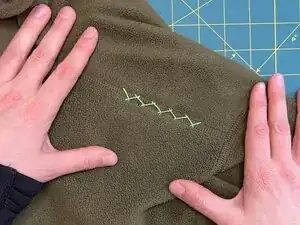
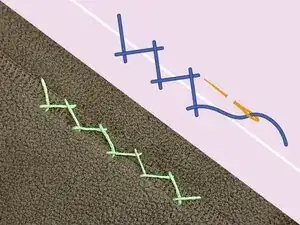
The herringbone stitch follows two parallel lines, with the thread creating a crisscross pattern between them.
-
Before beginning, determine:
-
Stitch Width - The distance between the two parallel stitch lines. Mark both lines with chalk or heat-erasable pen.
-
Diagonal Stitch Length - The length of the diagonal stitch moving from one stitch line to the other that creates the crosshatch pattern.
-
Backstitch Length - The length of the small backstitch that secures each diagonal stitch.
-
-
-
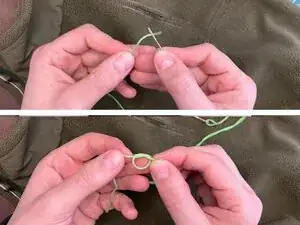
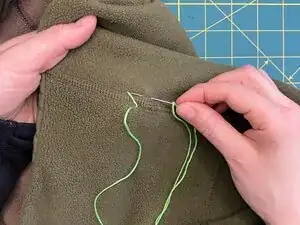
Thread the needle with a length of thread approximately 24 inches (~61 cm) and tie a knot at one end of the thread. For more details see Needles and Thread.
-
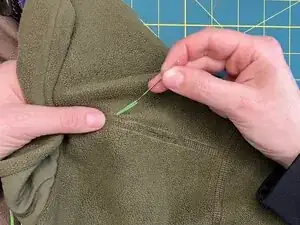
From the backside, insert the needle through to the front at a marked stitch line. Overlap any existing stitching by at least 1/2 inch (~13 mm).
-
Pull the thread through until the knot lies flush against the back of the fabric.
-
-
-
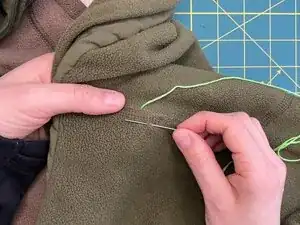
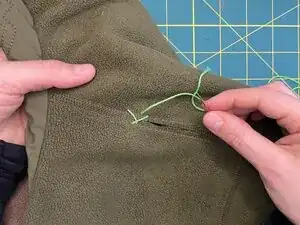
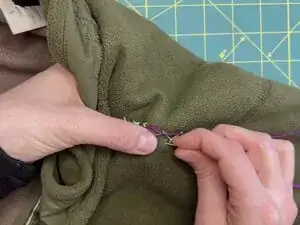
On the front side, move the needle diagonally across the seam in the direction of the stitch path.
-
Insert the needle into the opposing stitch line at the Diagonal Stitch Length determined in Step 3.
-
Make a small stitch backwards along the marked stitch line with the Backstitch Length determined in Step 3.
-
Pull the thread through.
-
-
-
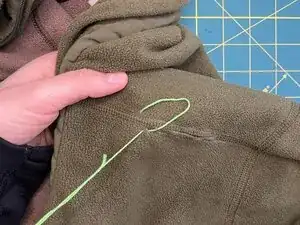
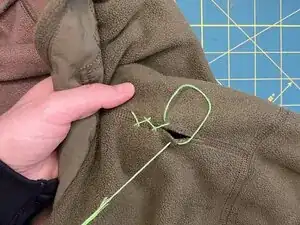
Move diagonally across the seam again.
-
Insert the needle, make a backstitch, and pull the thread through.
-
-
-
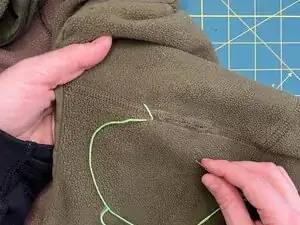
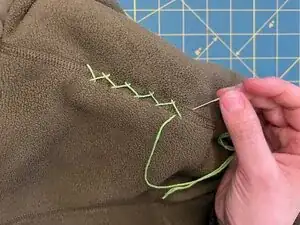
Repeat the diagonal and backstitch sequence, forming a crisscross pattern along the seam.
-
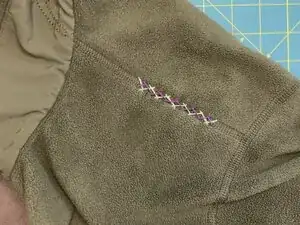
Continue stitching until the repair extends at least 1/2 inch (~13 mm) beyond the damaged area.
-
-
-
To complete the stitch, move the needle to the backside and make a secure knot on the backside of the fabric using one of the techniques from Knot Thread to the Fabric (2 Ways).
-
-
-
Ensure the stitches have effectively secured the seam.
-
For additional strength and coverage, repeat these steps to add another stitch line.
-
-
-
Check the tension frequently while stitching, especially when repairing a slit or split seam, where fabric edges may shift.
-
Adjust as needed by gently pulling or loosening the thread to ensure the stitches lie flat without distorting the fabric.
-
Pause periodically to smooth the fabric and confirm the stitch tension is even along the repair.
-