Introdução
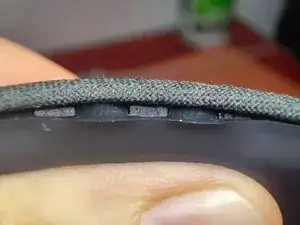
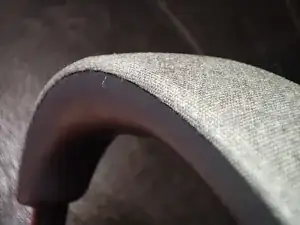
Use this guide if the fabric on your headband has peeled and is sticking out from the seam between the parts (a common issue).
Ferramentas
-
-
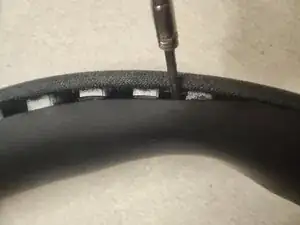
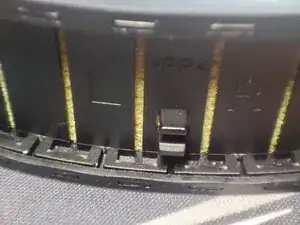
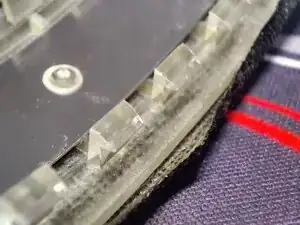
Slide the silicone overlay down with your finger to expose the 'teeth'.
-
Then, using a pry tool or a thin screwdriver, gently pry between the teeth slightly sideways and then downwards to release the plastic latch from the tooth.
-
Start in the middle and work your way towards the edges.
-
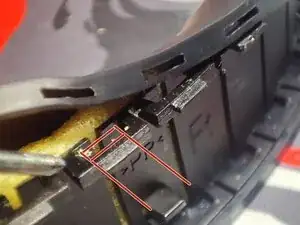
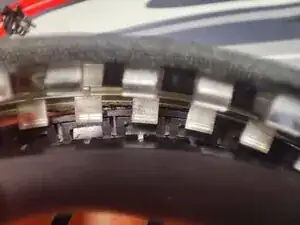
Make sure you are pulling on the plastic frame inside with the screwdriver, not the silicone case. Refer to the last picture to understand how it is assembled (red lines indicate the tooth).
-
-
-
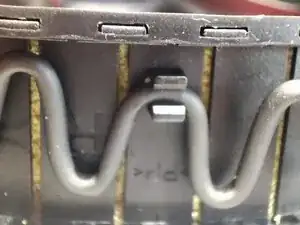
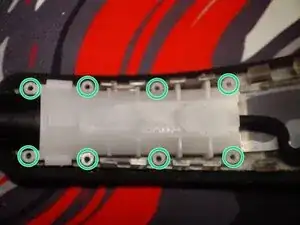
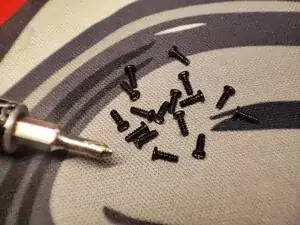
Unscrew the 8 screws on each side using the smallest Phillips screwdriver.
-
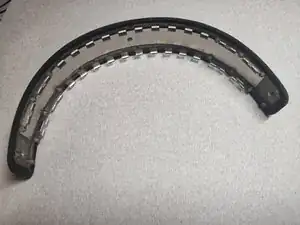
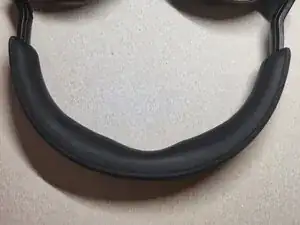
Now the main headband is free
-
-
-
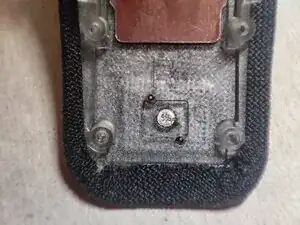
For those who want to completely remove or replace the fabric from the headband: unscrew and remove the Sennheiser emblems.
-
-
-
Use contact glue to re-adhere the fabric to the frame where it has come unstuck.
-
Follow the adhesive's instructions, which typically involve applying a thin layer to both surfaces, waiting 3-5 minutes for them to dry (become non-tacky) without touching them, and then pressing them firmly together.
-
Cyanoacrylate (super glue) may also work, but it's much more aggressive and messy. If you need to re-glue the fabric or repeat the process later, it will be almost impossible to remove the super glue.
-
-
-
Assemble in reverse order.
-
Note that there are "R" and "L" markings on the headband and the silicone cover. In my case, however, the silicone cover was assembled the other way around; otherwise, the cable latch wouldn't have matched the curve of the cable.
-
Enjoy the brand-new-looking headband :)
-

5 comentários
Dima, thank you very much for the guide!
I’d kiss you on the lips for this but I’m afraid it may be considered a harassment nowadays, so I’d firmly shake your hand 🤝
My MOMENTUM 4 jeans edition (the fabric is the whole point!) are finally going to look decent ☺️
I have repaired my fabric yesterday with a help of this guide.
Have to confess I damaged my silicone a bit on the very tip of the headband because I wasn't careful putting it back together.
But I managed to tuck it in nicely, and the fabric is not shabby anymore!
With the process of disassembly being as easy as it is, I start thinking about customization options, like paint, engraving, maybe aqua print... :)
I think I'll keep it for the next iteration of the "project" ;)
I dont get how the silicon is attached can you explain that to me better
Maurits -
The best way I’ve found is to use two screwdrivers: one very small and one larger flathead. First, insert both into the small hole in the silicone and stretch it so it thins out — it’s quite strong, but be careful. Then, with the larger screwdriver, twist gently to widen the gap between the head bend and the teeth; otherwise, you won’t be able to fit it. Finally, push it over the teeth — with a bit of fiddling, it will slip into place.
Maurits -
Good thing to know is that the last couple of centimeters (about an inch) of the plastic holding the silicone overlay close to the ear phones is slightly different from how the plastic is at the top of the head. The transition is slightly fragile with only a few millimeters of plastic on each side. I managed to break one of these. It will not matter a lot since the teeth will hold the plastic together when everything is put together, but it is good to avoid. My advice is to have patience when taking this apart.
Oskar Edlund -
It's not very easy to remove the silicone overlay, and I was afraid of break it. So I decided to glue again the fabric into the grooves.
Leonardo Echeverria -