Introdução

Use this guide to replace the motherboard on a HP ProBook x360 11 G5 EE.

  1. QEIOWsPCkDROf5QM
    QEIOWsPCkDROf5QM
    OX16UUCaX1WeBaDK
    2DYjVMSYnyqUauVH
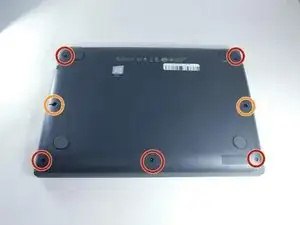
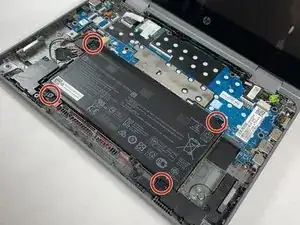
    • Remove the 4.1 mm screws with a T5 Torx screwdriver.

    • Remove the 4.1 mm screws using a JIS #0 screwdriver.

  2. 255ayd2RgeXNpNJl
    • Use an opening pick to pry the corners of the keyboard deck.

  3. PgF6HxJPCtb1uDhw
    PgF6HxJPCtb1uDhw
    AZtYgHyrIVwadTIW
    6tftvJuTjRyU6OG4
    • Use an opening pick or opening tool to pry around the sides of the keyboard assembly.

  4. W5qnneYFDrJrGMQO
    W5qnneYFDrJrGMQO
    OqXBXGsQJggXi5Gh
    ZVIUeykZdRN3UXMA
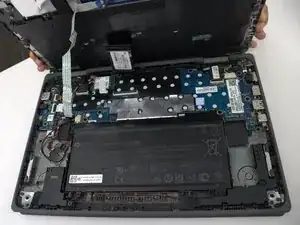
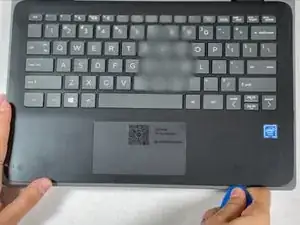
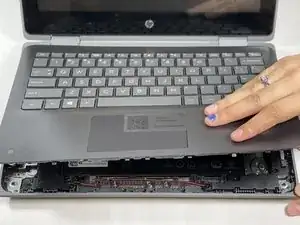
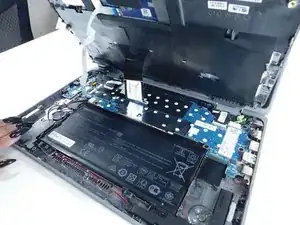
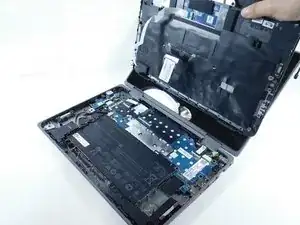
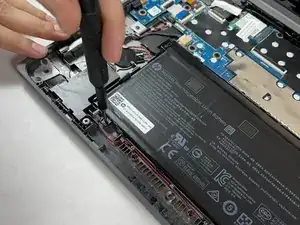
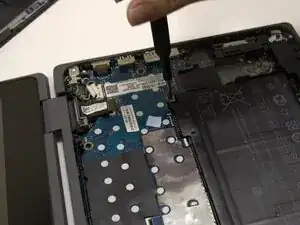
    • Lift the keyboard assembly to expose two ribbon cables.

    • Lift the two plastic tabs that hold the cables in place on the motherboard

    • Slide the ribbon cables out of each connector.

  5. dLUm1qRNDq2VoFRk
    dLUm1qRNDq2VoFRk
    4d4MTWTHinrXuZoL
    • Remove the keyboard assembly from the rest of the computer.

  6. AuuYggoixAT2lYJm
    AuuYggoixAT2lYJm
    oOZiXmR25OjXtnQO
    • Remove the four 3 mm screws from the battery with the JIS #0 screwdriver.

  7. QIlxwe1aUSvmS1bS
    QIlxwe1aUSvmS1bS
    2Yj3aGUgALyrdlFR
    PblTuPxPq4dZiZW1
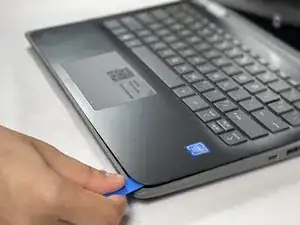
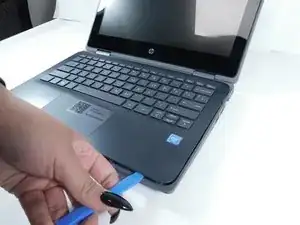
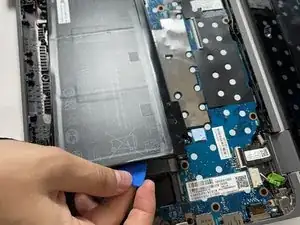
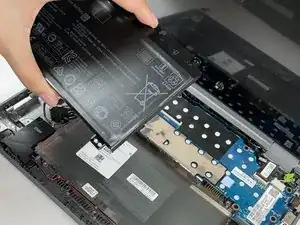
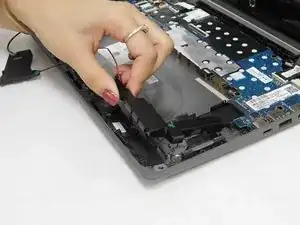
    • Pry the battery up from the laptop using an opening pick.

    • Lift the battery out of its place.

  8. aOVLEkX2HDPb1gO5
    aOVLEkX2HDPb1gO5
    NNP1CJx2WFFgLs6O
    • Remove the four 5 mm screws holding the speakers in place using a JIS #0 screwdriver.

  9. WiWu1R6VmC1BmVpO
    WiWu1R6VmC1BmVpO
    aqjoih4Vkj1bwVlK
    • Disconnect the speaker wire from its socket on the motherboard.

  10. TwVyVqwZIsdUrDnU
    TwVyVqwZIsdUrDnU
    KZXZIgBW4NXuha1A
    6JGXOfsBcmjMqUQ5
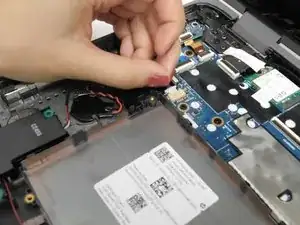
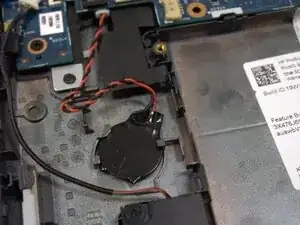
    • Remove the left speaker gently.

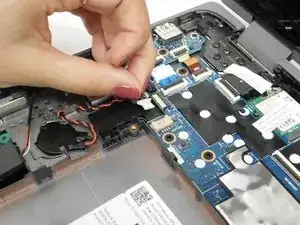
    • Remove the cable that connects both speakers together from the notches that hold it in place. Be careful when pulling the wire to avoid damaging it.

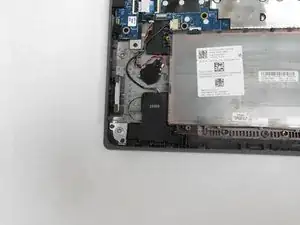
    • Remove the right speaker gently.

  11. PetAgtEUtfjwdHZl
    PetAgtEUtfjwdHZl
    e5psaNQJG5TZcDyR
    LQeIelMXmXVBipeT
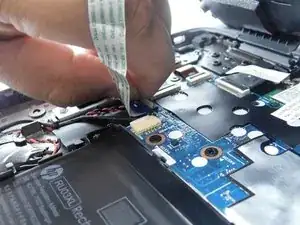
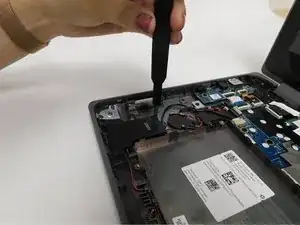
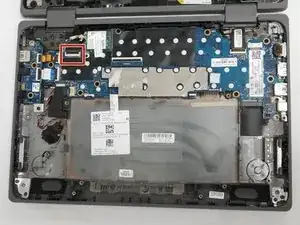
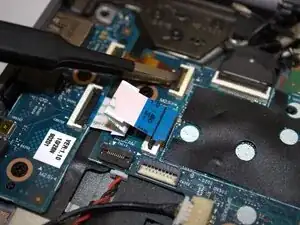
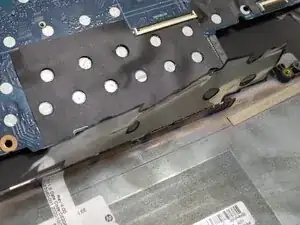
    • Disconnect the ribbon wire from the motherboard by lifting the small flap that holds it in place.

  12. A1Ak2BKJjfSOByQf
    A1Ak2BKJjfSOByQf
    T5eYDob15WEyMESQ
    • Remove both antenna cables that are attached to the wireless card.

  13. 3PynexPpOi1jmrUB
    3PynexPpOi1jmrUB
    5HJF1wOQPe1JBRjA
    TxIqlPmalvpNsV6o
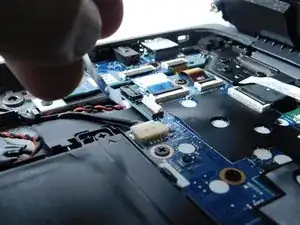
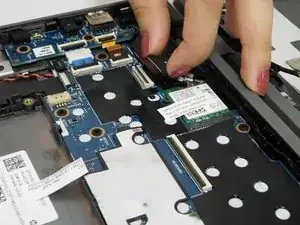
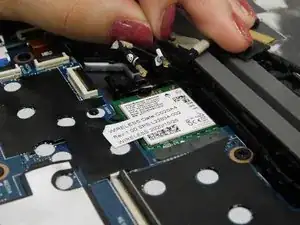
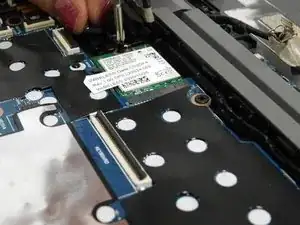
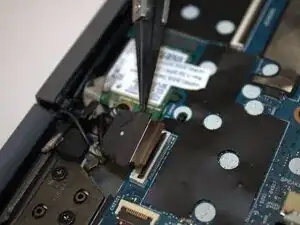
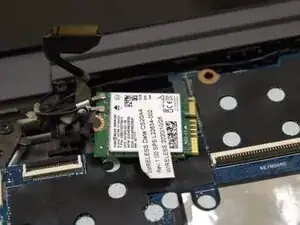
    • Remove the 3 mm screw that secures the wireless card using a JIS #0 screwdriver.

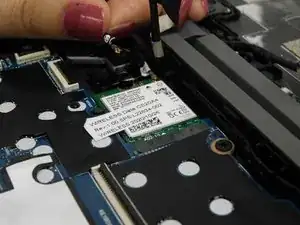
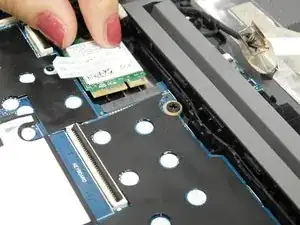
    • Slide the wireless card out of the slot gently.

    • Make sure not to pull it directly up as it can break.

  14. KObuoRb5ykkjfITl
    KObuoRb5ykkjfITl
    eKiKwLC6BphPX5NB
    XeCAElHLpEvhSNyP
    • Lift the locking flaps securing the three ribbon cables.

    • Disconnect the ribbon cables.

  15. xef2JBMpKqNFleMB
    xef2JBMpKqNFleMB
    WcD3MFG6D1Iy1Iby
    LX44avlCVoW6RvuR
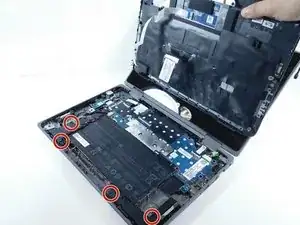
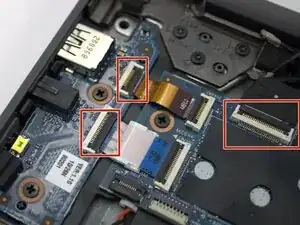
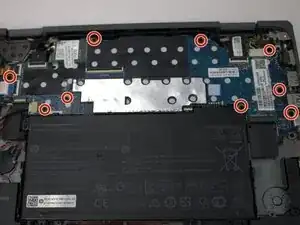
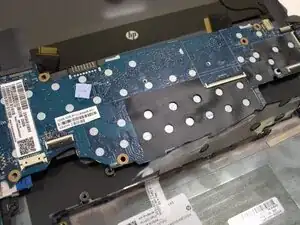
    • Use a Phillips #1 screwdriver to remove all nine 3 mm-long screws securing the motherboard.

  16. FcjPZoHos4IPGnLn
    FcjPZoHos4IPGnLn
    s1x3DU2t2XXWmcMA
    qhWVBWVnBASdjlQI
    • Carefully remove the silver electrical tape.

    • Shimmy the motherboard out.

Conclusão

To reassemble your device, follow the above steps in reverse order.
Take your e-waste to an R2 or e-Stewards certified recycler.
Repair didn’t go as planned? Try some basic troubleshooting or ask our Answers community for help.

Hannah Salgren

Membro desde: 20/10/25

97 Reputação

0 comentários