Introdução
This guide explains how to replace or upgrade the RAM in the HP ProBook 455 G7 (Model: 7JN02AV). The RAM (Random Access Memory) is responsible for short-term data processing and directly affects multitasking speed and system responsiveness.
Common symptoms of failing or insufficient RAM include freezing, programs not loading, blue screens, and overall slow performance. For more detail, see the “Performance Issues” section of the Troubleshooting Page.
Make sure the laptop is fully powered down and unplugged.
Handle RAM modules only by their edges and avoid touching the gold contacts.
If you’re upgrading, HP recommends matching the RAM’s speed, type, and voltage to your existing module.
Ferramentas
-
-
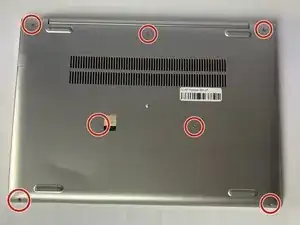
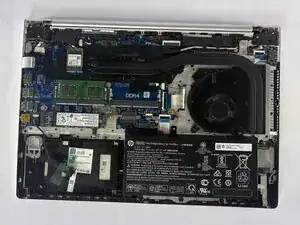
Flip the laptop over so the lower case is facing up.
-
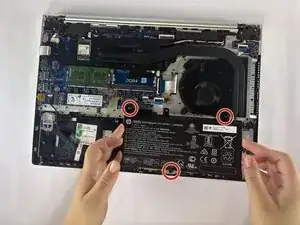
Use a Phillips #1 screwdriver to remove the seven 8 mm-long screws securing the lower case.
-
-
-
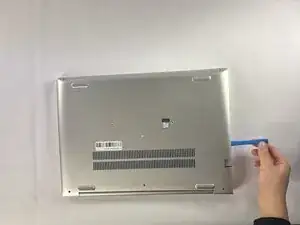
Insert an opening tool into the seam between the lower case and chassis.
-
Pry around the entire perimeter until the lower case fully releases.
-
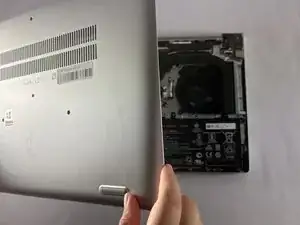
Lift and remove the lower case.
-
-
-
Use a Phillips #1 screwdriver to remove the three 4 mm-long screws securing the battery.
-
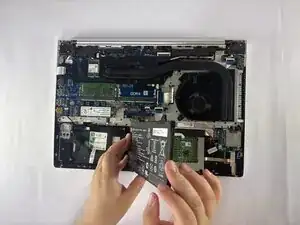
Carefully lift the battery and remove it from the laptop.
-
-
-
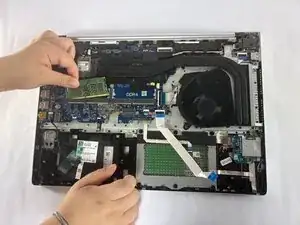
Two clips secure the RAM module in place, one on each side. Using your fingers, spread the clips away from the RAM module.
-


To reassemble your device, follow the above steps in reverse order.
Take your e-waste to an R2 or e-Stewards certified recycler.
Repair didn’t go as planned? Try some basic troubleshooting or ask our Answers community for help.