Introdução

This is a guide showing how to upgrade/replace your WiFi module.

In my case, I wanted to upgrade to one that could use the WiFi 7 standard.

  1. VFiskHUVvkKsIWGm
    • First thing you'll do is flip it over, remove any SD cards, USBs, and remove any case.

  2. gAD5xjueWP1jZJsV
    gAD5xjueWP1jZJsV
    vCJPorKJfw3Ky2SP
    cKXZDaBxyVsoH2ny
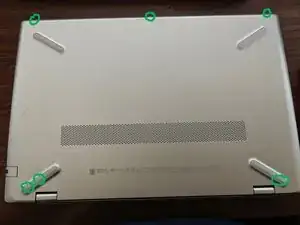
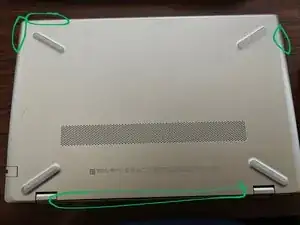
    • There will be about 6 screws you'll need to remove.

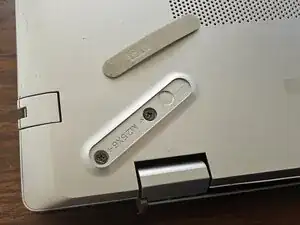
    • You will have to at least partially remove the rubber feet to access 3 of the screws.

    • The screws are really tiny, so I recommend putting them in a Tupperware or Ziploc if you don't have a magnetic screw tray.

  3. eLqVOrFqP3oC3lp4
    eLqVOrFqP3oC3lp4
    hXs4EH4sbfhAHxhC
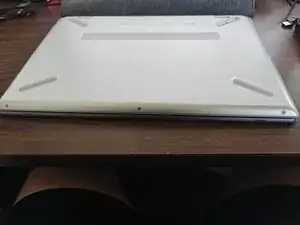
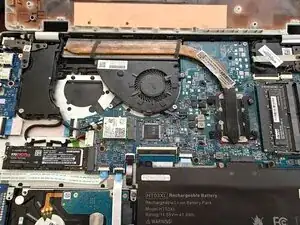
    • You'll use a credit card, ID card, or pry tool to separate the bottom of the laptop from the rest of it. Make sure it's plastic, not metal.

    • You might want to use multiple to hold sections open as you work your way around.

  4. MxSWQioaRDSiYwLo
    • You remove the bottom to reveal the guts.

  5. OCJlpSSKI6IcCpxi
    OCJlpSSKI6IcCpxi
    fubDdN2rUa5dIQvK
    • Find the WiFi module.

  6. NLN1PpDJCNsMfitg
    • Detach the antenna cables.

  7. KMy3mPymKspqZDZ1
    KMy3mPymKspqZDZ1
    VdNUpKUAW4Yxh6pQ
    • Unscrew the screw.

    • It will pop up once it's unscrewed. That's normal.

  8. 2nuYCmokV2cjcVax
    2nuYCmokV2cjcVax
    FuNLuKlVrVrWVIOG
    • Pull the module out.

  9. 2sCn4Rv2dBYWAqIo
    • Put in the new module.

    • You might need to push the end to get it to seat.

  10. yrLUo4aEp2QZsIYA
    yrLUo4aEp2QZsIYA
    lZurAB31aKYeMhs2
    • Push it flat and screw it in.

  11. 4AXpkm1Sr4P2NGSU
    4AXpkm1Sr4P2NGSU
    H6AyopIbWWfKsiXb
    iaK3jwgD4XlBSO6J
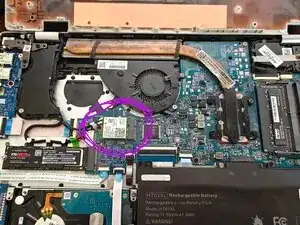
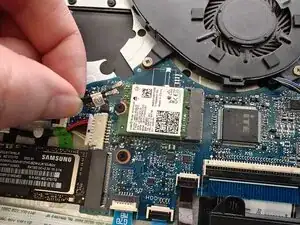
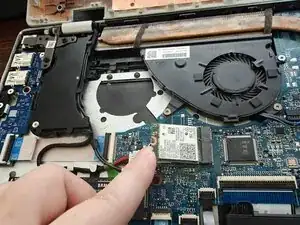
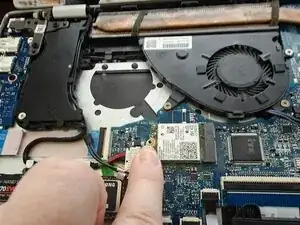
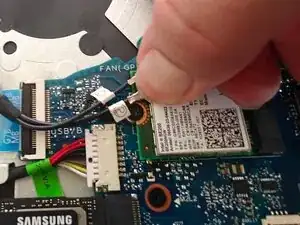
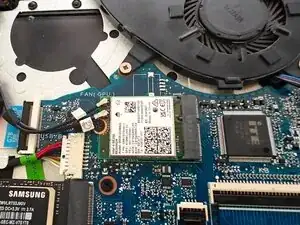
    • Reattach the antenna cables.

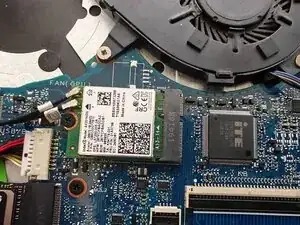
    • They should have labels "1" and "2" on the cables. Attach them to the points labeled "1" and "2" on your new WiFi module.

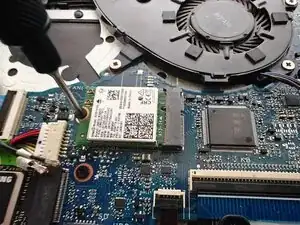
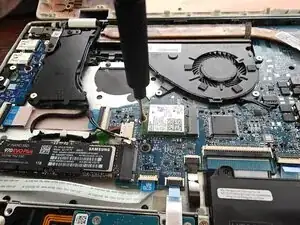
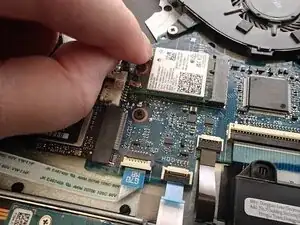
    • They're teeny-tiny snap buttons, like miniature versions of what you'd find on a jacket.

    • Make sure they snap on properly, you might need to use your thumbnail. You can give them a gentle tug to make sure they're actually attached.

  12. DRbS5cX3f4tSKGpR
    • Snap the lid back on

    • Put the lid screws back in

    • Stick the sticky rubber feetsies back on

    • Plug back in any SD cards, USBs, and put your case back on if you have one

  13. VSpGstEvDBu3bJ3Y
    • Go to this link and install the WiFi and Bluetooth drivers that Intel recommends.

    • Power cycle your laptop (off and on again).

    • That's it, you're good to go!

Conclusão

You're all set!

Quinn Enestvedt

Membro desde: 05/09/25

538 Reputação

0 comentários