Introdução

This guide is intended to illustrate the process of removing a motherboard from an HP Elitebook Folio 1020 G1 so that it can be replaced.

Before taking any part of the computer apart, please remember to power down your computer and unplug the power cable from any power source. Failure to do so could result in harm to yourself or the computer.

  1. itsycJoLWUdRS6Om
    • Use a TR8 Torx screwdriver to remove:

    • Six 5.3 mm screws

    • Four 3.3 mm screws

  2. uuqUrDG2Rl6R5jHE
    • Use a nylon spudger to gently pry the lower case up and off.

  3. rFoVyNnBPGmWOPNF
    rFoVyNnBPGmWOPNF
    YklrkSSVUdJeVPa4
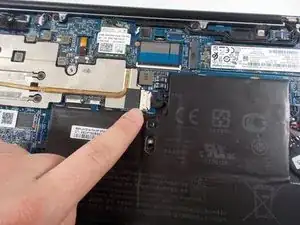
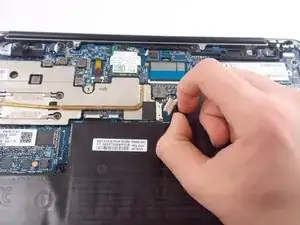
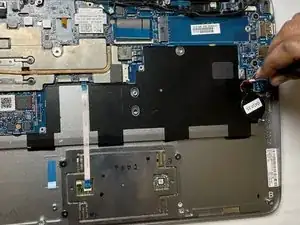
    • Gently pull and free the battery's bundled cable connector that leads from the battery to the motherboard.

  4. m2TfbVDD5BSkZydG
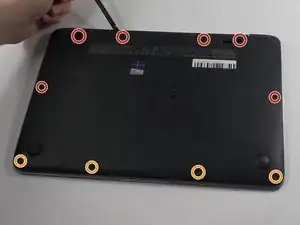
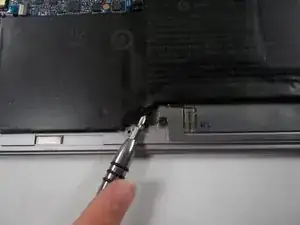
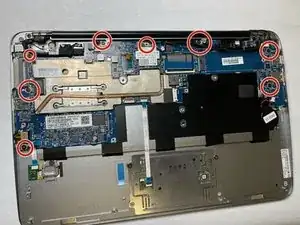
    • Use a Phillips #1 screwdriver to unscrew and remove the six 4 mm screws that secure the battery.

  5. rHm6PUipyNNuYHLb
    rHm6PUipyNNuYHLb
    veQp5QWxAZXcpthb
    • Remove eight 4.6 mm screws shown in the circles using a Phillips #0 screwdriver.

  6. meE4QOhbBWgrJqAM
    meE4QOhbBWgrJqAM
    GBNSsoQfTrFGwGUb
    2svTv1GwW1V3Up6q
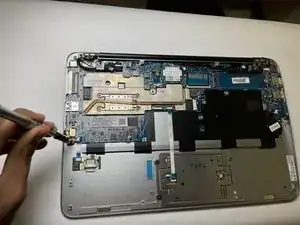
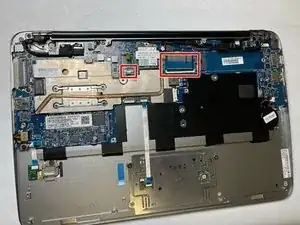
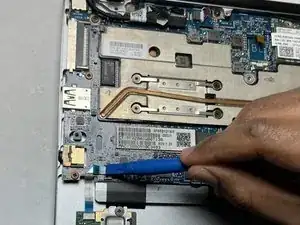
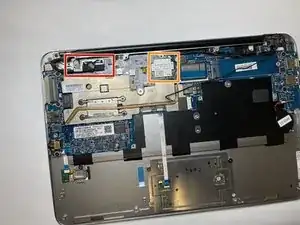
    • Disconnect the keyboard connections from the motherboard.

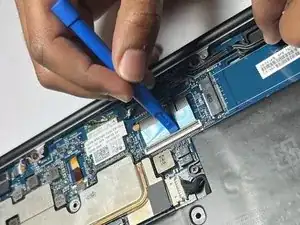
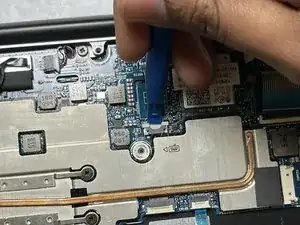
    • Disconnect by lifting the underside of the white tabs with a spudger.

  7. gEsDoyJUUNRdMQXQ
    gEsDoyJUUNRdMQXQ
    Ax6EwP3iAmgCwpQB
    Vt4Q2RihVRLacqCI
    • Disconnect the ribbon cables by lifting the underside of the white tabs with a spudger.

  8. ZqinMout1ZLkWHAT
    ZqinMout1ZLkWHAT
    OcaAsuJsL1aBVHFs
    XHNjBDbBFOEybAvN
    • Remove the connectors by pulling the white support edges backward with a pair of tweezers.

  9. kTTjDhJplkpA5KqA
    kTTjDhJplkpA5KqA
    DFIHDVHqZG2ZlhRD
    HJdBxFY24ex5LvMX
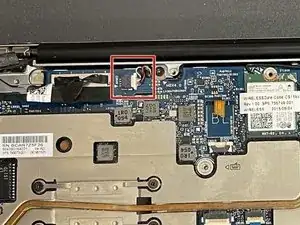
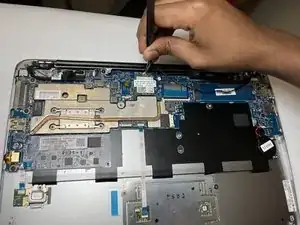
    • Gently pull on the black pull tab on the top of the connector.

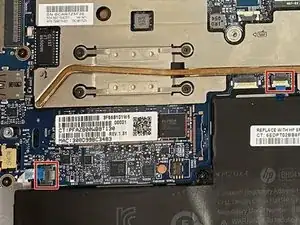
    • Remove both wires going to the top of the Wi-Fi card using the tweezers.

  10. AXWs3LJ4vDg4vBMW
    AXWs3LJ4vDg4vBMW
    nVAsMacGjb44cAHL
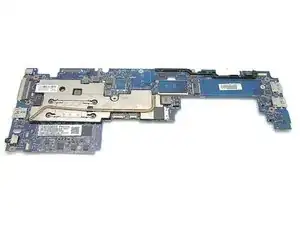
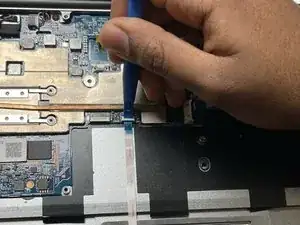
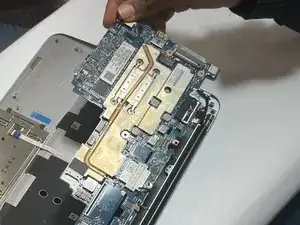
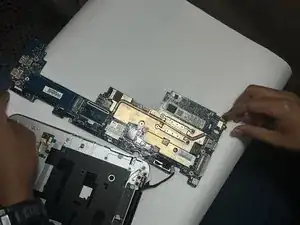
    • Lift the now disconnected motherboard from the side shown in image 1.

    • This side must be lifted to avoid damaging the ports.

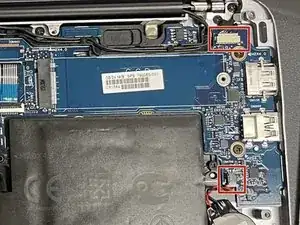
    • The disconnected motherboard (aside from the port removed in step 12) is shown in image 2.

Conclusão

Attach terminals in reverse order of guide to new motherboard, reattach the battery and back panel.

Zachary Sinnott

Membro desde: 28/03/23

151 Reputação

0 comentários