Introdução

  1. sJgmGv2gwQNPNdSl
    sJgmGv2gwQNPNdSl
    hPRK1RboFxsRUpTT
    AWywwvKjvKiJ4RdY
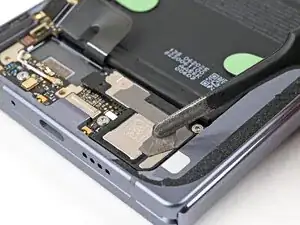
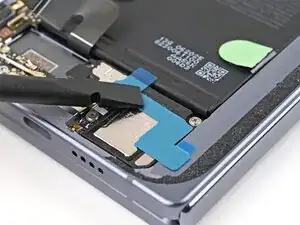
    • Insert the loudspeaker at an angle into the bottom of the frame and press down to secure it.

  2. BUGWY2tCnMjEs4hV
    BUGWY2tCnMjEs4hV
    qNhj3BCQvXsK1Nmo
    • Use a Torx Plus 3IP driver to install the 2.4 mm‑long screw securing the loudspeaker.

  3. djrvnu4L6q5ZUfMk
    djrvnu4L6q5ZUfMk
    ndH3YJZgT1DnVfQ2
    OFOAjCF4QkArgVsV
    • Use tweezers or your fingers to peel off the conductive fabric on top of the loudspeaker.

  4. VFeDAmxNdnFKhLZA
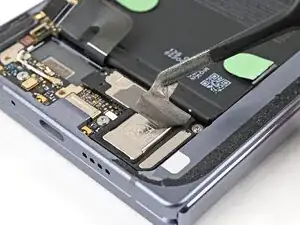
    • If there's some adhesive residue left on the loudspeaker, use isopropyl alcohol (>90%) and a coffee filter or a microfiber cloth to remove it.

  5. ivRl2UFl1wWL2F3D
    ivRl2UFl1wWL2F3D
    SX11hlgHSHZklRXi
    xxIgxRJXOvoet6si
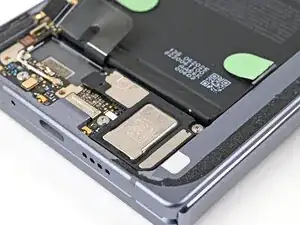
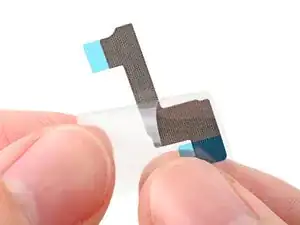
    • Peel off the clear liner on the top loudspeaker conductive fabric.

    • Place the conductive fabric over its spot on the loudspeaker.

  6. v1sOb1o3gqPrBEob
    v1sOb1o3gqPrBEob
    Xccl324FmYCGBRNU
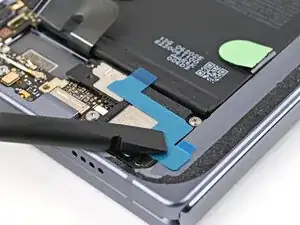
    • Use the flat end of a spudger or your fingers to press down the conductive fabric and adhere it.

  7. rXnUqNNVr3jZGaBh
    rXnUqNNVr3jZGaBh
    BfFgXfDYWGqW4ibq
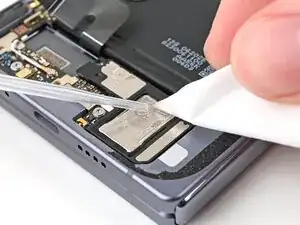
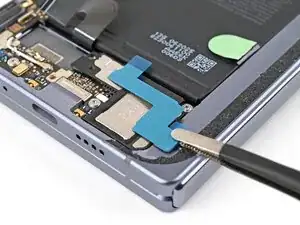
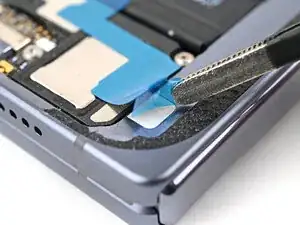
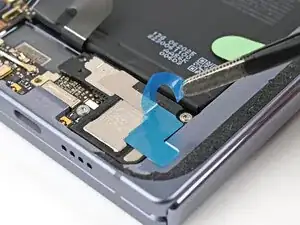
    • Remove the small, rounded blue liner on the underside of the tape.

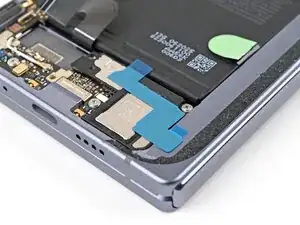
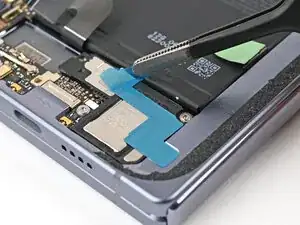
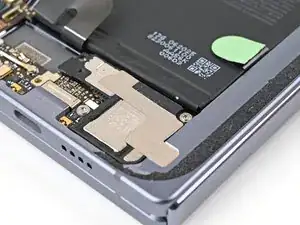
    • Press down the fabric so it adheres to the frame.

  8. xBePYUrS3EGL2u43
    xBePYUrS3EGL2u43
    ZIEVUhxhKcppSbNX
    UFNMhZ2eJMPPvUFH
    • Remove the large blue liner from the conductive fabric.

Conclusão

To reassemble your device, follow these instructions in reverse order.

Alex Diaz-Kokaisl

Membro desde: 16/01/22

227430 Reputação

0 comentários