Introdução
This guide will take you through the steps required to replace the battery on a Garmin Fenix 5x watch only. (The Fenix 5s and Fenix 5 have different procedures.)
-
-
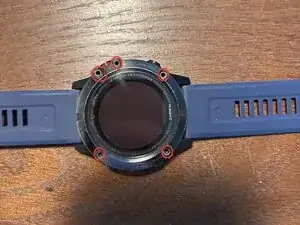
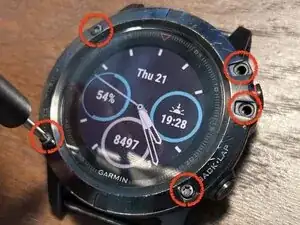
Remove the five screws surrounding the display using a Torx T7 bit.
-
Please take note of how tight they are so you can achieve the same torque during final reassembly.
-
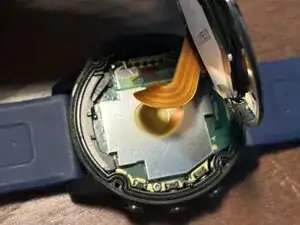
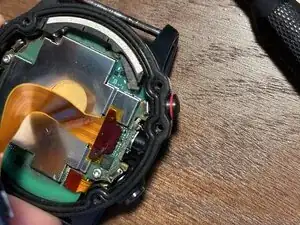
Carefully lift up the display.
-
-
-
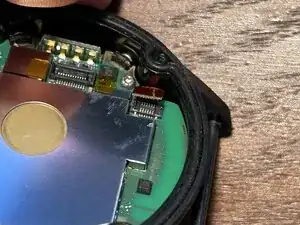
Remove the green sticker covering the two press connectors.
-
Save this for later; you might be able to reinstall it at the end. If not, no worries.
-
-
-
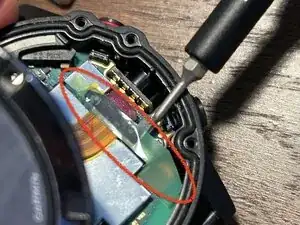
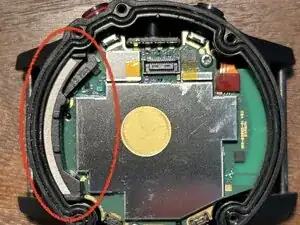
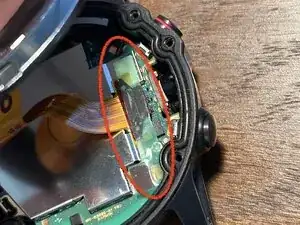
Remove the display ribbon cable press-fit connector.
-
Remove the top conductive piece. Take note of its orientation because this will be important later.
-
-
-
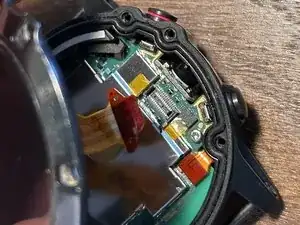
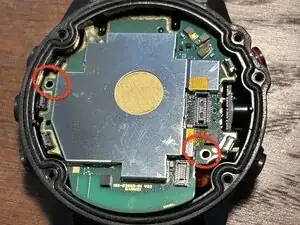
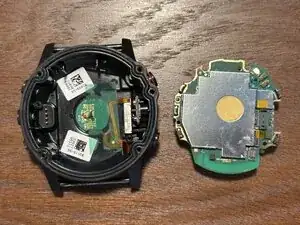
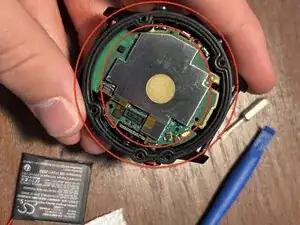
Use a Torx T5 bit to remove the mainboard screws. Then carefully pry up the mainboard.
-
I recommend prying the same way as shown in the image; it is easiest and least likely to cause damage.
-
-
-
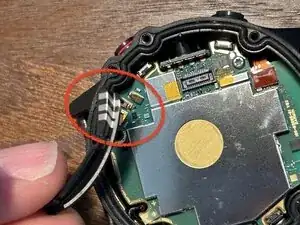
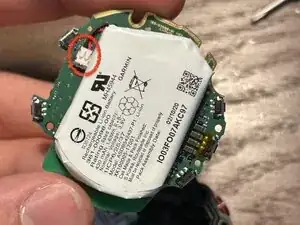
Carefully remove the battery connector by lifting up, not by pulling out.
-
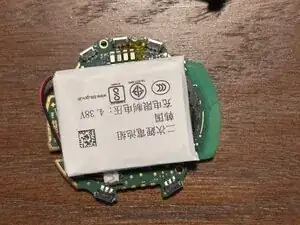
Remove the battery from the mainboard by prying gently and using isopropyl alcohol to dissolve the adhesive.
-
This step may be very difficult, and some very gentle heat could be helpful, but be careful not to puncture or in any other way damage the battery cell.
-
-
-
Plug in your new battery. The battery wires may be longer than the original, so orient the battery in a way so that the wires do not interfere with the mounting holes of the mainboard.
-
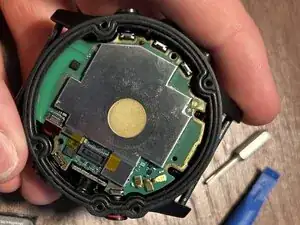
Reinsert the mainboard. If your replacement battery is a different size/shape than the original, you may have to reposition it a few times before the board will fit.
-
-
-
Replace both screws and do so carefully to make sure you do not pinch the battery wires.
-
Reconnect both ribbon cables and replace the small conductive piece on the top side, ensuring correct alignment with the pins on the mainboard.
-
-
-
(optional) If you are able to replace the small green sticker covering the press connectors for the ribbon cables, do this now.
-
Then, if you would like, you may power on your watch to confirm functionality before final reassembly.
-
-
-
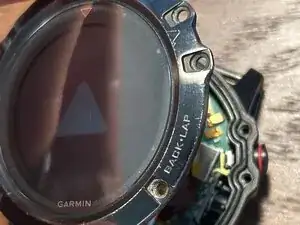
Ensure that the o-ring is clean and properly in place in its groove. This is what keeps everything waterproof, so if you use your watch in water, this is very important to check.
-
If during the repair you got dust or other debris inside the groove or around the o-ring, carefully clean with alcohol around the ring and the sealing area on the underside of the display.
-
-
-
Insert the screws on the face of the watch.
-
First, gently tighten all screws, and then proceed to fully tighten opposite pairs at a time to ensure a proper and complete seal.
-
Do not over-tighten screws; try to achieve the same torque as you noticed at the start of the repair. Check around the edge where the two pieces meet; at most, you should see a hairline gap.
-
-
-
Test your watch's charging, data transfer, and other functionality. For most Li Ion batteries, it is recommended to complete one full charge and discharge cycle before normal use.
-


Congrats! The repair is complete.
