Introdução
If the battery in your Garmin DriveSmart 50 LMTHD is depleted or needs to be changed, this guide will show you how to remove the old battery and replace it with a new one.
Check out our troubleshooting page to confirm that the Garmin requires a new battery.
Before beginning the repair make sure to power off and unplug the device to avoid electrical hazards. If the front screen is cracked, wear safety glasses and gloves to prevent splinters or any type of injury. If there happens to be a swollen battery during the disassembling process, handle it carefully using gloves as it imposes a fire hazard.
Ferramentas
-
-
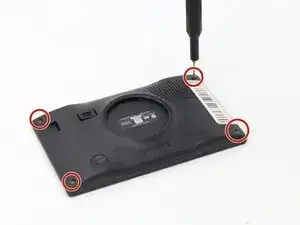
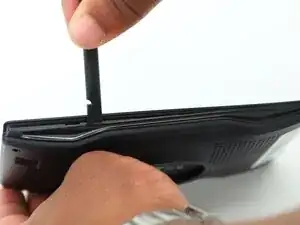
Use a spudger to gently pry the locks around the screen, applying even pressure along the edges.
-
-
-
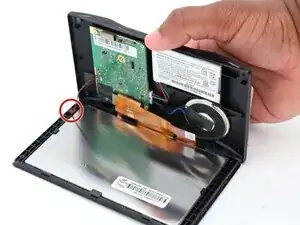
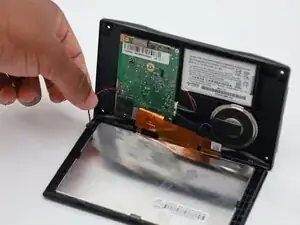
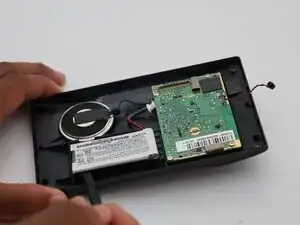
Carefully open the casing to avoid damaging any fragile components, and gently disconnect the black and red wire plug attached to it.
-
Since the plug is on a hook, unlock it with the spudger tool.
-
-
-
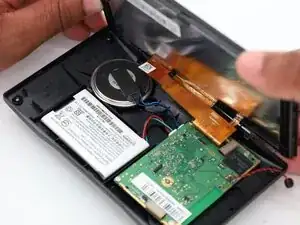
Flip the Garmin over to the other side in the previous step, and slide the screen backwards to undo the orange connector.
-
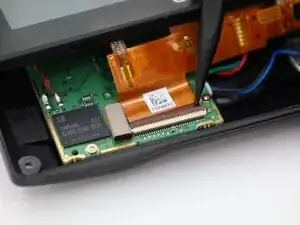
Use the pointed end of the spudger tool to lift the clasps and detach the orange connector.
-
-
-
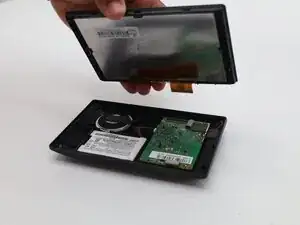
Unplug the connector that is connected from the battery to the circuit board using tweezers.
-
Use the spudger tool to gently remove the battery from the adhesive pad and use your hands to fully remove it.
-


To reassemble your device, follow these instructions in reverse order.