
Introdução
Your Garmin (Model Number: 010-01507-03) Dash Cam 35 is a reliable device that captures high-quality video and audio. If your dash cam's battery life has dropped or it won't turn on at all, the screen isn't on when the device is powered, or it constantly reboots, you may have a damaged motherboard that needs replacement.
If you see that your dash cam is not powering on, is not responding to a charging cord, the screen is off while the device is powered on, or the device reboots randomly, it could be an issue with the motherboard. A replacement may be necessary if general troubleshooting has not resolved the issue.
In this guide, we'll walk you through a safe replacement of your dash cam's motherboard. You don't need any dangerous tools to repair the motherboard; however, you'll need to be careful when disassembling the dash cam. Repairing the motherboard is, overall, a straightforward process that requires basic knowledge.
Before starting, make sure you turn off the dash cam and unplug it to avoid any electrical hazards. Back up any vital footage beforehand in case of damage.
Be sure to handle the device carefully, as damage can occur if mishandled. Make sure to follow the guide's steps altogether to avoid damage. If done correctly, you can successfully repair the motherboard on your Garmin Dash Cam 35.
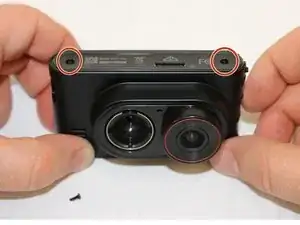
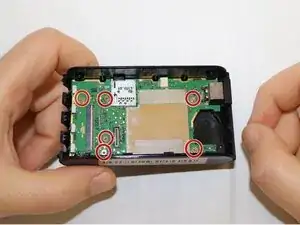
-
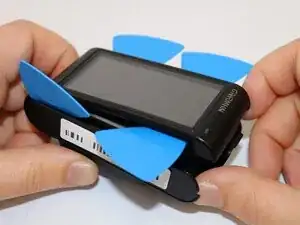
-
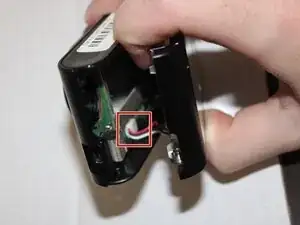
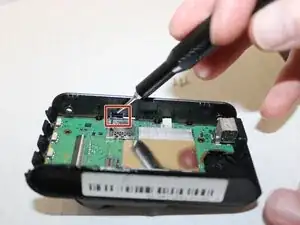
Carefully lift the lock on the motherboard for the ribbon cable. Unslot the ribbon after the lock is undone.
-
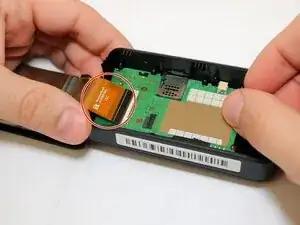
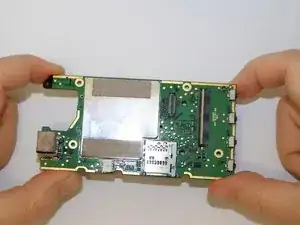
Remove the case.
-
To reassemble your device, follow these instructions in reverse order.