Introdução
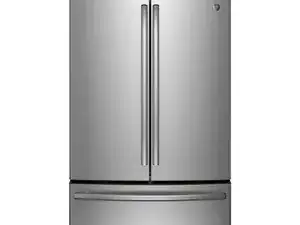
I have a GE fridge with an ice maker in the bottom compartment. The entire floor of the freezer was a giant sheet of ice. Once filled over the course of a few days, the water would overflow onto the floor. This problem would happen repeatedly every few days. On the back wall of the freezer, I could see where water was possibly emanating, leaving frozen drops of water. The end-user manual describes a "Clogged Drain Tube" and to "call for service". Nowhere does it say WHERE the drain is located. I suspect if it really is a damaged tube, the one deep inside the unit, it might get ugly but mine was simply clogged. The water drains through 2 tiny slits so gunk could be your problem.
Ferramentas
-
-
You can do this! It will be hard to hurt yourself or damage your fridge by trying to do this. There really is not anything to break. It should take about a half hour.
-
-
-
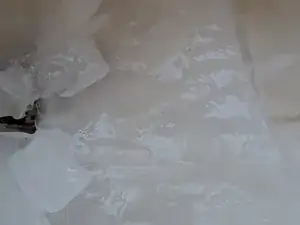
This mess kept appearing under my freezer basket. If you know you have the same problem, Leave the ice in the freezer, unplug it, do the cleaning, and THEN remove the ice. This way the freezer stays frozen and nothing thaws. You can then take your time and the ice will be waiting for you when you are finished.
-
-
-
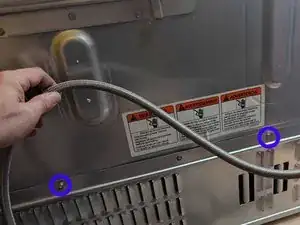
Slide the fridge away from the wall making sure the water line isn't caught or pinched. You do not need to disconnect the water---but unplug the unit. Do not remove anything from the freezer until you are done cleaning the drain. Nothing will thaw this way.
-
-
-
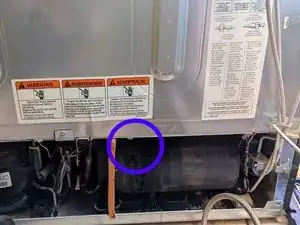
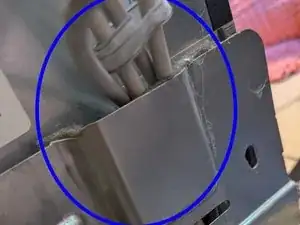
There are six screws. Two not shown are on the bottom of the left side. The heads are 1/4". No need to go near the panel above--its an electrical board.
-
-
-
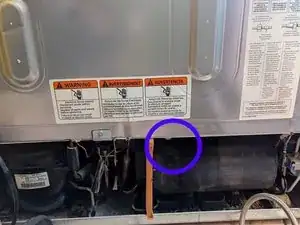
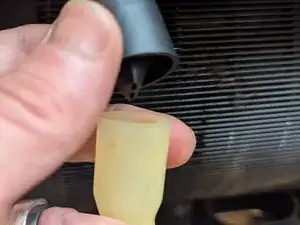
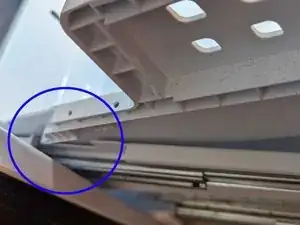
I have unfortunately already removed the tube from this photo but you will see the tube in the following images. It hands down vertically in this spot. There is a secured hard plastic tube that leads into the fridge and a gasket that connects a drain tube to the part shown.
-
-
-
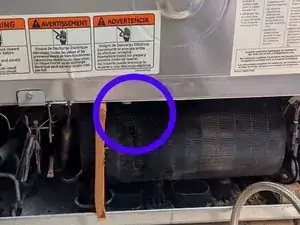
The tubing (not shown) just slides off the nipple. But I had water dripping onto the condenser. Place a sheet of plastic or paper, or anything to deflect the water away from the round horizontal part. The dripping will land on it. I used a plastic flexible cutting board and a container to catch the liquid--about 15ml?
-
-
-
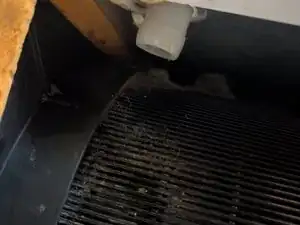
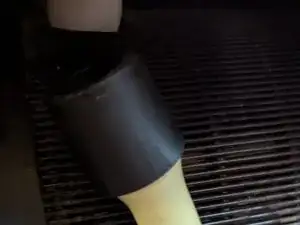
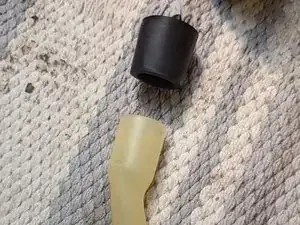
This is the black gasket that connects to the fridge shown previously and the drain downspout. GE mentions replacing this but I can't remotely imagine why.
-
-
-
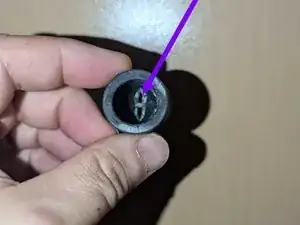
Look inside the black adapter/gasket. This was full of scum. See how tiny the outlet is? This had to be the issue. If you just clean this, you should be fine.
-
-
-
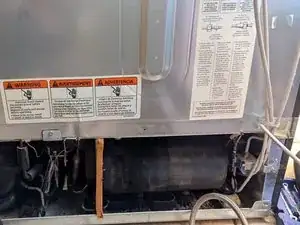
Now is probably a good time to vacuum all the dust. I also attached my shopvac to the connector to suck out any extra crap. Not sure if it helped. I also stuck a pipe cleaner up there and pulled out a bit more scum. I then flushed it with a turkey baster and warm water followed by clean water. Cover the condenser with plastic to keep it dry
-
-
-
Re-attach these 2 pieces and then attach them back to the tube in the fridge. Because the tubing is curved, it will take a mild amount of effort.
-
-
-
Replace the back panel but try not to crush or pinch any of these tubes. Remember, 6 screws.
-
-
-
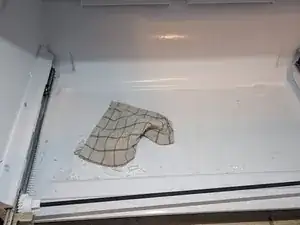
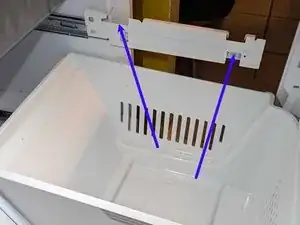
Empty the drawers. Sadly, they will just dump everywhere if you try to be slick and reattach the drawers full. Remove the basket, clean out the skating rink of ice and the reattach. to do this, Slide out of the arms and place the basket in the notches. It should slide in easily.
-


To reassemble your device, follow these instructions in reverse order.
2 comentários
This also works on my GE GFE26GGHCWW. Same problem, same fix.
I went a little further than you and defrosted the water tray leading to the drain. A hair dryer works fairly well but takes time; I found the service sheet tucked under to upper right hinge cover and turned on the freezer evaporator heater test. It runs for about 10 minutes then shuts off, but was a big help in thawing all that ice; I just kept restarting it until all the ice was melted.
For fridges with the LED display, here's how you enter test mode (quoted from the service sheets).
Enter Service mode by pressing the "Water", "Crushed" and "Cubed" buttons simultaneously for 3 seconds.
The display will show 00 in the FZ temperature display and 00 in the FF temperature display.
LCD display: Use the up and down buttons on the left to increment the 10's place and the up and down buttons on the right to increment the 1's place to select the desired test. Then press either 'GO' pad to run the test.
LED display: Use the FZ temp keys to increment up and down the 10's place and the FF temp keys to increment the 1's place to select the desired test. Press any key other than the temp adjust keys to run test.
Run test 16 to exit diagnostics and return to normal operation.
The control will reset to normal operation if power is cycled.
There are two tests you can use; test 60 is the FZ Defrost Heater Test, or you can use the one I chose, test 93, the FZ Defrost Heater Test with Feedback. The only difference between them is that test 93 shows you the current temperature of the FZ evaporator which is useful for telling when it's gotten warm enough to make a difference. I probably ran it for a good hour all total, but it completely melted the ice inside the rear panel, meaning I didn't have to wait for it to melt on its own overnight or remove the rear panel and melt it by hand.
Anyway, thanks for the guide; like you I found the black drain plug was clogged.