Introdução

  1. PatKSLMvRSCOynVd
    PatKSLMvRSCOynVd
    UZ1EMHOPn1OOROX1
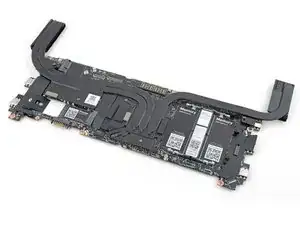
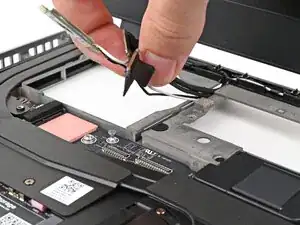
    • Grab the Mainboard by the curving pipes of its heatsink.

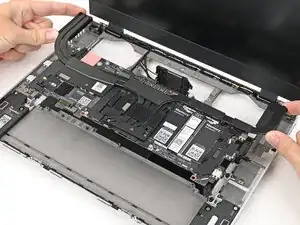
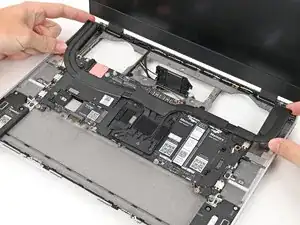
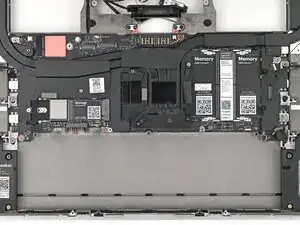
    • Place the Mainboard into the laptop and onto its alignment pegs.

    • Make sure all of the cables are above the Mainboard before continuing.

  2. rQNuGVWoMpTRgAm4
    rQNuGVWoMpTRgAm4
    CCLIW5cpxUPx2h26
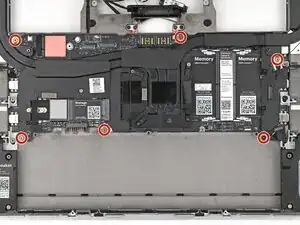
    • Use your Framework Screwdriver to install the six 2.0 mm‑long T5 Torx screws securing the Mainboard.

  3. PGxQFlAMpQZj5BVv
    PGxQFlAMpQZj5BVv
    L5BhIvAiyMXIdcSm
    • Route the display, webcam, and Wi-Fi module cables into their slots in the frame.

  4. qcuLHBVFJDZnKUMT
    qcuLHBVFJDZnKUMT
    GFfFqD5dKWkgNAiq
    pANGvheAlRkHdGjo
    • Press the two display connectors straight down into their sockets to connect them.

  5. AoaLePKXSIIUHrLe
    AoaLePKXSIIUHrLe
    decYDkJWGWSoacsv
    • Press the speaker cable connector straight down into its socket to connect it.

Conclusão

To reassemble your device, follow these instructions in reverse order.

Take your e-waste to an R2 or e-Stewards certified recycler.

Repair didn’t go as planned? Try some basic troubleshooting, or ask our Answers Community for help.

Alex Diaz-Kokaisl

Membro desde: 16/01/22

227430 Reputação

0 comentários