Introdução

  1. bUxQvbiAchgyOcNU
    bUxQvbiAchgyOcNU
    ZBZkng2LxOrEcSYC
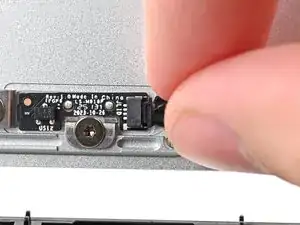
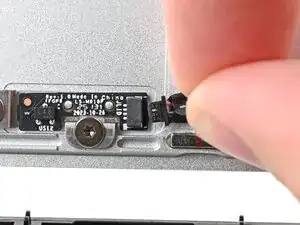
    • Grip the Hall Effect cable connector by its black pull tab and slide it straight out of its socket.

  2. 3HViQssybXMHZGxD
    3HViQssybXMHZGxD
    XL4IPDKvu6VbqNUN
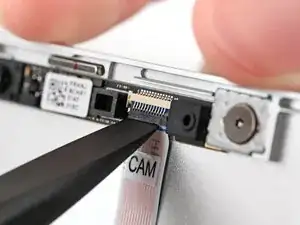
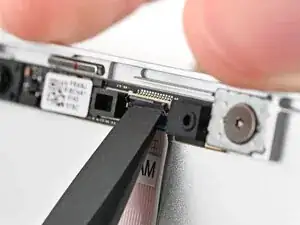
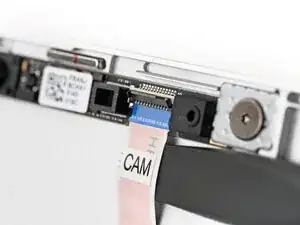
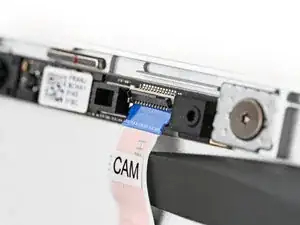
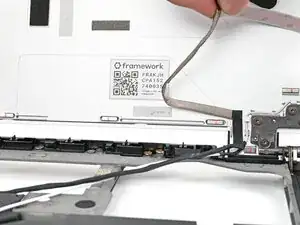
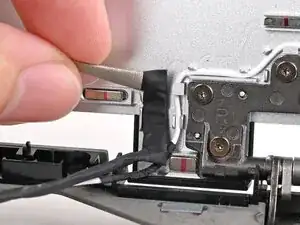
    • While supporting the Top Cover with one hand, use the flat end of your Framework Screwdriver, or a clean fingernail, to lift up the locking tab on the webcam ZIF connector.

  3. iXcNPAiFBjn1GWYH
    iXcNPAiFBjn1GWYH
    dLLdblaVLgVZy2J1
    PUaGOyRhSsFflOL2
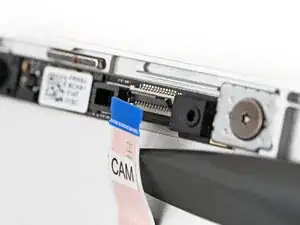
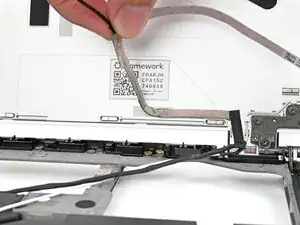
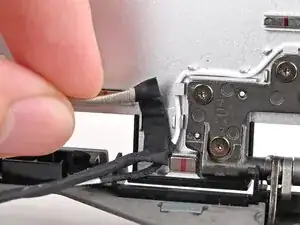
    • Slide the flat end of your Framework Screwdriver under the webcam cable, near the ZIF connector, and twist to slide the connector out of its socket.

    • Alternatively, you can use your fingers to slide out the cable.

  4. ag1LkVaPaBhGF4S4
    ag1LkVaPaBhGF4S4
    2UAsCXE6nPXxHhWu
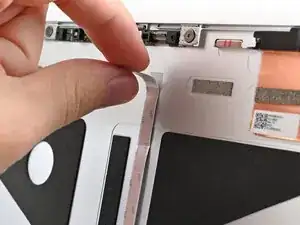
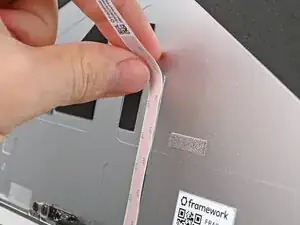
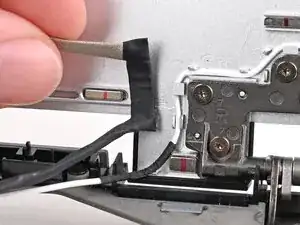
    • Use your fingers to peel off the flat portion of the webcam cable from its adhesive near the top edge of the Top Cover.

  5. Gkqvwm6VNENSUhl1
    Gkqvwm6VNENSUhl1
    gaH2ITdiZBwaLXCi
    • Continue peeling to separate the cable from the adhesive near the center of the Top Cover.

  6. ggIwHfReBTmClMth
    ggIwHfReBTmClMth
    OrcCgCOmgTOOONdE
    KZIAYJFEe6uSjZQn
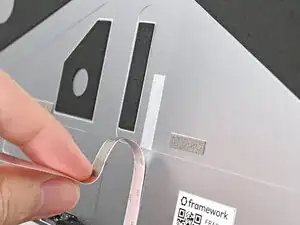
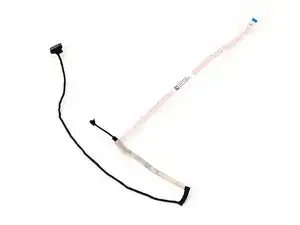
    • Use your fingers to peel off the thick portion of the webcam cable from its adhesive near the bottom edge of the Top Cover.

  7. GXhpKUOavbggHGwH
    GXhpKUOavbggHGwH
    XQGCmukPAYhfxQbX
    NwTWWJCvfZNwFiTN
    • Grip the webcam cable near its bend and peel it off the Top Cover.

  8. iYDBGtnbEw32JIQJ
    • At this point, the webcam cable should be free and you can remove it.

Conclusão

To reassemble your device, follow these instructions in reverse order.

Alex Diaz-Kokaisl

Membro desde: 16/01/22

227430 Reputação

0 comentários