Introdução

  1. N6VBTWgFXKw3MrHk
    N6VBTWgFXKw3MrHk
    PjqktJUGCVDgbJXW
    Am4Qo1gIWRNegdMl
    • Align the speakers over their alignment pegs and press them down into place.

  2. QDvAUvlK32xCUNbG
    QDvAUvlK32xCUNbG
    M6OdIRwY3tLLgOoK
    • Be very careful replacing these screws, as it's easy to damage their posts and prevent the screws from fully tightening. Don't overtighten the screws—just tighten them until they're snug.

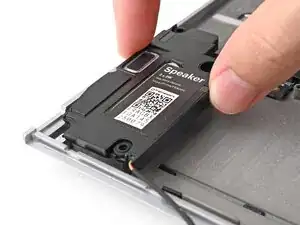
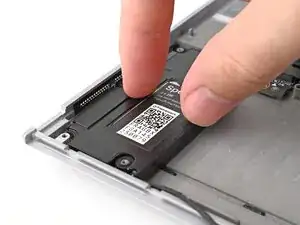
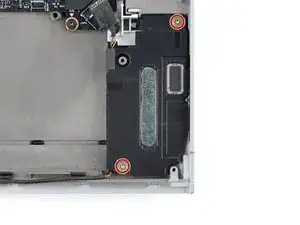
    • Use your Framework Screwdriver to install the two 2.0 mm‑long T5 Torx screws securing each speaker (four in total).

  3. 6EMOYsXFECB5khCw
    6EMOYsXFECB5khCw
    WDYtKS15O5tEWdeo
    KMopVRNyoAyM1RIS
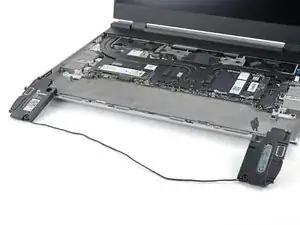
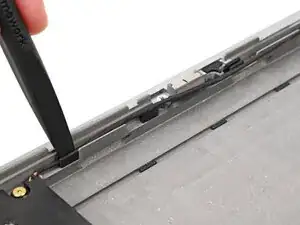
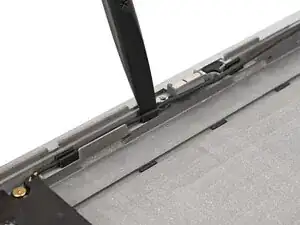
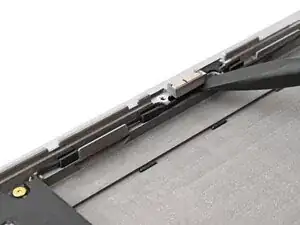
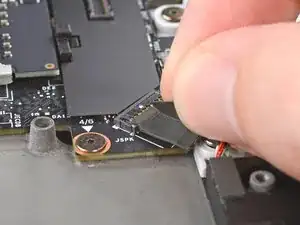
    • Use the flat end of your Framework Screwdriver to push the speaker cable back into its clips along the bottom edge of the laptop.

  4. ACrwSD3Fsve6VQjn
    ACrwSD3Fsve6VQjn
    iKiajN2gDfBFWCLn
    • Press the speaker cable connector onto its socket to connect it.

Conclusão

To reassemble your device, follow these instructions in reverse order.

Take your e-waste to an R2 or e-Stewards certified recycler.

Repair didn’t go as planned? Try some basic troubleshooting, or ask our Answers Community for help.

Alex Diaz-Kokaisl

Membro desde: 16/01/22

227430 Reputação

0 comentários