Introdução

  1. rVbPRJRms4MSNMFe
    • Set your Framework Laptop face-down on a clean work surface.

  2. vHxdQ4nutodKmGLo
    vHxdQ4nutodKmGLo
    ScjmV1EpCVL3BZ2l
    OeWFnBZdQLRYxqcv
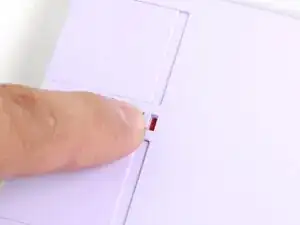
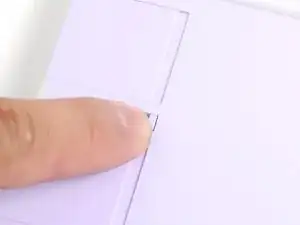
    • Use your fingers to flip both Expansion Card latches to the lock position. The red bar shouldn't show on the latches.

  3. htncoSsQ5lRQxh4B
    htncoSsQ5lRQxh4B
    gKDoJJDiONCqQKHt
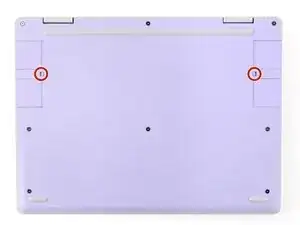
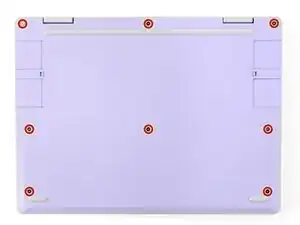
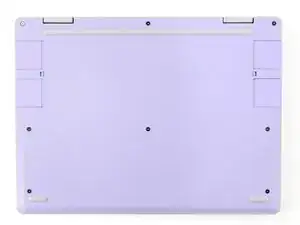
    • Use your Framework Screwdriver to fully loosen the eight captive T5 Torx screws on the bottom of your laptop.

    • Most screws in your Framework Laptop (including these) are captive—they're designed to stay in place after you loosen them.

    • Your laptop comes with a spare set of screws in the frame above the battery. Be careful—the replacement screws aren't captive.

  4. HjSRKARyMbyulDVR
    • Flip your laptop over so it's face-up on your work surface.

  5. IHQvUCWgGwHidYtV
    IHQvUCWgGwHidYtV
    XesmVVMaZpRoCSYR
    • Open the laptop lid so that both the screen and the base lie flat on your work surface.

  6. kqfZBedOtJIGV65n
    kqfZBedOtJIGV65n
    pJbEwCr3gqZX3vlv
    gNlWLId5bSNCI3Is
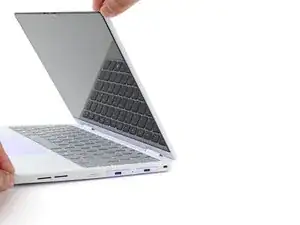
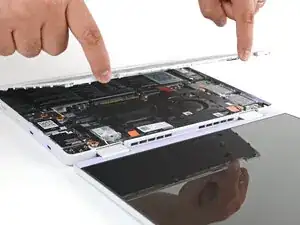
    • Use your fingers to grip the Input Cover in the hinge cutouts.

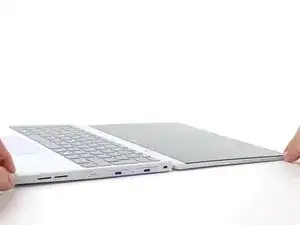
    • Lift upwards to swing the Input Cover up from the base of the laptop.

    • There are magnets holding the Input Cover down, so you'll feel some resistance. If it feels like a lot of force is required, check that you've fully loosened all the screws on the bottom of your laptop.

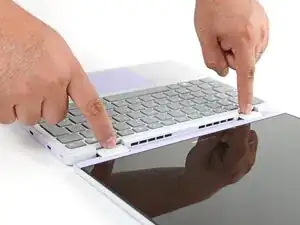
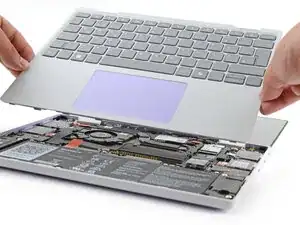
    • Remove the Input Cover.

Conclusão

To reassemble your device, follow these instructions in reverse order.

Arthur Shi

Membro desde: 03/01/18

326111 Reputação

0 comentários