Introdução

  1. bCnmRpDo2L1muYA5
    bCnmRpDo2L1muYA5
    PkjmE66QFWiGyJPD
    rXfwXpgdDlUm4VSA
    • If you installed the Handle on your Desktop, follow this step. Otherwise, skip it.

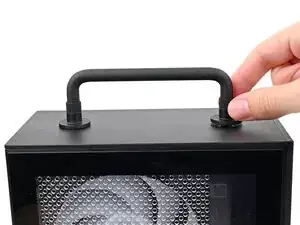
    • Rotate the Handle's screw threads counterclockwise on both sides until it comes free.
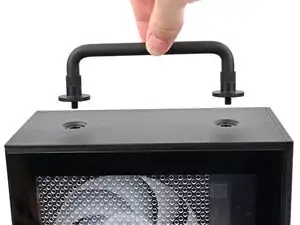
    • Remove the Handle.

  2. 25uSW5yTweC4DhJH
    25uSW5yTweC4DhJH
    NLSHNAcGIfXySxVC
    uIxWPNWJJEnVnIum
    • Use your finger to lift up the two D-rings on the Top Panel screws.

  3. BeKqSvRJr2nX2qFK
    BeKqSvRJr2nX2qFK
    odGLjCiIdEQeE2bh
    IDSwwb3LHUUaXukA
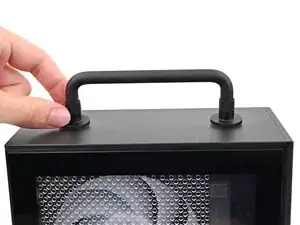
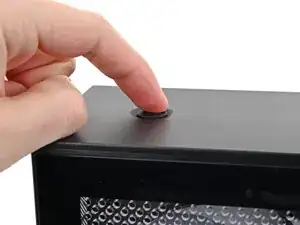
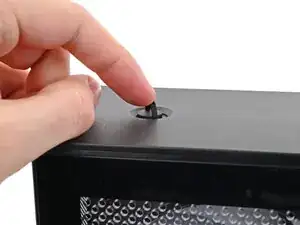
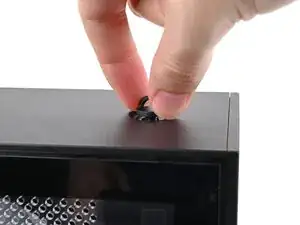
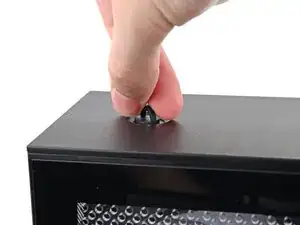
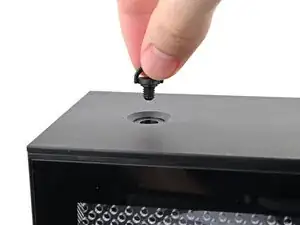
    • Use your fingers to twist the screw counter-clockwise and loosen it.

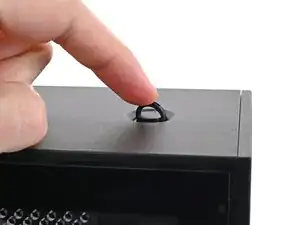
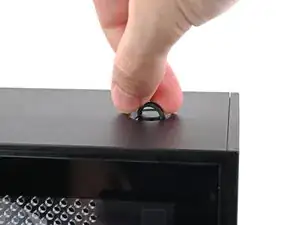
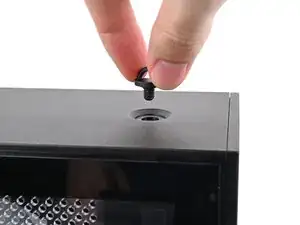
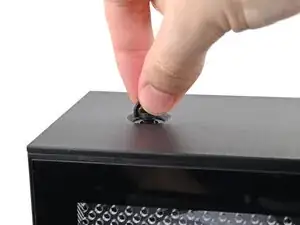
    • Remove the Top Panel screw.

  4. 4RopBQ6BtjnY1WrK
    4RopBQ6BtjnY1WrK
    ktjYiQLsGJUndqrb
    J4lBDyCSGfYoWxD4
    • Repeat the same procedure for the other Top Panel screw.

  5. jTMMgoIeaomUVn3V
    jTMMgoIeaomUVn3V
    k25EnLrWVNWIYJKF
    l1bqihYbxPsKZm41
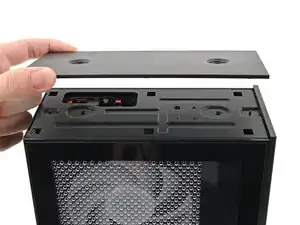
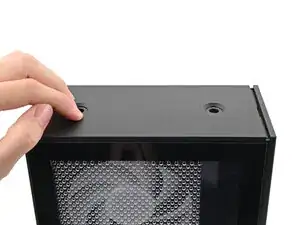
    • Slide the Top Panel towards the rear of the computer to release the clips securing it to the chassis.

    • If you're having a hard time gripping the Top Panel, use the screw holes to get a better handhold.

    • Lift the Top Panel off the chassis and remove it.

Conclusão

To reassemble your device, follow these instructions in reverse order.

Alex Diaz-Kokaisl

Membro desde: 16/01/22

227430 Reputação

0 comentários