Introdução

  1. q2n2cUuArfPUmHWe
    q2n2cUuArfPUmHWe
    Lk4HYbKfJADaMdwV
    QcOhvFUrOJFAMqyG
    • Use your fingers to pull the Front Panel off the magnets securing it to the chassis.

  2. KHTwAfBVGhWW3Dwm
    KHTwAfBVGhWW3Dwm
    WFpBVRITjssP66SF
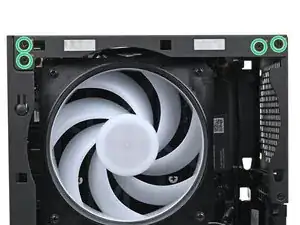
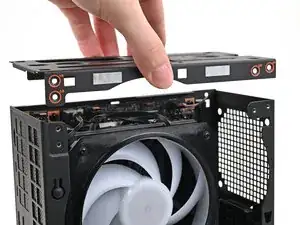
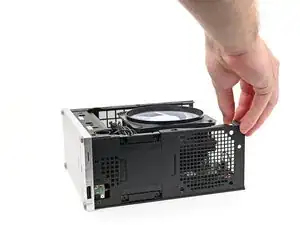
    • While holding the Desktop steady, use your Framework Desktop Screwdriver to remove the eight 4.0 mm‑long Phillips screws securing the top plate.

  3. LuCcXEuaQClKsABW
    LuCcXEuaQClKsABW
    euI4PluTKeGGsZTZ
    • Lift the top plate off the Desktop and remove it.

  4. TyYkNV2ZthyMIFqv
    TyYkNV2ZthyMIFqv
    gDgkLVDMvJHCxJXO
    • Rotate the Desktop onto its right side so the Mainboard is facing upward.

  5. HdUuWg3uAHDqigtn
    HdUuWg3uAHDqigtn
    omBInFrDL1rEwdrV
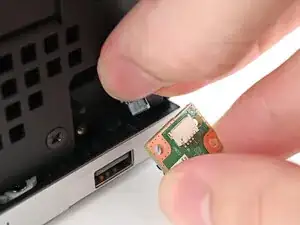
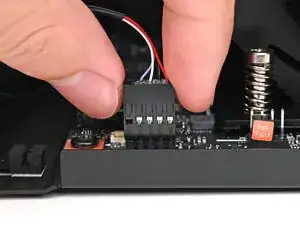
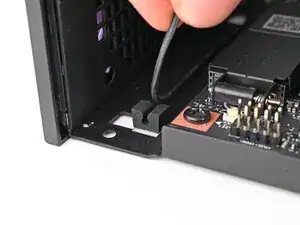
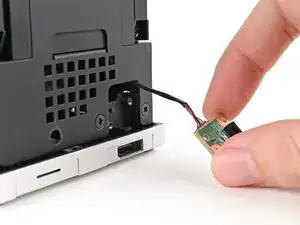
    • Use your fingers to lift the power button cable connector off its nine‑pronged socket on the Mainboard.

  6. MJOSfIs4ZowuWic2
    MJOSfIs4ZowuWic2
    VmaYFbftDQlJWhgw
    • Pull the power button cable out of its rubber clips in the chassis.

  7. LAl1irfBINHUWFE2
    LAl1irfBINHUWFE2
    lHlm65Rg6oYWKRjL
    • Rotate the Desktop so it sits upright.

  8. MclnQ2yNBxv3bXiA
    MclnQ2yNBxv3bXiA
    4ZKEseFhgfhYIvcT
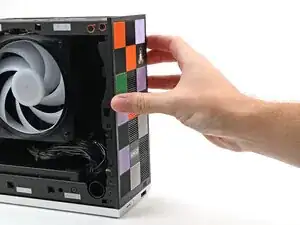
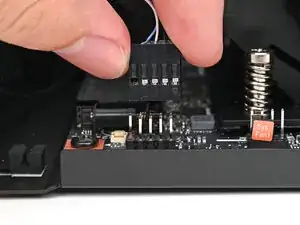
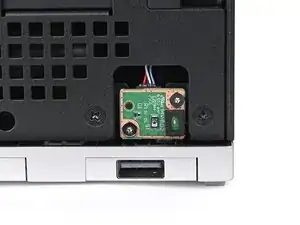
    • Use your Framework Desktop Screwdriver to remove the two 4.5 mm‑long screws securing the Power Button Board.

  9. oHrMP1MXTuIi423n
    oHrMP1MXTuIi423n
    QADdcv4X5v1WIKXV
    • Use your finger to pull the Power Button Board off its alignment peg.

  10. sQ1lBSna62PWc2N2
    sQ1lBSna62PWc2N2
    LhIbwU5osaibXLx3
    KFNVijKuf1odKJAt
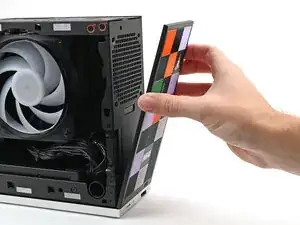
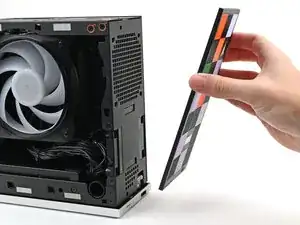
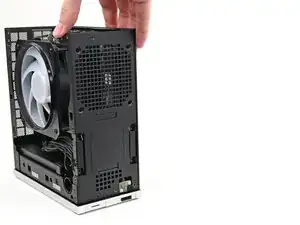
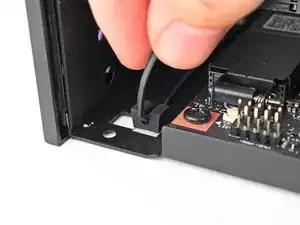
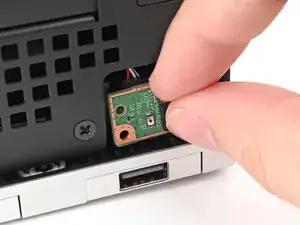
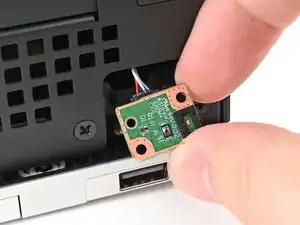
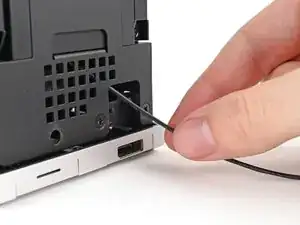
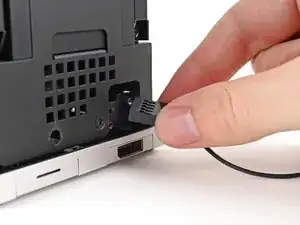
    • Pull the Power Button Board away from the Desktop, threading its cable through the chassis.

Conclusão

To reassemble your device, follow these instructions in reverse order.

Alex Diaz-Kokaisl

Membro desde: 16/01/22

227430 Reputação

0 comentários