Introdução

  1. 1OK2ElW3FAHvP2pV
    1OK2ElW3FAHvP2pV
    KIdK4SOKasi5INhk
    doOCAMIBlxoWbvQZ
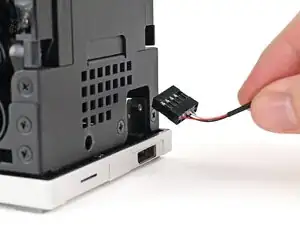
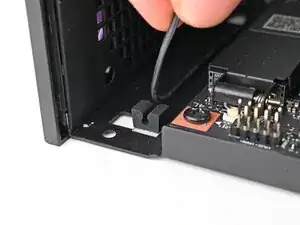
    • Insert the Power Button Board cable into the slot in the Desktop.

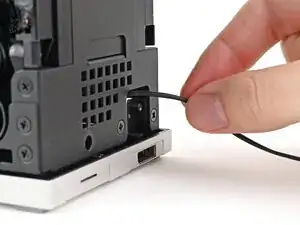
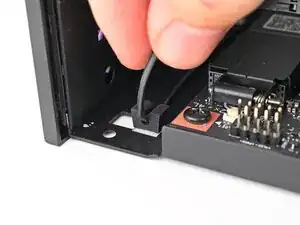
    • Grip the cable from the top of the Desktop and thread it through the chassis.

  2. DoABJrq1aZkbvqJo
    DoABJrq1aZkbvqJo
    aaHeINXqBVNRGStB
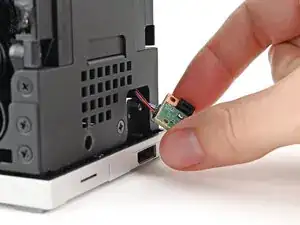
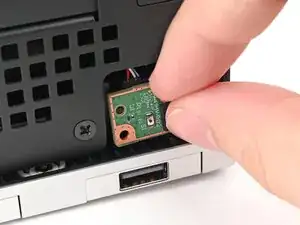
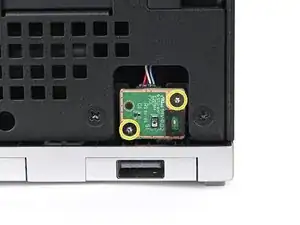
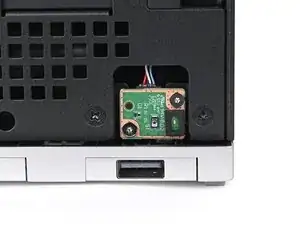
    • Place the board into its slot in the Desktop so the alignment peg is threaded through its hole in the board.

  3. npGqTkZFFGxxYQGp
    npGqTkZFFGxxYQGp
    1hxHSCZbUlYRTSew
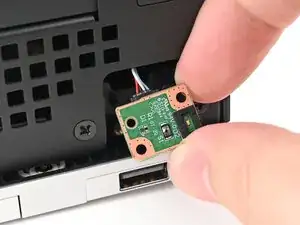
    • Use your Framework Desktop Screwdriver to install the two 4.5 mm‑long screws securing the Power Button Board.

  4. sPVYBcR5fMLWdjeX
    sPVYBcR5fMLWdjeX
    QJjxf2CHVIeJt3Xb
    • Rotate the Desktop onto its right side so the Mainboard is facing upward.

  5. fFSv3LDA4Aq3EgEk
    fFSv3LDA4Aq3EgEk
    DWBsrBNrMoWbtKcA
    • Press the power button cable into its rubber clips in the chassis.

  6. hqImuhdVIPnv1lOP
    hqImuhdVIPnv1lOP
    cr6SKUL6NI2fOBvx
    • Slide the power button cable over the nine-pronged connector on the Mainboard.

  7. RBxX1VbQMksvENOW
    RBxX1VbQMksvENOW
    TyeiZ2RkHLtKrGGs
    • Rotate the Desktop so it sits upright.

  8. OIQGSqXNekb6UPA3
    OIQGSqXNekb6UPA3
    WoIWmZaJ5HNoBhWC
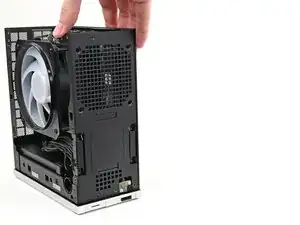
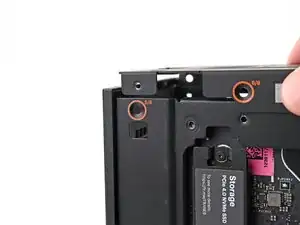
    • Place the top plate on top of the Desktop, making sure it slots into the chassis so the orange circles are visible.

  9. Lc4L151BTBQMI6TZ
    Lc4L151BTBQMI6TZ
    VkOcZRVhgnXcfoS6
    • Make sure the matching screw hole on the top plate labeled "5/8" is slotted on the inside of the Chassis so that the orange circle is visible.

  10. X2R3CBNkaVJGrV1E
    X2R3CBNkaVJGrV1E
    Ah1JUwvrkGPktqg4
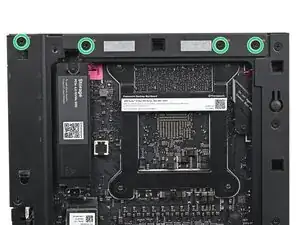
    • While holding the Desktop steady, use your Framework Desktop Screwdriver to install the eight 4.0 mm‑long Phillips screws securing the top plate.

  11. ZODRRaNn1cpHr1ij
    ZODRRaNn1cpHr1ij
    tYQil3CHPTsh2cSb
    d3wsEgc2QsGRhCMT
    • Lay the bottom of the Front Panel on the small, protruding lip in the silver base to align its tabs.

    • Press the Front Panel flat to the chassis and let it align to the magnets.

Conclusão

To reassemble your device, follow these instructions in reverse order.

Alex Diaz-Kokaisl

Membro desde: 16/01/22

227430 Reputação

0 comentários