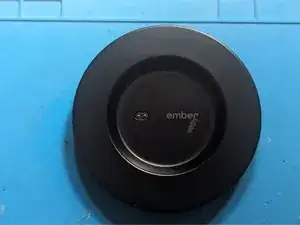
Introdução
The spring contacts, AKA pogo pins, are a common point of failure in the charging base for the Ember Mug. Replacement requires a spot of soldering.
Ferramentas
-
-
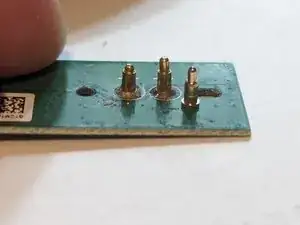
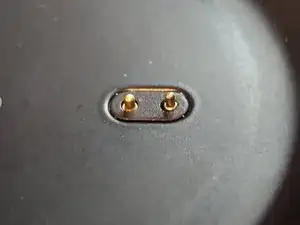
The charging base has two spring contacts, also called pogo pins, that transfer power from the charging base to the mug.
-
Over time or due to liquid exposure, the contacts can oxidize or lose their ability to spring back up, resulting in a loss of contact and thus failure to charge the mug.
-
-
-
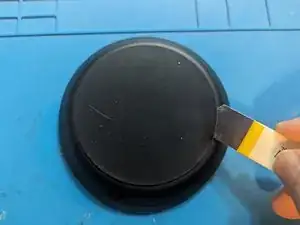
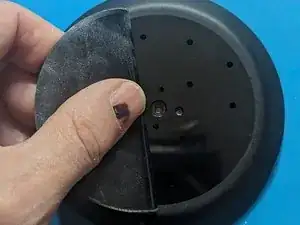
The rubber base on the bottom of the charging plate covers a Torx screw that must be removed to open up the plate.
-
Peel back the base far enough to expose the Torx screw.
-
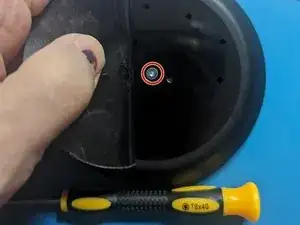
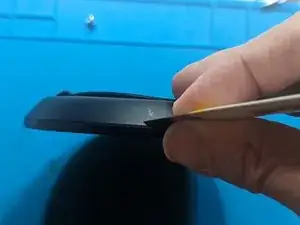
Using a T8 Torx driver, remove the single retaining screw.
-
-
-
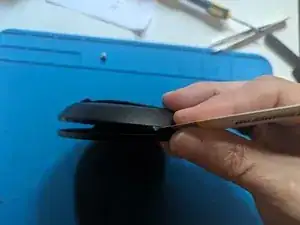
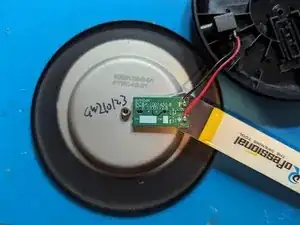
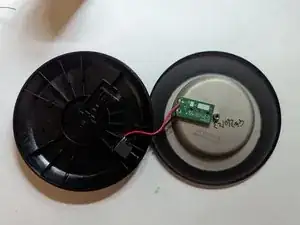
Use a metal pry tool such as the iSesamo inserted into the seam between the metal top and the plastic base to open it up.
-
-
-
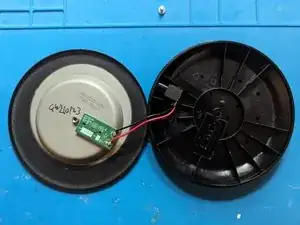
Here we see the two halves separated, but connected by wiring.
-
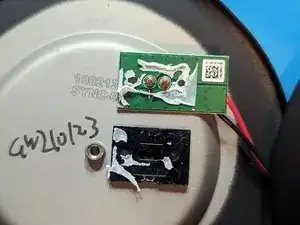
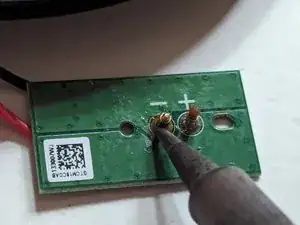
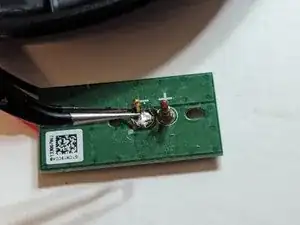
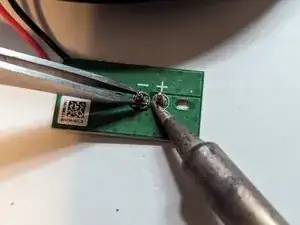
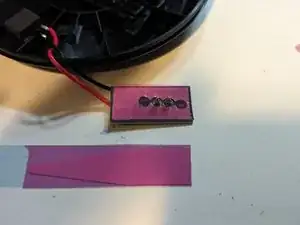
The circuit board is held on with adhesive. Use your pry tool to gently separate the circuit board from the plastic mounting block it sits on.
-
-
-
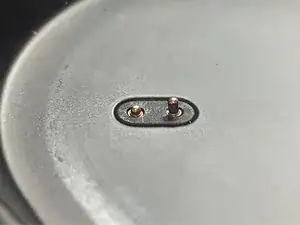
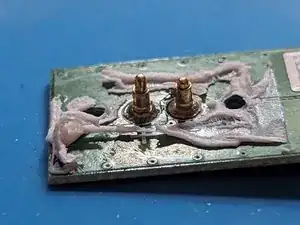
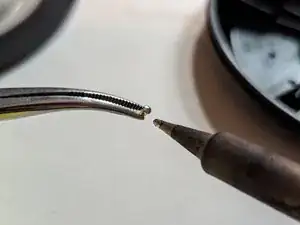
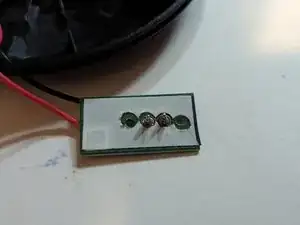
Here you can see a closeup of the pin with the failed spring on the right vs. the functional pin on the left
-
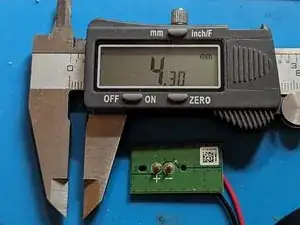
The pins are approximately 4.5 mm in height on this particular model.
-
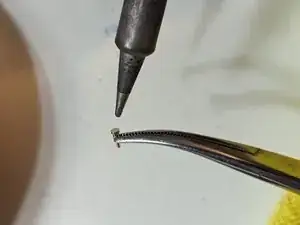
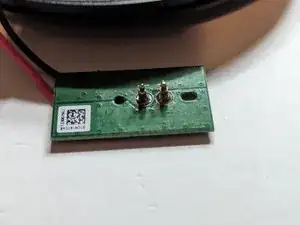
Here is the replacement pin placed next to the originals. So far, so good.
-
-
-
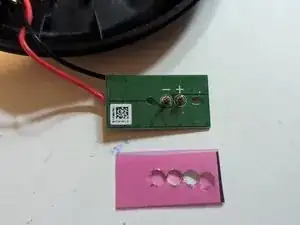
The adhesive keeps the parts together, but also provides a modicum of waterproofing.
-
I chose iPhone battery adhesive as it appears to be very similar to the original adhesive found on the charging plate.
-
-
-
Final step, place the mug on the charging base.
-
Success, we have a charging light once again!
-


While the replacement pin from AliExpress wasn't a 100% exact match, it was certainly close enough to be fully functional so all in all, the repair was an unqualified success!
Note that I've added an eBay listing that purports to contain the correct pins for this charger, but I have not seen the kit so I cannot verify that information.

11 comentários
Great guide Jerry! The only suggestion is that while the base is opened up and I have a bag of 10 new pogo pins (on their way from AliExpress), I will be replacing them both. It will only will take me another 2 minutes and also ensure the new pins are both protruding the exact same amount. The question is whether I will hang onto that "good" one that I didn't need to replace in the bag of 8 spare pogo pins. If you are a big DIY repair person, you will know this moral dilemma oh too well. ;-)
Entirely sound reasoning in my opinion; if one has failed, how far behind will the second one be? And as you say, you've got 10 of them, so it's not like you have to be stingy with them.
As someone who tends to hold onto things for too long (I finally donated the perfectly good iPhone 4's and 5's I had sitting in a box since Verizon will no longer allow 3G devices to be added to their network), I understand the temptation, but then again, you've got 8 brand new ones if you ever need another one, so what's the advantage to hanging on to a used one? Like that commercial about turning into your parents: When will you need it? Never - throw it away. :D
Excellent guide thanks for the roadmap to the fix.
I carried out the steps as described, but I used a hole punch to slice a permanent hole over the screw, so I never had to peel back the base rubber. I thought it might not stick back on nicely if I peeled it back. I also used some very thin foam trim tape instead of the IPhone battery adhesive tape. Worked very well
I also ordered my pogo pins from Digikey, and got them overnight. I ordered Mill-Max pogo pins which are rated for 50-100 thousand cycles. That's quite a bit of coffee. Digikey part number ED9001-ND. Mill-Max part number 0900-1-15-20-75-14-11-0. It's a perfect replacement size. 10 of them cost me about $6 CAD, and I got free shipping because I had other stuff to order.
Thanks for the feedback. The rubber on the base has not shown any signs of coming off so far, but yours is a perfectly valid alternative.
I do appreciate the information on replacement parts; the more choices we can offer, the better. I'll add them to the parts list when I get a few minutes.
Thanks for the guide. I did the resoldering of the pins a couple of times now. Since this is very difficult for me to align the pins correctly when soldering, i just designed a pcb with the pins ontop and ordered this pcb with the pins already assembled 5 times. now i can easily swap it when the pins break XD
Stefan -
is there a link to order this :D need to do a replacement
Ray Lin -
If you can order more pre-made pcb’s there are a lot of people who would buy them including me.