Introdução
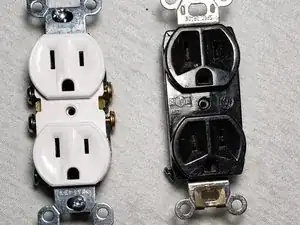
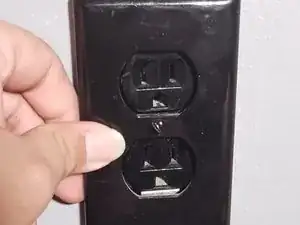
Common reasons to replace an outlet are for cosmetic and functional purposes. Cosmetic reasons include scratches, cracks, chips, etc. Functional reasons to replace an outlet would include: an outlet is not providing power, an outlet is not holding plugs tightly, and an outlet does not have optional features such as USB ports. This guide shows how to replace a standard residential wall outlet.
-
-
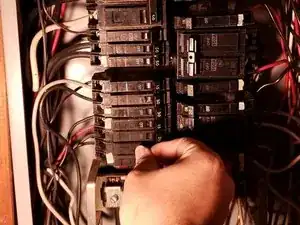
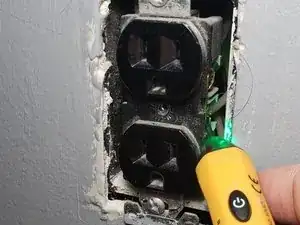
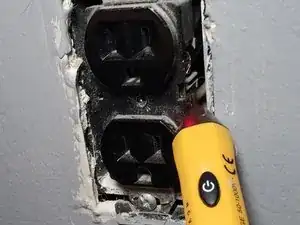
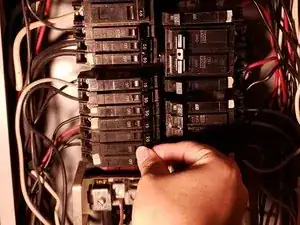
Turn off the power to the outlets by switching off all breakers that are labelled "receptacle."
-
Alternatively, you can switch off all breakers.
-
-
-
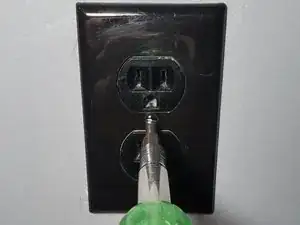
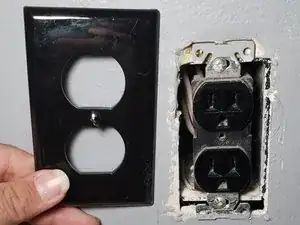
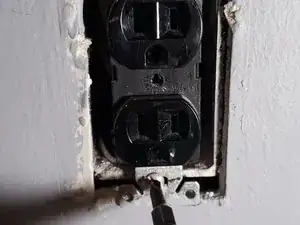
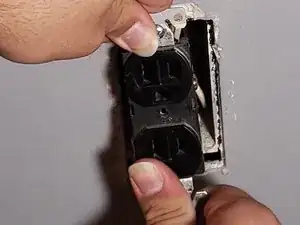
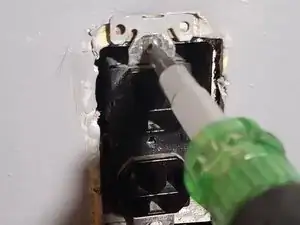
Using a flat-head screwdriver, remove the outer cover plate of the outlet by unscrewing the middle screw.
-
-
-
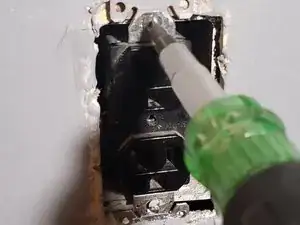
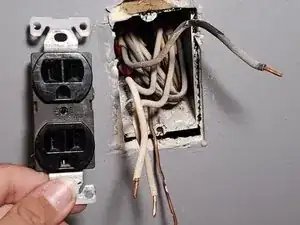
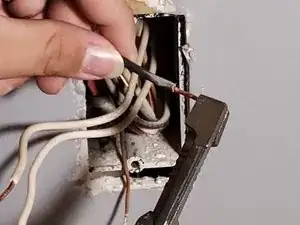
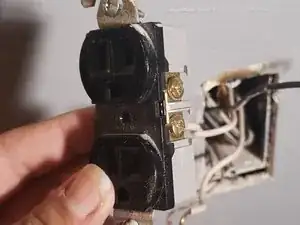
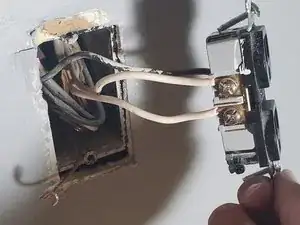
Holding the top and bottom tabs of the outlet, pull the outlet away from the wall, exposing the wires inside the electrical box.
-
-
-
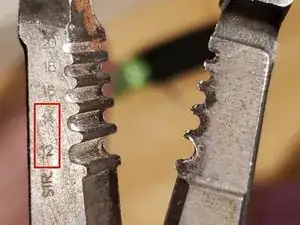
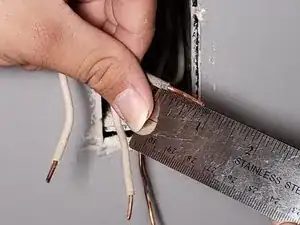
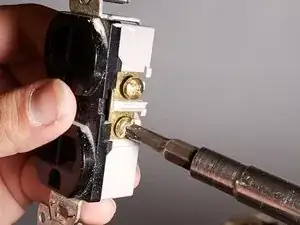
Using a pair of wire strippers, place the wire into each groove, closing the wire strippers around the wire to find the size that barely does not fit around the wires.
-
In the United States, residential wires are typically 12 gauge or 14 gauge, denoted by 12 and 14 on the wire strippers.
-
-
-
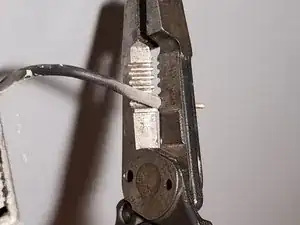
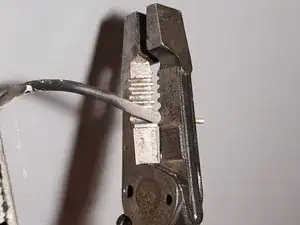
For each wire, approximately 0.75 inches (2 centimeters) away from the clipped end of the wire, clamp the strippers down on the wire and pull the strippers toward the clipped end of the wire, revealing the bare wire underneath.
-
-
-
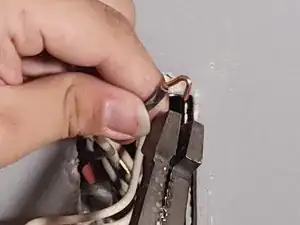
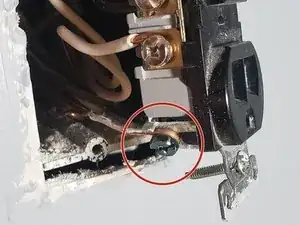
For each wire, using a pair of wire strippers or pliers, take hold of the exposed tip of the wire, and curve the tip of the wire, making a small hook.
-
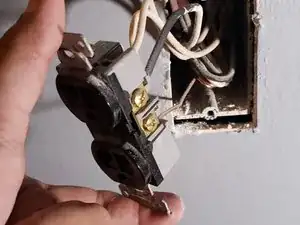
Separate the wires so that the black wires are on the right and the rest are on the left, with the ground wire at the bottom.
-
-
-
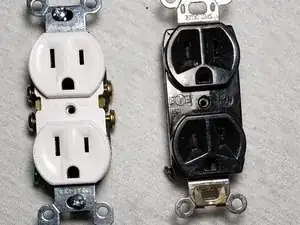
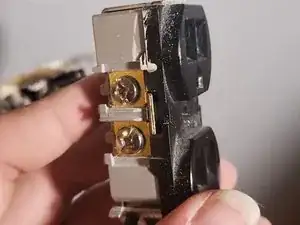
Hold the outlet with face of the outlet pointing toward you, with the copper screws on the right, and the silver screws on the left.
-
-
-
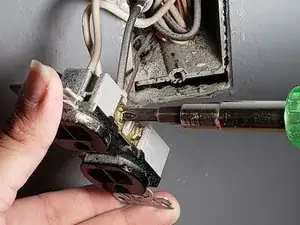
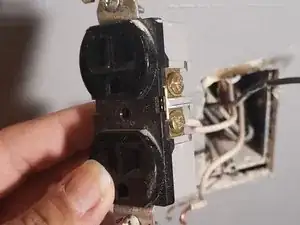
Hook each black wire around a copper screw, with the hook clockwise, and tighten the screw down.
-
-
-
Hook each white wire around a silver screw, with the hook clockwise. Tighten the screws down completely
-
-
-
Hook the ground wire around the screw that is separate from all other screws, and tighten the screw down.
-
-
-
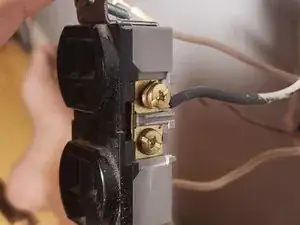
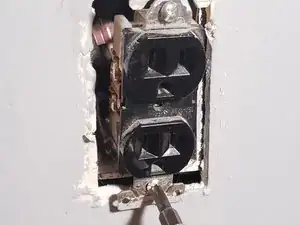
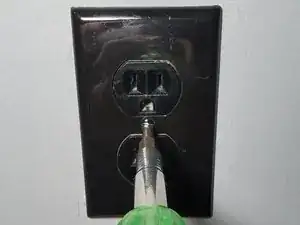
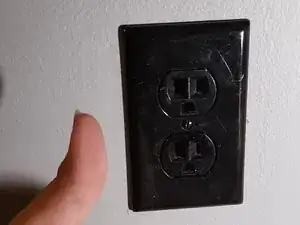
Fully tighten the screws on the top and bottom tabs, positioning the outlet so that it is straight, vertically.
-


4 comentários
pictures tell the story in the right manner, easy to do.
Thanks from Aria electical
This is a great step by step guide. I wish I had this a couple of years ago. I knocked myself off a ladder because I thought the power was off... didn't test it... and got super lucky. Don't be like me... spend the money on a voltage tester to make sure it isn't live.
Michelle -
if you are in the fullerton ca area and we can help... check us out at http://fullertonElectricpros.com
Michelle -
Just a friendly tip... On Step 17 you could mention using 2 UniShims® as an option for both receptical screws to make the outlet, set more flush with the outlet cover. I found out about the product while tring to find a better and simpler way to make some of my outlets in my apartment look more flush and professional. Instead of using the plastic outlet shims you get and any hardware store and they work great. You should check them out on the UniShim® website.
Tim H. -
Switching off all breakers is overkill. Find the breaker that feeds the receptacle that needs to be replaced. In most cases on breaker feeds one or two rooms. You may need to run an extension cord from another room and plug in a lamp or use a battery powered lamp to provide light to work from. I don't recommend using a flashlight as they are difficult to position and you need two hands to do this.
tfrench390 -
I'd recommend having a multi-meter for this and before switching off the current, test the receptacle for power. Often the receptacle will have power and this will allow you to verify that power is present. If you obtain no voltage reading, remove the cover and test directly from the wires. If no voltage is read from the wires with the circuit breaker on, the receptacle is not the problem.
tfrench390 -