Introdução
Based on lenovo_legion_9_16irx9_hmm.pdf "Hardware Maintenance Manual" from https://pcsupport.lenovo.com/si/en/produ...
Ferramentas
-
-
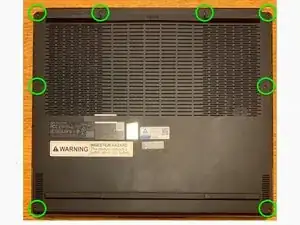
Flip the computer over to access the screws on the bottom.
-
Remove 8 black, 7mm PH0 screws (M2 x L7).
-
Note: Virtually all the other screws for this computer are PH1 screws which may get stripped when using a smaller screwdriver, but these screws require a Philips PH0 driver.
-
-
-
Pry up the clips/latches and then remove the lower case. Start at the front (four clips), then sides (three clips each side) and back (four clips) - there is also one clip in the middle of the case.
-
-
-
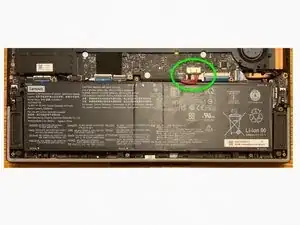
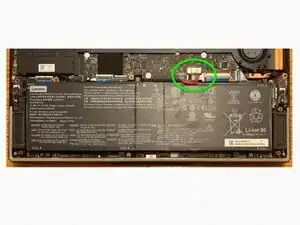
Almost anything that is done with a computer is safer if the battery is disconnected, so it is good to do that now.
-
Disconnect the battery pack cable from the system board using fingernails or a pry bar. Use your fingernails to pull the connector to unplug it. Do not pull the cable. It can be very tight. I used a 3.5 mm flathead screwdriver to carefully push the side plastic edges down towards the battery. Do not knock any of the components on the board.
-
To reassemble your device, follow these instructions in reverse order.