Introdução

Prerequisite Only

  1. 3xuNQIhuXs2XUDwB
    • Remove the four rubber feet of the device using a metal spudger.

  2. 1ei14ULmbwWVfTiO
    1ei14ULmbwWVfTiO
    utorX5oROpEptkcn
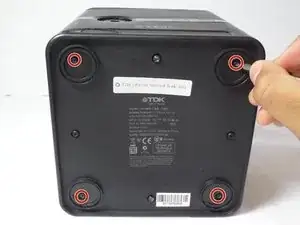
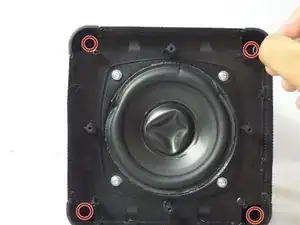
    • Remove the four 9 mm Phillips #0 screws located under the feet of the device.

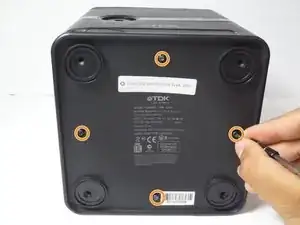
    • Remove the four 9 mm Torx #8 screws located on each side of the bottom the device.

  3. vsJ1XXupavPuJIFr
    vsJ1XXupavPuJIFr
    pOD5MwkMGkJrFVsu
    • Pull the bottom cover of the device towards you.

  4. HbXjAUjt2SDoCDup
    HbXjAUjt2SDoCDup
    rOsORsOrMEt4Cxsv
    • Remove the four 13 mm Phillips #1 screws.

  5. aiQA3cHgBSHTNOJc
    aiQA3cHgBSHTNOJc
    rMwpc26rsDZsZVpk
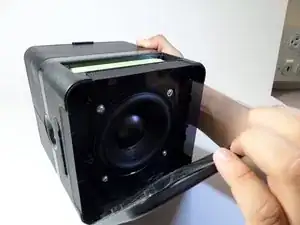
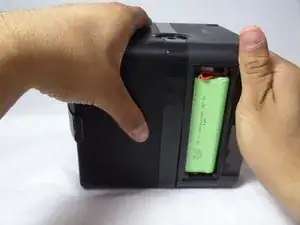
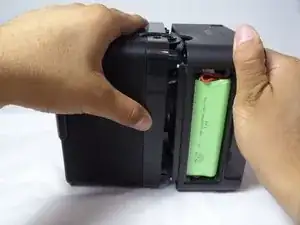
    • Use one hand to grip the device from the side of the handle, and use the other hand to grip the side of the device that contains the woofer

    • The woofer is the circular component located at the bottom of the device after the bottom cover has been removed

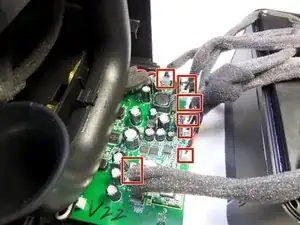
    • Pull apart the compartments by applying force in opposite directions.

    • Do not pull with extreme force!! There are many electrical wires inside the device that can become damaged if the bottom panel is removed without care

  6. CdfTOgkcIr5Tu5Ug
    • Disconnect the seven cables attached to the motherboard.

    • Do not use too much force when pulling on the wires. Pulling with too much force can damage the wires.

    How to mother board perching & Price

    Jahangir alam -

Conclusão

To reassemble your device, follow these instructions in reverse order.

Eduardo Barrios

Membro desde: 14/09/15

359 Reputação

0 comentários