Introdução
If your Dell XPS 13 7390 is producing distorted audio, crackling sounds, or no sound at all, you may have a failing speaker module that needs to be replaced.
The left and right speakers route audio through small drivers that can wear out over time, especially after long periods of high volume use or exposure to dust and debris. If you notice buzzing, rattling, or uneven sound output, it’s a strong sign the speakers are no longer functioning correctly.
Avoid applying excessive pressure to the speakers during removal, as the drivers and cabling are delicate and can be damaged easily.
Before you begin this repair, power off the laptop completely and disconnect any external devices.
-
-
Remove the eight 3 mm screws that secure the base cover to the palm-rest assembly using a T5 Torx screwdriver.
-
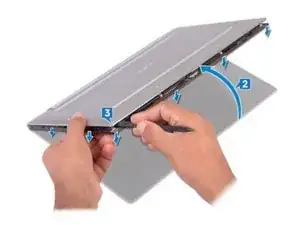
With the computer face-down, open it at an angle.
-
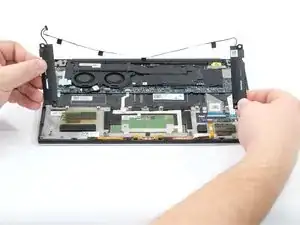
Using a spudger, pry the base cover from the palm-rest assembly, starting at the front left and right corners.
-
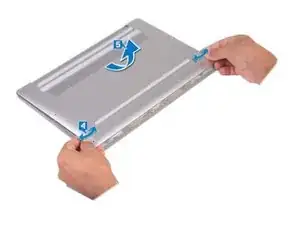
Moving the base cover from left to right, release the clips securing the base cover to the palm-rest assembly.
-
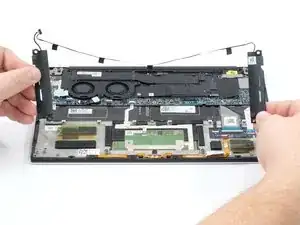
Lift the base cover from the palm-rest assembly.
-
-
-
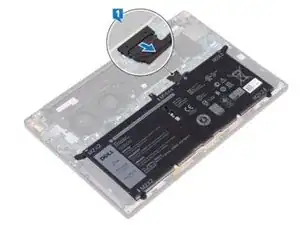
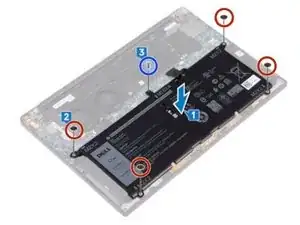
Disconnect the battery from the system board.
-
Remove the four screws (M2x2) that secure the battery to the palm-rest assembly.
-
Remove the screw (M1.6x4) that secures the battery to the palm-rest assembly.
-
Lift the battery off the palm-rest assembly.
-
Turn the computer over, open the display, and press the power button for about 5 seconds to ground the computer.
-
-
-
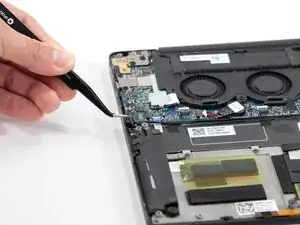
Use tweezers or a clean fingernail to gently pull the speaker cable outward from its connector on the system board, as shown in the photo.
-
Pull evenly from both sides of the connector to avoid bending or twisting the cable.
-
Once loosened, slide the connector straight out of its socket.
-
Move the disconnected cable aside to prevent it from catching on nearby components.
-
-
-
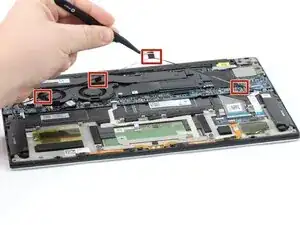
Use tweezers or your fingers to slowly lift and remove the tape securing the speaker cable to the chassis.
-
Lift the cable out of any routing channels or clips along the inside of the laptop.
-
Fully unroute the cable so it can move freely across to the opposite speaker.
-
-
-
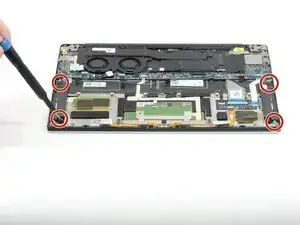
Use a Phillips #00 screwdriver to remove the four 2 mm screws holding both speakers in place.
-
-
-
Lift each speaker straight up from the chassis using your fingers.
-
Check that the cable is fully free so it does not snag while removing the speakers.
-
Remove both speaker modules and set them on a safe, clean surface.
-

To reassemble your device, follow these instructions in reverse order.