Introdução
If your Dell XPS 13 7390 is starting to slow down, running out of storage, or failing to boot properly, the SSD may be the cause. Solid-state drives can wear out over time, leading to crashes, missing files, or long loading times. Upgrading or replacing the SSD can restore performance and give your laptop a noticeable speed boost.
Before you begin this repair, power off the laptop completely and disconnect any external devices.
-
-
Remove the eight 3 mm screws that secure the base cover to the palm-rest assembly using a T5 Torx screwdriver.
-
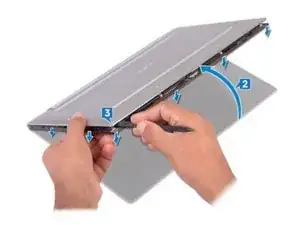
With the computer face-down, open it at an angle.
-
Using a spudger, pry the base cover from the palm-rest assembly, starting at the front left and right corners.
-
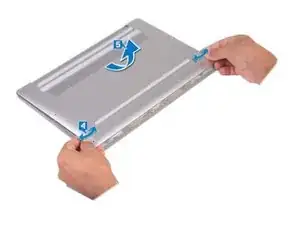
Moving the base cover from left to right, release the clips securing the base cover to the palm-rest assembly.
-
Lift the base cover from the palm-rest assembly.
-
-
-
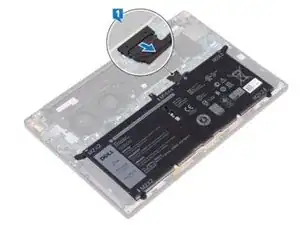
Disconnect the battery from the system board.
-
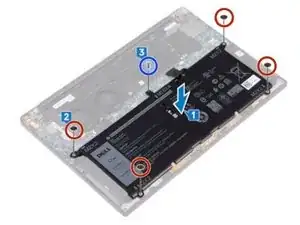
Remove the four screws (M2x2) that secure the battery to the palm-rest assembly.
-
Remove the screw (M1.6x4) that secures the battery to the palm-rest assembly.
-
Lift the battery off the palm-rest assembly.
-
Turn the computer over, open the display, and press the power button for about 5 seconds to ground the computer.
-
-
-
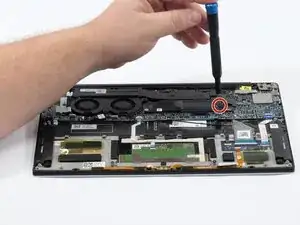
Remove the single 3 mm screw holding the SSD in place using a Phillips screwdriver.
-
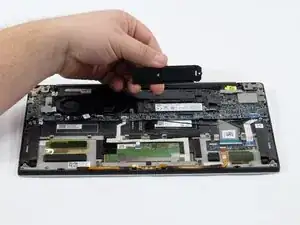
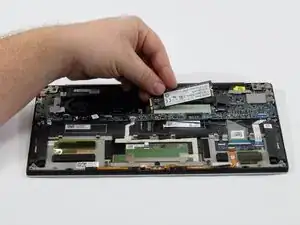
Carefully lift up the SSD cover using your fingers.
-

To reassemble your device, follow these instructions in reverse order.