Introdução
This guide will show you how to properly remove the base cover and battery module for the Dell XPS 13 7390 to access the internal components.
Whether it's replacing the WIFI-card or applying new thermal paste, this guide will act as the first step for any procedure involving the inside of the laptop.
Be sure to turn off your device before you begin.
-
-
Remove the eight 3 mm screws that secure the base cover to the palm-rest assembly using a T5 Torx screwdriver.
-
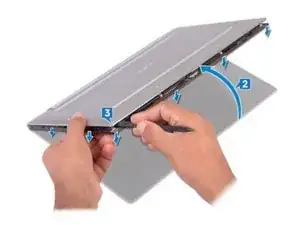
With the computer face-down, open it at an angle.
-
Using a spudger, pry the base cover from the palm-rest assembly, starting at the front left and right corners.
-
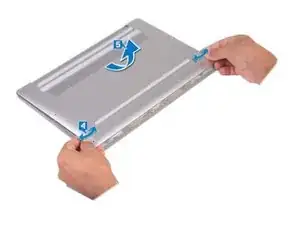
Moving the base cover from left to right, release the clips securing the base cover to the palm-rest assembly.
-
Lift the base cover from the palm-rest assembly.
-
-
-
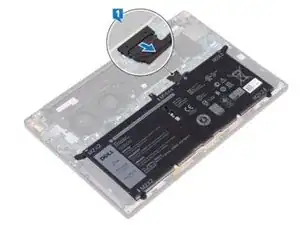
Disconnect the battery from the system board.
-
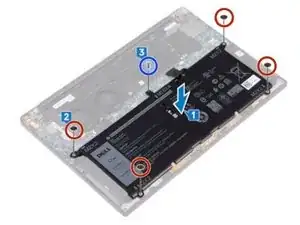
Remove the four screws (M2x2) that secure the battery to the palm-rest assembly.
-
Remove the screw (M1.6x4) that secures the battery to the palm-rest assembly.
-
Lift the battery off the palm-rest assembly.
-
Turn the computer over, open the display, and press the power button for about 5 seconds to ground the computer.
-
To reassemble your device, follow these instructions in reverse order.