Introdução
Use this guide to replace the volume button assembly in the Dell Venue Pro.
The volume button is mounted internally and requires removing the back cover, battery, and motherboard to access it. This guide walks through the necessary steps to safely remove and replace the volume button assembly.
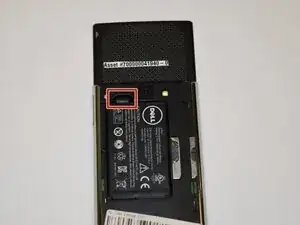
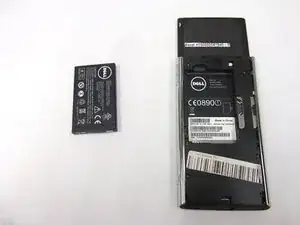
Before beginning, power off the phone and remove the back cover and battery.
Ferramentas
-
-
Use your finger to lift the battery using the notch in the upper left corner of the compartment.
-
-
-
Remove the Back Cover
-
Slide and lift the back cover off the phone. (Use the existing Back Cover Removal guide as reference)
-
-
-
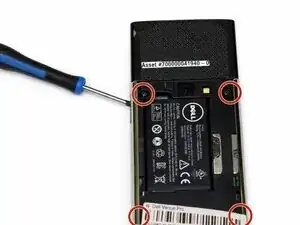
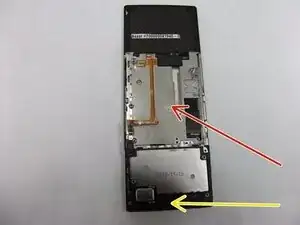
Remove the Midframe Screws
-
Use a Phillips #00 screwdriver to remove the 4.57 mm screws securing the midframe to the phone.
-
Keep track of each screw and its original location to ensure correct reassembly.
-
-
-
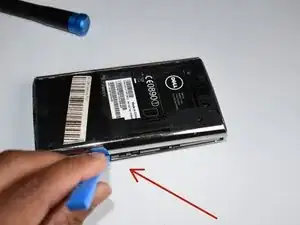
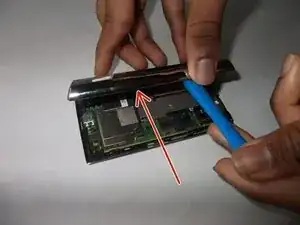
Remove the Midframe
-
Insert a plastic opening tool into the seam between the midframe and phone body.
-
Gently twist the tool to release the clips around the edges.
-
Once all clips have disengaged, pull the midframe upward to remove it completely.
-
-
-
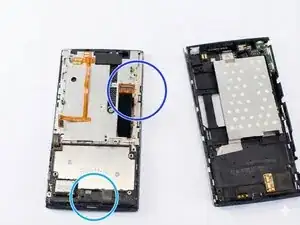
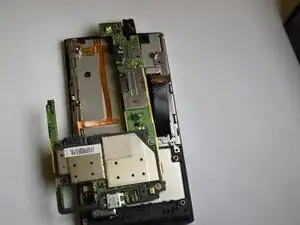
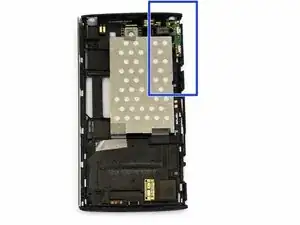
Expose the Motherboard
-
With the midframe removed, the motherboard should now be fully visible.
-
Identify the following components before continuing:
-
SIM card reader near the top of the device
-
Metal shielding covering the center of the motherboard
-
Micro-USB charging port at the bottom
-
Secondary daughterboard connection on the left side
-
Set the midframe aside.
-
-
-
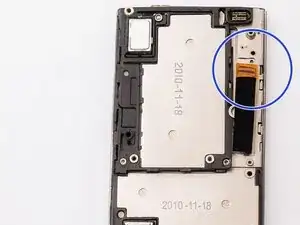
Disconnect Internal Cables
-
At this point, the motherboard should be fully visible, as shown in your reference photos. You should see:
-
Disconnect the following cables:
-
Display cable
-
Micro-USB charging port at the bottom
-
Any remaining flex cables attached to the motherboard
-
-
-
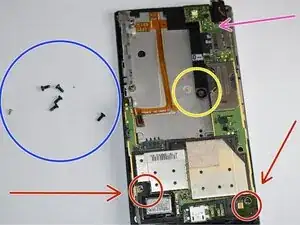
Remove the Motherboard Screws
-
Use a Phillips #00 screwdriver to remove the 2.68 mm screws securing the motherboard to the frame.
-
Screws are located near:
-
The bottom right corner (charging port area)
-
The middle left side
-
The top of the motherboard
-
Set all screws aside.
-
-
-
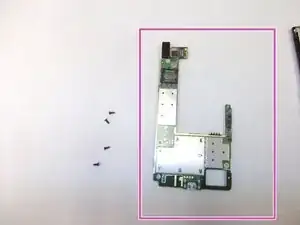
Remove the Motherboard
-
Starting from the top edge, gently lift the motherboard up and away from the phone housing.
-
The micro-USB charging port may fit snugly in its opening. Lift carefully to avoid bending the board.
-
Once free, remove the motherboard from the device. Set the motherboard aside.
-
-
-
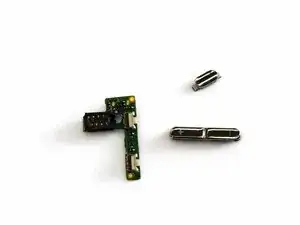
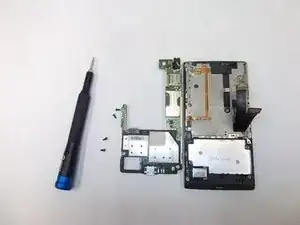
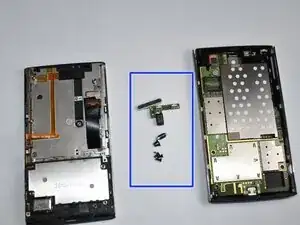
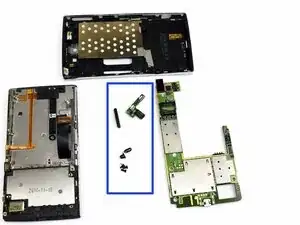
Remove the Volume Button Assembly
-
Locate the volume button assembly along the side of the phone frame.
-
Lift the volume button assembly out of its recess.
-
-
-
Install the New Volume Button Assembly
-
Place the replacement volume button assembly into the phone frame.
-
Ensure it sits flush and aligns correctly with the external button openings.
-


To reassemble your device, follow these instructions in reverse order.