Introdução

This guide introduces how to replace the battery from Dell Latitude E7470. The laptop comes with different battery configurations. While this guide shows how to remove a standard capacity battery, the procedure is similar when replacing the extended capacity battery. And the last steps have photos of the extended capacity battery (the part sold by iFixit.com)

  1. jyZZPZxH5JMsOUCb
    • Remove the eight 4 mm screws on the back cover using a Phillips #0 screwdriver.

    After unscrewing the 8 screws, they stay on the back cover.

    Victor Ashiedu -

  2. 3yAeDmqHgF3kPNvM
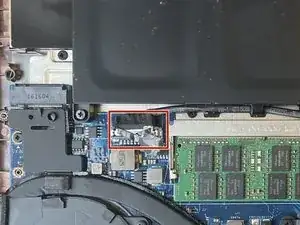
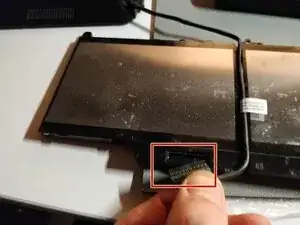
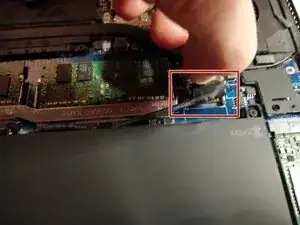
    • Use the pull tab on the battery connector to lift the connector straight up off its socket on the motherboard, disconnecting it.

    Personally, I would remove the battery as the first stage battery should be disconnected before any work is completed.

    Richard Holmes -

  3. NuiTeIZQJXECEFta
    NuiTeIZQJXECEFta
    2i5XNthrPAhNwteE
    j6dPKOX4ES6D4Tld
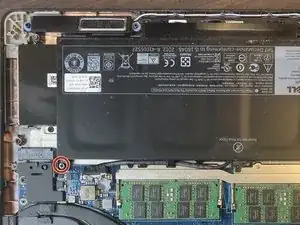
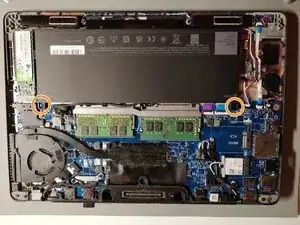
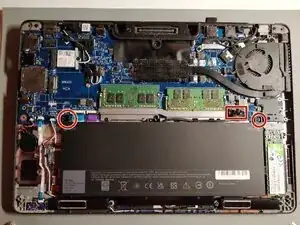
    • Remove the single 4 mm Phillips screw securing the bottom left corner of the battery.

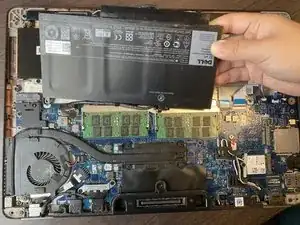
    • If you are removing an extended capacity battery (see third photo), remove the Phillips screw securing the bottom right corner of the battery.

    My laptop had 2 screws holding the battery. I am not sure why. It may be useful to check whether yours has 2 as well. Unlike the laptop’s back cover, after unscrewing the screws on the battery, you have to remove the screws.

    Victor Ashiedu -

    I too have 2 battery screws. My battery is longer than the one pictured. I think my battery must be an extended capacity battery.

    What I do not understand is that in the picture, on the extreme right - next to the computer's outside edge, there is a round CMOS battery pictured with a red/black twisted pair of wires plugging into the motherboard. My machine has an empty space with no battery. What about the machines of others? Was there one that has been removed? My machine seems to work ok without it. Should I install one?

    wilie -

  4. pumoahILSLPQnvYC
    • Remove the battery from the laptop.

  5. ykKnZmh2ehuYQ2QN
    • Gently unplug the cable on the battery side.

    • Here the photos show the extended capacity battery. You may have a shorter size for the standard battery.

  6. wfVPQRHgEDKYfoDT
    wfVPQRHgEDKYfoDT
    pZDLWC5WtaHRMPUt
    • Before inserting the new battery, you may need to remove the protective blue plastic film on the metal silver side of the battery (they are on the ifixit Replacement Laptop Battery, see link above).

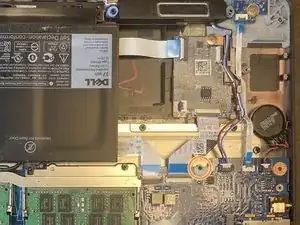
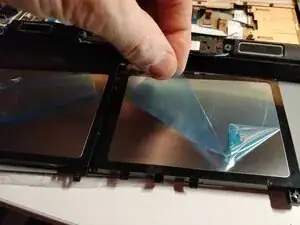
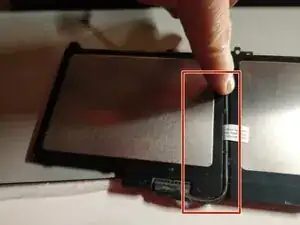
    • Re-plug the same cable on the new battery, and allow the cable to go around as showed on the photos.

  7. cjsHkk1L1AUOsGuQ
    cjsHkk1L1AUOsGuQ
    WYpZmuycTB3KHWAs
    • Screw back the battery (here the photos show the extended capacity battery)

    • Plug back the battery cable to the mainboard connector.

Conclusão

To reassemble your device, follow these instructions in reverse order.
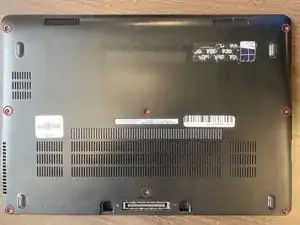
Hervé

Membro desde: 26/02/23

134 Reputação

0 comentários