Introdução
This guide provides detailed step-by-step instructions for replacing the motherboard in a Dell Latitude 9510 laptop. The motherboard serves as the main circuit board, connecting all internal components and ensuring proper system operations. Before you start, be sure the whole system is fully powered off and unplugged. Follow these steps efficiently to ensure a safe, proper replacement process and restore your device to full working condition.
-
-
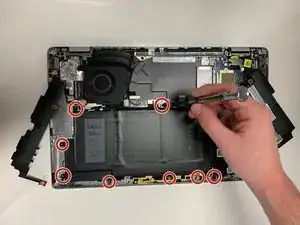
Flip the device so that the base plate is facing you.
-
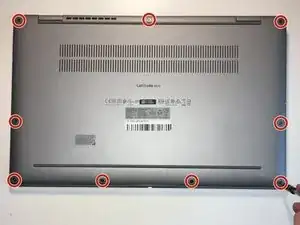
Use a Phillips #0 screwdriver to remove the nine 5.5 mm screws securing the base plate.
-
-
-
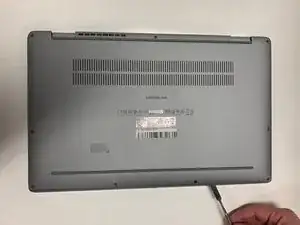
Wedge a spudger between the base plate and the chassis, then gently pry around the entire perimeter to release the base plate.
-
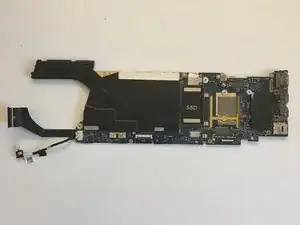
Remove the base plate.
-
-
-
Use a spudger to gently lever the speaker connector out of its port.
-
Lift the speakers up and out.
-
-
-
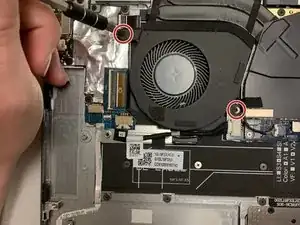
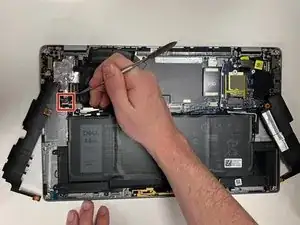
Place your fingernails behind the plastic tabs on the speaker's motherboard connector, then pull directly backwards, toward the wires, until the connector releases from its port.
-
Lift the fan up and out.
-
-
-
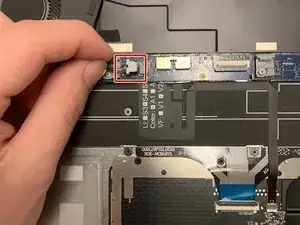
Place your fingernails behind each of the plastic tabs on the plug, and pull directly backward until the connector releases.
-
-
-
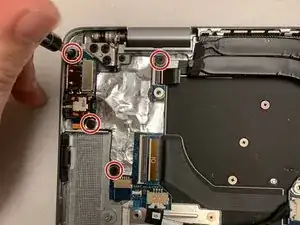
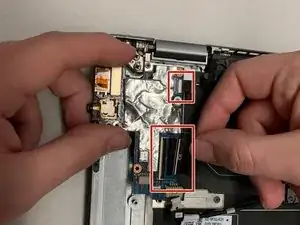
Flip up the locking bars on the two ZIF connectors so they stand vertically, then gently remove the two ribbon cables connected to the IO daughterboard.
-
Lift the IO daughterboard up and out.
-
-
-
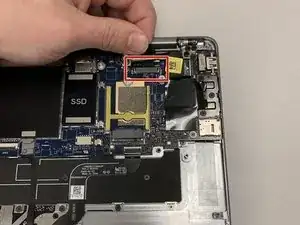
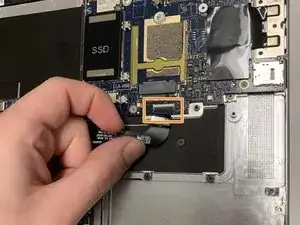
Place a spudger behind a plastic tab on either side of the plug, then "walk" the connector out of its socket by gently pushing the plug toward the cables, alternating sides, until the connector releases.
-
Lift the battery up and out.
-
-
-
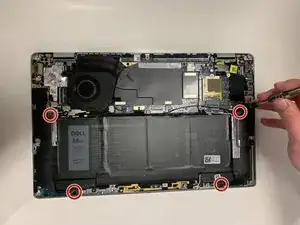
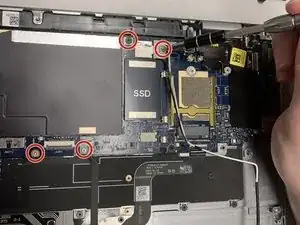
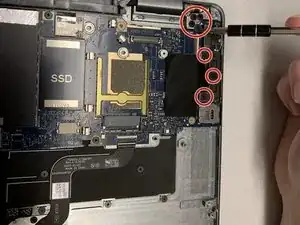
Use a Phillips #00 screwdriver to remove the four screws.
-
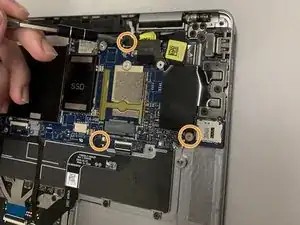
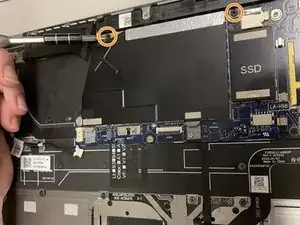
Use a Phillips #00 screwdriver to remove the three screws.
-
-
-
Flip up the small metal display cable clip, until the clip is parallel to the ribbon cable, then pull it directly backwards until it releases.
-
Flip up the lock-bar on the ZIF connector, then gently pull the ribbon cable until it releases.
-
-
-
Use a Phillips #00 screwdriver to remove the seven 4.0 mm screws.
-
Use a Phillips #00 screwdriver to remove the two 4.5mm screws.
-


To reassemble your device, follow these instructions in reverse order.