Introdução

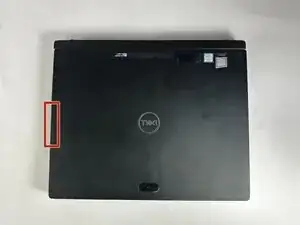
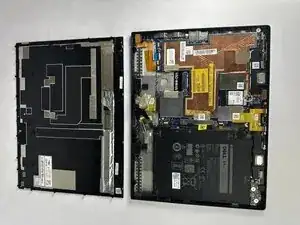
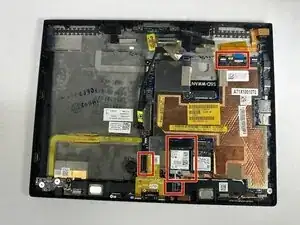
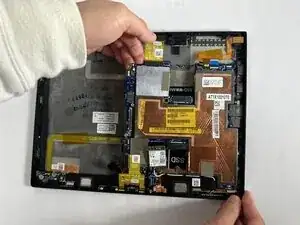
The motherboard (system board) contains the CPU, memory, and all major components of the Dell Latitude 7285 2-in-1. If your tablet experiences power failures, port issues, or complete hardware failure, the system board may need replacement.

Before beginning, power off the device completely, remove the detachable keyboard, and unplug all accessories. You’ll need to remove several components before accessing the system board.

  1. SkpL5faLOdymBr33
    SkpL5faLOdymBr33
    6NmQx1HrYZwlw4Yv
    • Power off the tablet.

    • Remove the microSIM and microSD cards.

  2. ClJ3yYSmEPYk1IXL
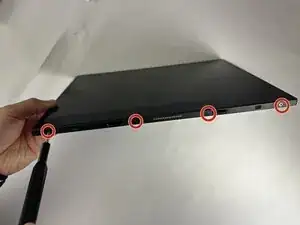
    • Using a Phillips #00 screwdriver, remove the four 4 mm screws securing the display panel to the tablet.

  3. Esej5ePkksUgJZU1
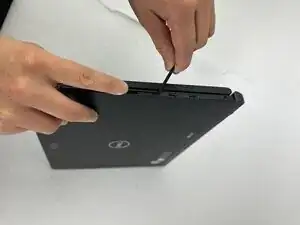
    • Pry around the edges of the display using an opening tool to release the clips, starting at a corner.

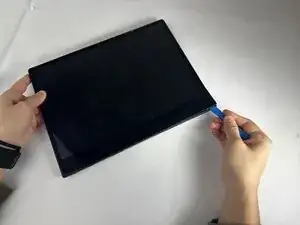
    • Lift the panel and slide it upward to free it from the frame.

    • Tilt the panel open.

    • Caution: Do not open the display more than 90° to prevent cable damage.

  4. QDULUmevMhS5Gjv5
    QDULUmevMhS5Gjv5
    yVAoeVAAvX4jDyuL
    ICDlmTqZ1hy1dHKW
    • Rest the bottom edge of the display against the tablet’s rear cover.

    • Open the display to 180° and lay it flat on your workspace.

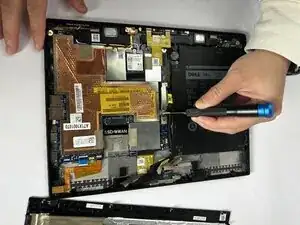
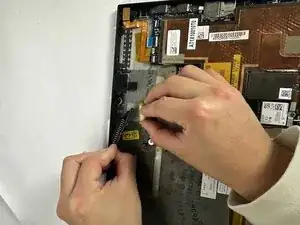
    • Gently remove the adhesive tape that secures the display cable on the system board.

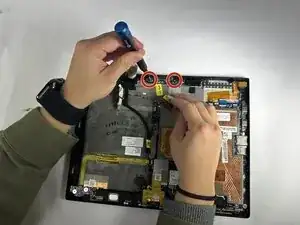
    • Remove the two 2.5 mm screws using a Phillips #00 screwdriver.

  5. dPKuAPt4ULHcuo1m
    • Lift the metal tab and disconnect the display cable from the system board.

  6. wDFBOBVsLibdkCQf
    wDFBOBVsLibdkCQf
    nA6F1ebmbtKVA5X2
    • Lift the display panel off the tablet and remove it.

  7. XGl6KyIByFXHvKrq
    • Remove the four 3 mm screws securing the battery using a Phillips #00 screwdriver.

  8. AbFNdeAoGesJxcOC
    AbFNdeAoGesJxcOC
    22XBoSxBpQVWhxrE
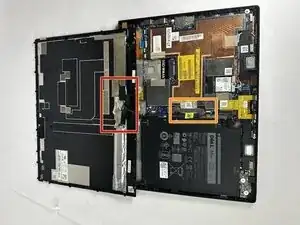
    • Using a Phillips #00 screwdriver, remove the single 2.5 mm screw securing the metal bracket on the system board.

    • Lift the metal tab and disconnect the battery cable.

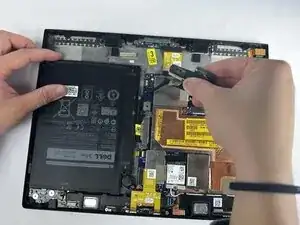
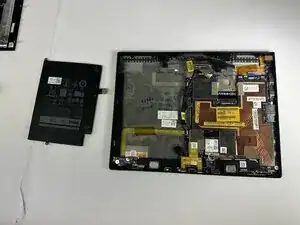
    • Lift the battery straight up and remove it from the device.

    • When reinstalling the new battery, ensure the battery cable is fully seated and the display cable lever is locked before closing the device.

  9. kRA5aE6CYTHKrdNR
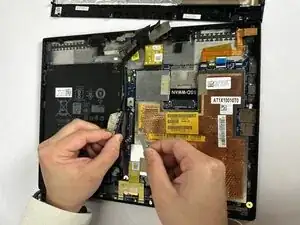
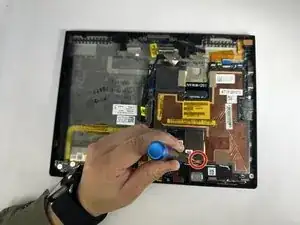
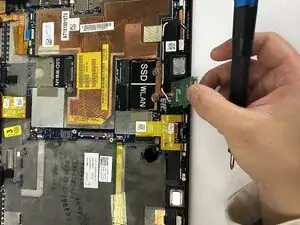
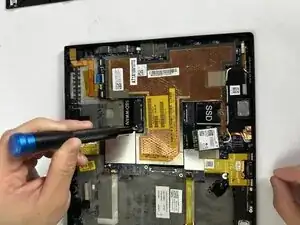
    • Using a Phillips #00 screwdriver, remove the 2 mm screw securing the SSD shield.

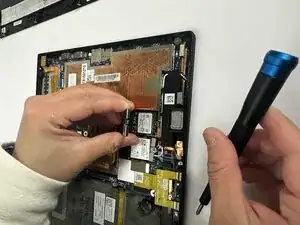
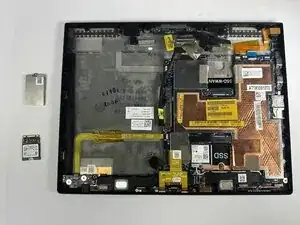
    • Lift the shield away from the tablet.

  10. uvCwAALjUcDsMN26
    uvCwAALjUcDsMN26
    RhyPLKoRMUYwW3BU
    • Slide the SSD module out of its connector.

    • Lift the SSD out of the tablet and remove it.

    • When installing a new SSD, slide it fully into the connector at a slight angle before securing the shield screw.

  11. Evo5nuYGGHEw45pQ
    • Disconnect the docking board cable from the system board.

  12. kYhyGtsqcUJdhFQo
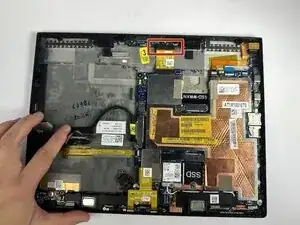
    • Using a Phillips #00 screwdriver, remove the two 4 mm screws securing the docking board bracket.

    • Lift the bracket off the docking board and set it aside.

  13. RybyXKyiYKehCwMm
    RybyXKyiYKehCwMm
    6ThXYKoXNDJwPJis
    • Lift the docking board straight up and remove it from the tablet.

    • When reinstalling, ensure the docking board cable is fully seated before replacing the bracket.

  14. QPBCPsFUhMAFsfRC
    QPBCPsFUhMAFsfRC
    rpjEWr4TyEWlhuaK
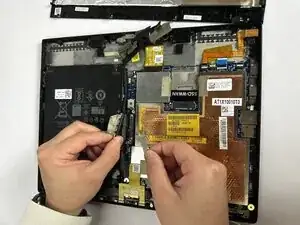
    • Disconnect the following cables from the motherboard: power button cable, USH board cable, audio board cable, and docking board cable.

  15. kviCOY3PTd6ncIxm
    kviCOY3PTd6ncIxm
    JSeGe5qSAMx5r4R5
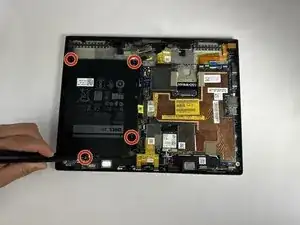
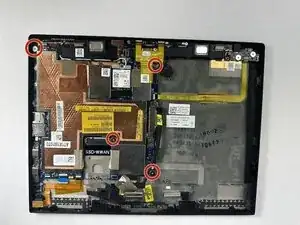
    • Using a Phillips #00 screwdriver, remove the four 1.5 mm screws securing the motherboard to the tablet.

    • Make sure to remove the copper shield and any adhesive tape running under the WWAN and WLAN slots before lifting the motherboard.

  16. 3CYItgrKvWaARU1s
    3CYItgrKvWaARU1s
    MdNwwFnoEIUptkjj
    • Gently lift the motherboard up from the tablet and remove it.

    • When reinstalling, ensure all cables are fully seated and shields/tape are replaced in their original positions.

Conclusão

To reassemble your device, follow these instructions in reverse order.

Madelyn Gibson

Membro desde: 04/11/25

411 Reputação

0 comentários