Introdução
This guide will cover everything needed in order to access the Dell Latitude 5320 2-in-1 fan unit and replace it. The Dell Latitude 5320 2-in-1 fan unit is responsible for the device's internal cooling. The fan unit ensures the device is running smoothly and efficiently by dissipating heat to prevent overheating of the hardware. Having a faulty or stuck fan unit can be detrimental for your Dell Latitude 5320 2-in-1. The fan unit moves heat out and away from the CPU; this is important to prevent permanent damage to hardware under excessive loads. Conduct regular maintenance to the fan unit and replace it with a direct OEM unit if necessary.
Make sure to visit the troubleshooting pages for proper diagnosis of your Dell Latitude 5320 2-in-1 before opening up your laptop, upgrading or removing any components.
Before you begin disassembly on your Dell Latitude 5320 2-in-1, make sure the device is powered off, unplugged from the charger, and the battery is disconnected.
Ferramentas
-
-
Shut down your laptop completely.
-
Unplug the laptop from any charging cables or other connected accessories.
-
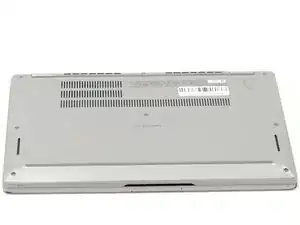
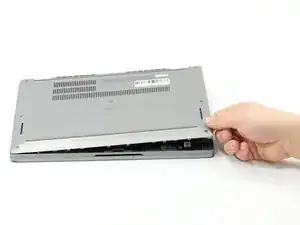
Flip the laptop over so the bottom case is facing upward.
-
-
-
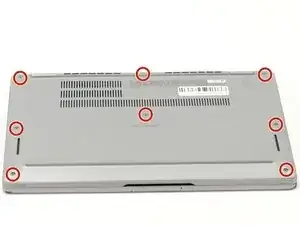
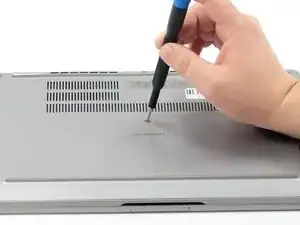
Using a Phillips #000 screwdriver, loosen the eight captive screws that secure the bottom cover.
-
-
-
Insert an opening tool into the seam between the bottom cover and the rest of the device.
-
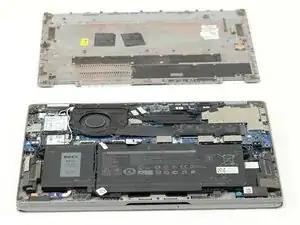
Gently work your way around the edges until the clips release. Lift the cover away and set it aside.
-
-
-
Gently lift the battery cable straight up from its socket on the motherboard to disconnect it.
-
-
-
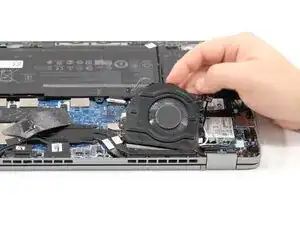
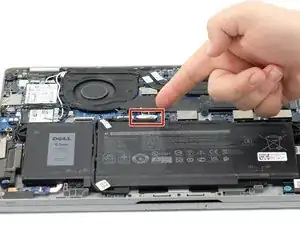
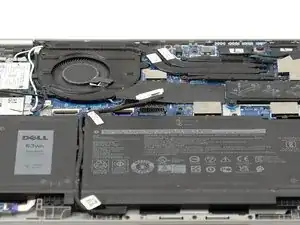
Rotate the device so that the fan unit is located at the bottom right corner
-
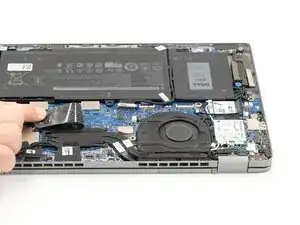
Gently pull back the black flap covering the fan cable.
-
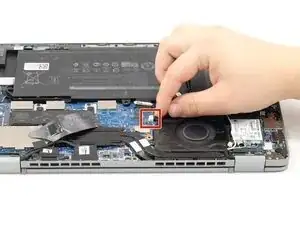
Unplug the fan cable from the motherboard socket.
-
-
-
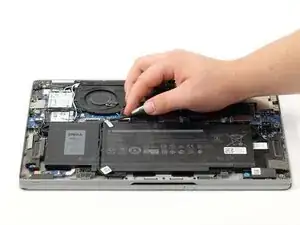
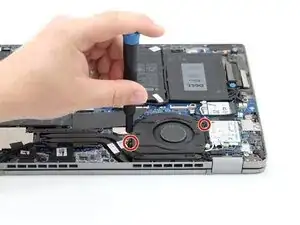
Remove the two 3mm fan screws using a Phillips #000 screwdriver.
-
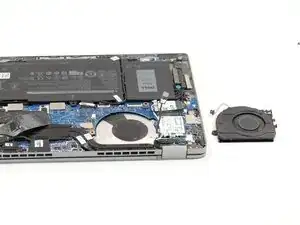
After carefully removing the wires from the plastic tabs carefully lift the fan unit out.
-


To reassemble your device, follow these instructions in reverse order.
