Introdução
Over time, dust buildup and degraded thermal paste can cause higher temperatures and reduced performance. This guide walks you through removing the bottom cover, disconnecting the battery, cleaning the cooling system, and reapplying thermal paste.
Note: This guide focuses on fan cleaning and thermal paste replacement only.
Caution: Disassembly involves risk of damage or injury. Proceed carefully and at your own risk.
Ferramentas
-
-
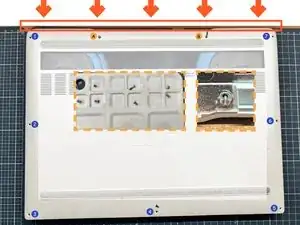
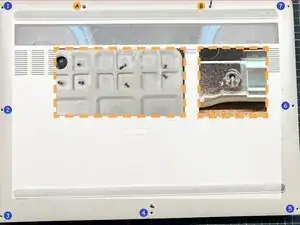
1. Loosen the captive screws labeled A and B.
-
2. Unscrew screws 1–7.
-
3. Pry up the bottom cover from the hinge edge and remove it.
-
-
-
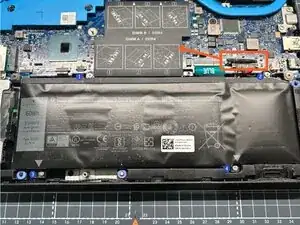
1. Pull straight up on the black battery pull tab to disconnect the battery cable.
-
2. Press and hold the power button several times to discharge any residual power.
-
-
-
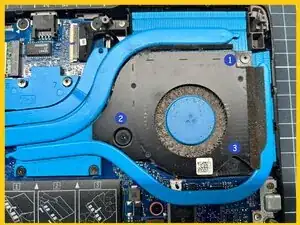
1. Unscrew screws 1–3 securing the right fan.
-
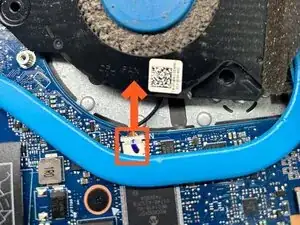
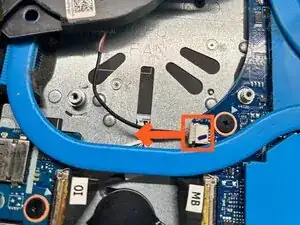
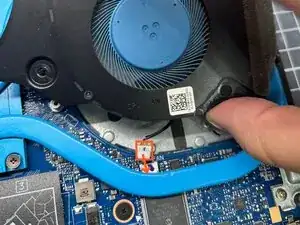
2. Disconnect the right fan cable.
-
3. Unscrew screws 1–3 securing the left fan.
-
4. Disconnect the left fan cable.
-
-
-
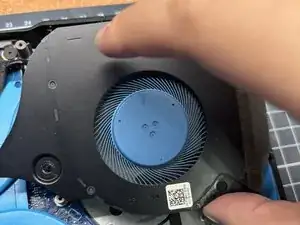
1. Use tweezers to remove large dust clumps from the fan blades.
-
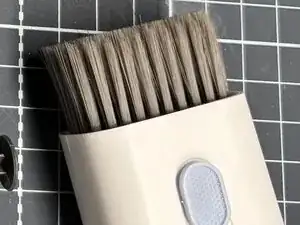
2. Brush away remaining surface dust.
-
3. Blow out fine dust using cool air, directing airflow from inside to outside.
-
-
-
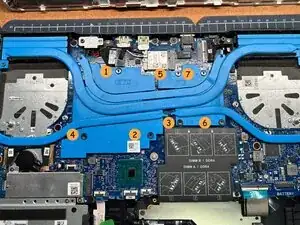
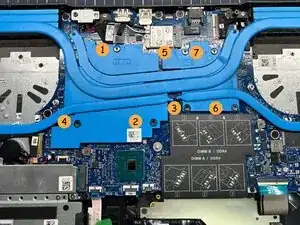
1. Loosen the heatsink screws in the order 7–6–5–4–3–2–1.
-
2. Turn each screw a few rotations at a time.
-
3. Repeat the sequence until all screws are fully loosened.
-
4. Lift the heatsink straight up and remove it.
-
-
-
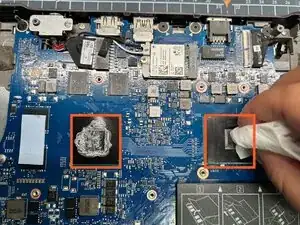
1. Wipe the old thermal paste off the CPU and GPU.
-
2. Clean the heatsink contact surfaces until no residue remains.
-
-
-
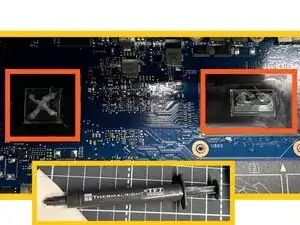
1. Apply a thin straight line of thermal paste to the CPU.
-
2. Apply an X-shaped pattern of thermal paste to the GPU.
-
-
-
1. Place the heatsink back into position.
-
2. Tighten the screws in the order 1–2–3–4–5–6–7.
-
3. Tighten each screw a few turns at a time until fully secured.
-
-
-
1. Reconnect the right fan cable.
-
2. Secure the right fan with its three screws.
-
3. Reconnect the left fan cable.
-
4. Secure the left fan with its three screws.
-
-
-
1. Place the bottom cover back into position without tightening the screws.
-
2. Power on the laptop and confirm the system boots normally.
-
3. Power off the laptop.
-
4. Fully tighten captive screws A and B.
-
5. Tighten screws 1–7 to secure the bottom cover.
-


Note: Before starting, wash your hands and touch a grounded metal object to discharge static electricity.
This guide shows how to clean the fans and replace the thermal paste on a Dell G5 5590 laptop to reduce temperatures and improve cooling performance.
