Introdução
This guide will show you how to replace the back cover on a Dell Chromebook 3100 2-in-1. You might need to do this if your Chromebook’s back cover is cracked, scratched, or broken from a drop or regular wear and tear. Replacing it helps keep the laptop looking good and protects the screen and internal parts from getting damaged. Doing this repair yourself can save money, reduce waste, and make your Chromebook feel like new again.
-
-
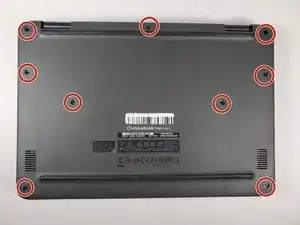
Turn the Chromebook upside down so the bottom panel is facing up.
-
Using a Phillips #1 screwdriver, remove all nine of the 5 mm screws from the back cover.
-
-
-
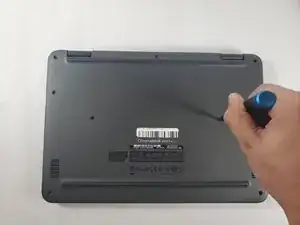
Use the opening tool to pry the back cover off of the device.
-
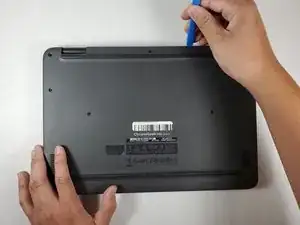
Gently insert your plastic prying tool between the bottom cover and the keyboard deck.
-
Work your way around the edges until the case starts to pop open.
-
Lift off the bottom cover carefully.
-

To reassemble your device, follow these instructions in reverse order and finally you’ve successfully replaced the back cover on your Dell Chromebook 3100 2-in-1. This simple repair helps protect your device’s screen and internal parts while giving it a cleaner, sturdier look.