Introdução
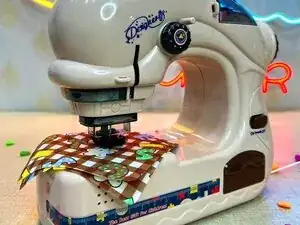
This technique guide explains how to safely set up, operate, and maintain the Dartwood Mini Sewing Machine for Kids. These steps help beginners avoid thread jams, needle issues, and uneven stitches while learning basic sewing skills. For stitch diagrams, threading visuals, and safety notes, the complete user manual is available via Manualslibraryy.
Step 1 — Safe Setup
- Place the machine on a flat, stable surface.
- Insert batteries or connect the power adapter.
- Ensure the needle guard is properly installed.
- Keep fingers clear of the needle area.
Step 2 — Threading Technique
- Raise the presser foot before threading.
- Follow the simple thread path shown on the machine.
- Insert bobbin correctly into the lower compartment.
- Pull both threads gently to the back.
Step 3 — Sewing Basics
- Start with slow speed control.
- Guide fabric lightly—do not pull.
- Sew straight lines before trying corners.
- Stop immediately if thread bunches.
Step 4 — Preventing Jams
- Use thin, soft fabrics only.
- Replace bent or dull needles.
- Re-thread if stitches look uneven.
- Never force thick material through.
Step 5 — Cleaning & Storage
- Turn off and unplug after use.
- Remove lint from bobbin area.
- Store machine in a dry place.
- Keep accessories together to avoid loss.
Common Issues This Technique Helps Avoid
- Thread tangling under fabric
- Needle breakage
- Uneven stitching
- Motor strain
Detailed safety instructions, threading diagrams, and stitch examples can be found in the official Dartwood Mini Sewing Machine manual on Manualslibraryy.
Conclusion
With proper setup and gentle handling, the Dartwood Mini Sewing Machine is a safe and enjoyable way for kids to learn basic sewing. These techniques promote smooth operation and help build confidence for beginner users.
To reassemble your device, follow these instructions in reverse order.
0 comentários