Introdução

Crie teardowns divertindo-se! Para mais informações sobre como redigir guias de teardown, confira o nosso guia de como tirar fotos fantásticas e as Perguntas frequentes sobre teardowns. Você também pode dar uma olhada nas nossas Diretrizes sobre teardowns para ter ideias sobre como redigir um teardown fantástico!

  1. khWp63IhFNfsYsrF
    khWp63IhFNfsYsrF
    mryhBFqVvj6TwPvg
    NUqn2vY4GVBsQx2Q
    • Para começar, decida o que você quer desmontar. Alguns exemplos de coisas que não devem ser desmontadas:

    • o seu pet.

    • o marca-passo do vovô.

    • qualquer dispositivo contendo plutônio.

    • o Optimus Prime.

    • Em seguida, vá à loja para adquirir o seu novo dispositivo. Preferimos ser ecológicos e ir a pé, mas cada um escolhe o seu meio de locomoção.

    • Entre na loja para encontrar o que está procurando. Se necessário, acampe na porta da loja para ser o primeiro da fila.

  2. PvQkpsNBYcPbENKj
    PvQkpsNBYcPbENKj
    gLphVEWZAhTHlOsj
    NDJROWKa6gCfmXGm
    • Em seguida, ache o seu dispositivo escolhido na loja. Não brigue com a senhora de 70 anos que acabou de pegar o último item da prateleira.

    • Não se esqueça de pagar o produto. Ao contrário do que dizem as crenças populares, truques mentais de Jedi não funcionam com seguranças de loja.

    • Recuse educadamente a garantia adicional.

  3. VIMYKehZdYUmhnMq
    VIMYKehZdYUmhnMq
    npLOwhfVqBYdiGXV
    Xr2SYywBCQGUUnDc
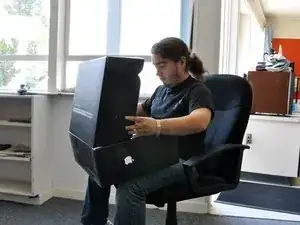
    • Na segurança de seu lar, abra a caixa do seu novo bebê e delicie-se com a sua superioridade tecnológica. Se você olhar para o dispositivo bem de perto, poderá vê-lo se depreciando.

    • Não se esqueça de simular a leitura do manual de instruções antes de descartá-lo.

    • Com o seu novo dispositivo instalado e funcionando, chegou a hora de curtir a sua nova aquisição. Lembre-se: água + eletrônicos = sonhos destruídos.

  4. EnJ4qQmxQwivZNWk
    EnJ4qQmxQwivZNWk
    MWCvRTiihXvBcXwH
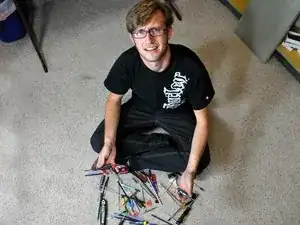
    • Certifique-se de organizar todas as ferramentas necessárias.

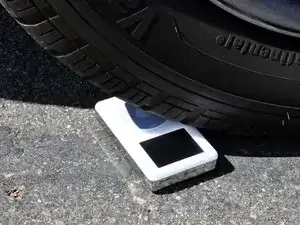
    • Tenha muito cuidado ao desmontar o dispositivo, a não ser que a sua intenção seja mostrar a destruição de um dispositivo. Sendo assim, proceda conforme planejado.

    • Acima de tudo, divirta-se!

  5. pqRUUIyf1O23DaFt
    pqRUUIyf1O23DaFt
    PZdGHU5xHwPnBPCT
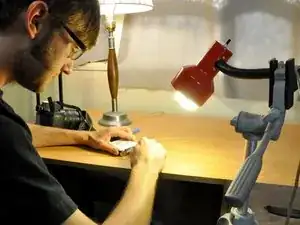
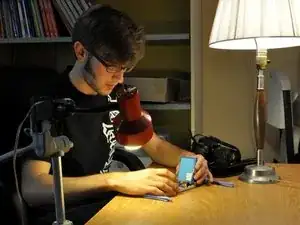
    • É chegada a hora de preparar o ambiente fotográfico.

    • A iluminação é essencial para se obter boas fotos. Instale as luzes e foque próximo à sua área de trabalho.

    • Recomendamos fixar uma luminária portátil com clipe em um tripé, para obter uma luz focada com precisão.

    An example of my own lighting setup can be found here: An example of a lighting setup

    Aiden -

    I find that clear, hi-res PCB images are best achieved with a CCD scanner (not CIS).

    There are numerous examples here:

    http://www.hddoracle.com/viewforum.php?f...

    I use a Canon MP370 multifunction printer/scanner/copier.

    Franc Zabkar -

    Hm. How might I write a how to. I kinda have other thoughts. Been doing this for a long time. Perhaps the first, a PDP-11, the mainframe of the day. Now days I take photos for myself with an EOS, Use a custom built bench. Start with the chip data sheets and manufacturer claims and test them. I will send a pic of my workbench if you would like. ; ) Thanks

    Ronny L Gonzales -

    tldr; Yes. Please do.

    - How DO you get such clean bright light and crisp photos ?

    - Is there an optimal lighting color(Kelvins) and or minimum flux recommended for taking good 'repair guide pics.'

    - IMHO adding some photos of 'photo setups'(^u^) &/or including a lists of useful photopgraphy setup accoutrements would be welcome inline edits to the present 'guide-guide'.

    Your humble reader,

    TR.

    Trisha Russo -

  6. eMeTORjfxiPuEBoI
    eMeTORjfxiPuEBoI
    EqoYrbT5t14P2O1Z
    ILWjtTQEOVHvwmO4
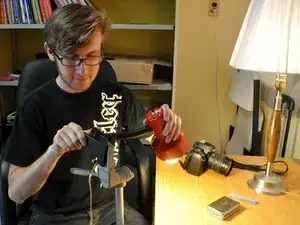
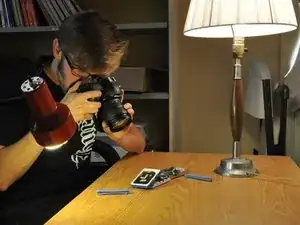
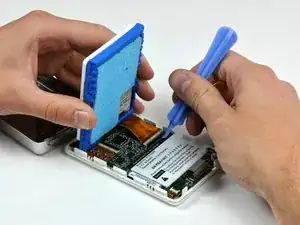
    • Com todo o equipamento adequado instalado, você pode agora se dedicar à desmontagem do dispositivo em si.

    • Durante a desmontagem, documente todos os passos com observações e fotos para compartilhar o seu conhecimento com a comunidade iFixit.

    • Você pode colocar uma folha de papel branco abaixo da sua área de trabalho para tirar fotos melhores.

    • Foi anexada uma foto da desmontagem tirada com a nossa instalação fotográfica profissional. Os resultados efetivos podem variar.

    what IS a 'professional lighting' setup? ie See comment thread on previous step.

    Trisha Russo -

  7. IEjPZcu6AxFtUgcv
    • Agora é a hora de partilhar o seu conhecimento com o mundo entregando-se a uma das mais benquistas e honradas tradições de todos os tempos: a escrita.

    • Dê asas a sua imaginação e mostre as suas habilidades de escritor(a) para a comunidade da iFixit.

  8. CqylbExU3eTkuEnc
    • Agora que o seu trabalho foi publicado no site da iFixit, é hora de sentar e relaxar, desfrutando da doce satisfação de ter criado um guia de teardown.

    • Isso pede uma dancinha de iPod!

Conclusão

Bom trabalho! Você criou um teardown! Mas por que parar por aqui?

Ajude a responder perguntas!

Walter Galan

708118 Reputação

17 comentários

I will try to make a Teardown Guide of an old Toshiba Satellite 1400, thanks for the inspiration!

jonasbits -

Why do I ALWAYS have one screw that strips and won't loosen or tighten, one that is obviously lost in a interdimensional black hole, and weird extra parts when I finish. Or the most vital, irreplaceable, Jesus part breaks, shorts out or disappears? LOL

borg3371 -

Because lots of machines have more parts than they need. It was suggested by Japanese motor cycle designers and manufactures that the British motor bike industry failed because they just put too many parts in their products and when copiers start they take apart the item and try to reduce the total number and reduce the costs increasing the profits

Mark Fort Te Teko NZ

nashi -

Is a teardown of an old, broken device OK? (I have an LG Optimus L7II with a busted LCD)

niccotaglia -

Totally! A broken device is a safe pick, you don't need to worry too much about breaking it more, and you might figure out how to replace the broken components!

Sam Goldheart -

Absolutely! Tearing down broken devices is how we learn what makes it tick. Even if you will never never ever get the device working again, the exploration is so worthwhile! Just always be careful with sharp and/or pointy tools. Sometimes tools slip when applying force, so I wear mechanic’s gloves for a little extra protection for my hands, especially when glass or displays are being removed.

Paul Kenyon -

I have a evolve 2 one touch alcatel with only 4 screws to teardown.

dennisp1964 -

While working on devices and prop replicas, I've found the following useful, even if NOT creating an iFixit teardown:

* Take pics of your steps and the screws, so that when you're faced with reassembly, you have a photo record of which screws went in which hole.

* Keep screws in separate containers, or little Ziploc parts bags (available at hobby and crafts stores, super cheap).

* Mark the individual parts containers or parts bags with a Sharpie, for what the screws are for (e.g. kybd, motherboard, palm rest).

David Spalding -

As with dismantling anything, it's best to set them out as you taken them off in some sort of reference grid. Or at the very least a photo of what you took off so when you come to that last weird screw that doesn't seem to belong anywhere, all you need do is back track your photos or look at where it came from and where it was left on your reference grid when you took it off.

It pays to prepare, I have a drawer full of "extra" screws, left over prior to finally slowing down and noting where I was putting things and from where they had just been removed.

Colm -

This is made of win. :D

Quick, cheap and easy tip: Take a fresh sheet off a lint roller, tape it tacky-side up to your work space or a clipboard. Now you have an easy place to put your screws! And they won't roll away! Group them and write the step number with a sharpie for reference.

Jefferson Malone -

A better use for the pill organizers you can get for a buck will work perfect for placing those tiny screws and keeps them separated, you can label the lids 1, 2, 3, etc. When ready for them open lid 1 when you need the screws for step 1 and so on.

Robert Vantine -

por que meus parafusos parecem ser uma sujeirinha num piso extremamente branco

villaspark -

I think a video tear down of various devices would be better. I don’t mind doing a tear down video of a toshiba laptop and uploading it here if possible

Samuel -

Hey shemzy20, you’re more than welcome to post a video teardown! The same photo and procedure guides still apply, you’ll just upload a video to the introduction of the guide instead of individual steps. Best of luck and happy fixing!

Sam Goldheart -

another solution for those pesky screws that tend to get lost is to use all those refrigerator magnets that your appliance repair men left behind from their last visit, you could glue several of them to a piece of cardboard, cloth, wood etc, or just buy the iFixit protech kit, it comes with a magnet plate

Luis Portilla -

Do I have this right? The purpose of a teardown is to discover how to take a product apart and get inside without destroying it —and so you can put it back together. So the purpose of a teardown is not to troubleshoot a specific defect. That is what a repair guide is for. I’m seeing this as Part 1: Teardown. Part 2: Write a repair guide. What do you think?

John Wackman -

Hey John, that’s about right!

We consider teardowns to be an exploration of the device—its design, repairability, and the procedures needed to get in. After a teardown you’ve got more experience to make guides to address hardware problems. Troubleshooting should start with software things (have you tried turning it off and on again) and then move into hardware replacements using the guides the teardown helped create!

Sam Goldheart -