Introdução

Se o seu controle DualShock do PS4 estiver apresentando o problema de drift no joystick, que é comum—movendo-se automaticamente sem toque ou ficando preso ao ser tocado—use este guia para reparar o problema sem necessidade de solda, algo com que muitas pessoas podem não ter experiência.

O controle precisará ser completamente desmontado para que o joystick esquerdo possa ser limpo e reparado. Este reparo simples, com conhecimento mínimo, é uma solução fácil. P.S.: o uso de luvas não é obrigatório durante o reparo do controle.

  1. MQ3qGUJEBabZOfPe
    MQ3qGUJEBabZOfPe
    CR5MxSbpgWThHNdC
    G6tHW2FyPbuXJ1Or
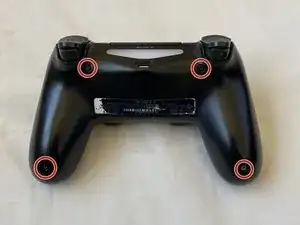
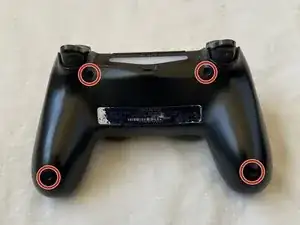
    • Remova os quatro parafusos de 6,0 mm na parte traseira do controle PS4 usando uma chave de fenda Phillips #00.

    I found a #0 screwdriver a better fit.

    thnews -

  2. NVlWA32pXNqVJLfF
    NVlWA32pXNqVJLfF
    PSGOL5RmqDMMA6DZ
    5vBTvfTAyto2wOZr
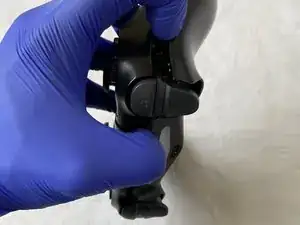
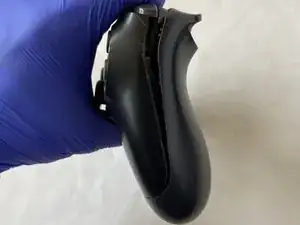
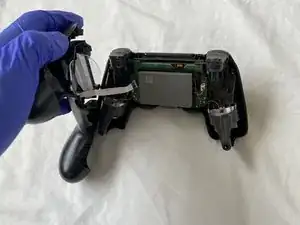
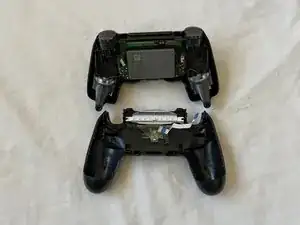
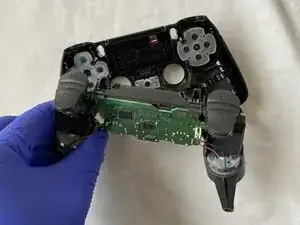
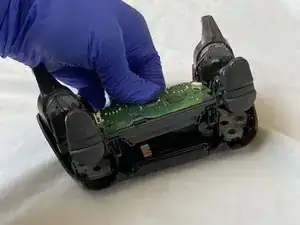
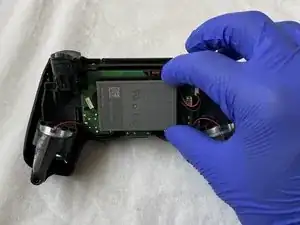
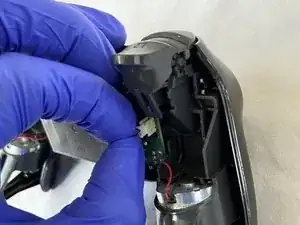
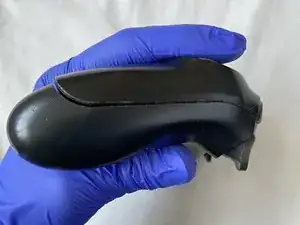
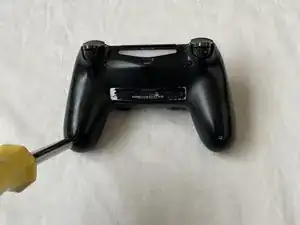
    • Separe a carcaça traseira do restante do corpo puxando a carcaça frontal e a carcaça traseira simultaneamente.

  3. rhftCg1cbH6lLsLo
    rhftCg1cbH6lLsLo
    ZKraUp6iTMOn15st
    GBgDAHBsPgaJP5tF
    • Seja muito cuidadoso ao separar completamente a carcaça traseira, pois a fita azul pode ser danificada.

    • Puxe levemente a fita azul para separar a carcaça traseira da carcaça frontal.

    • A carcaça frontal, que abriga a placa de circuito, será desmontada ainda mais.

  4. QcjerMCYKeTVboKg
    QcjerMCYKeTVboKg
    VqkkqUXFcQfXAA3v
    TatbHfc2mc2SvDGQ
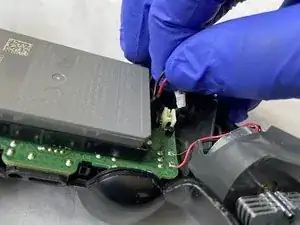
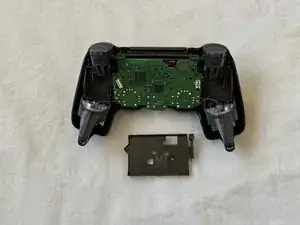
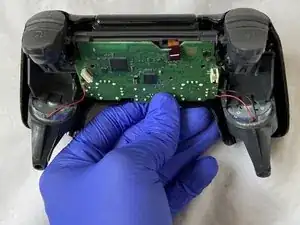
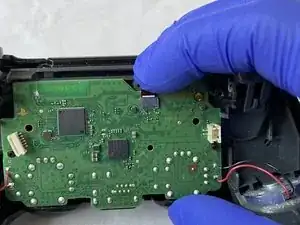
    • Remova o conector da bateria da placa-mãe pressionando os dois lados e puxando o conector para cima.

    • Tome cuidado para não rasgar os fios preto ou vermelho do conector ao remover os cabos.

  5. eNMTRgUm3SuMUMdq
    eNMTRgUm3SuMUMdq
    kbrhbnjES2EOI3dG
    RAeyJdCAvrvGRBCQ
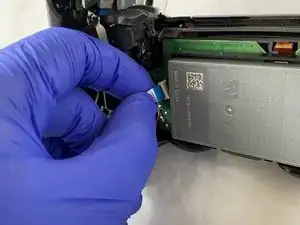
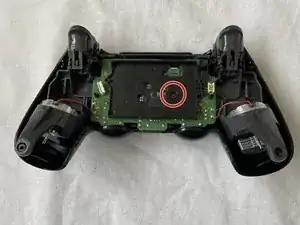
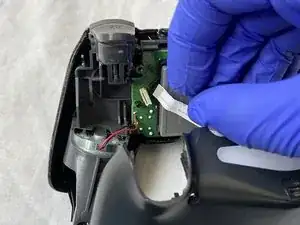
    • Use a chave de fenda Phillips #00 para remover o único parafuso de 6,0 mm preso à placa de circuito.

    • Uma vez que o parafuso for removido, o suporte da bateria ficará solto, permitindo que ele seja retirado puxando-o para cima.

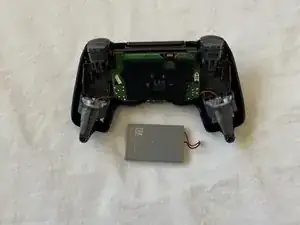
    • Remova o cabo da bateria.

  6. le2kZs5GrDTHYDE2
    le2kZs5GrDTHYDE2
    KjWrhErfpoiQZxid
    ndZB43RRFiVSaMJs
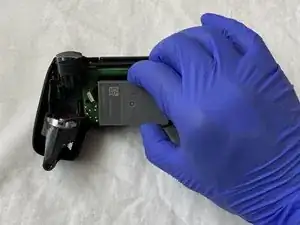
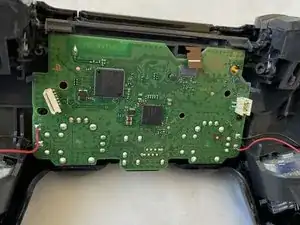
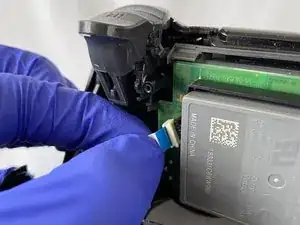
    • Desconecte o cabo da placa de circuito puxando-o para cima.

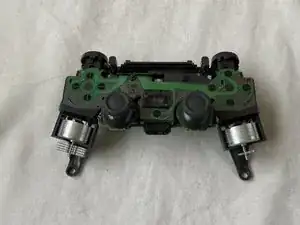
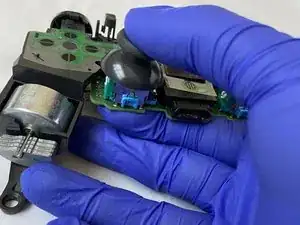
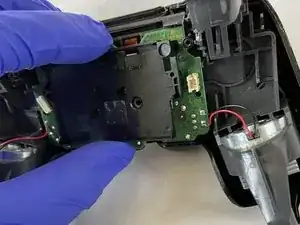
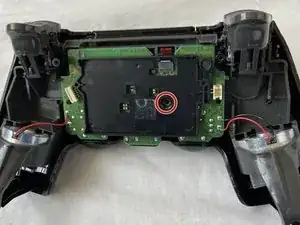
    • Puxe a placa de circuito para longe da carcaça frontal, de modo que ela fique completamente separada de todas as outras partes.

    Bis hier hin, bin ich gefolgt. Ich habe von diese Punkt an die Kontaktflächen der Druckschalter gereinigt, ( Isopropanol). Mit Wattestäbchen vorsichtig abgewischt. im abgenommenen Deckel die Silikonschablone mit den Gegenkontakten abgezogen und gereinigt (Isopropanol) und die Kunststoffknöpfe aus der Deckelhalbschale gedrückt. Danach alle Knöpfe und die Laufhülsen gereinigt ( Malzbier/Zucker entfernt) und wieder zusammengesetzt. Beim nächsten mal reinigen würde ich jetzt noch einen Stoß Teflonspray in die Hülsen geben. Nun alles rückwärts wieder zusammensetzen. Danke für die gute Beschreibung. (MaC)

    Martin Carstensen -

  7. HKWTZymHchGFTYRe
    HKWTZymHchGFTYRe
    ghTKWUNtCFyHbdri
    • Remova o joystick esquerdo puxando-o para cima até que ele se solte.

  8. TUMZPbNJIZRiycZQ
    TUMZPbNJIZRiycZQ
    XuwraGg1BnlNCivk
    • Em cada uma das câmaras verdes, há uma abertura que separa o corpo metálico prateado das câmaras verdes.

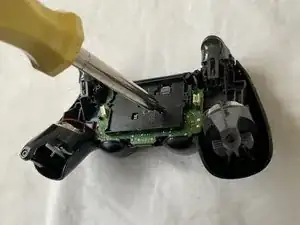
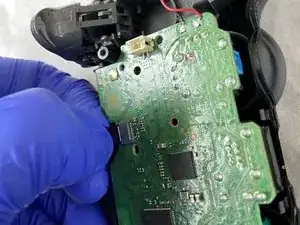
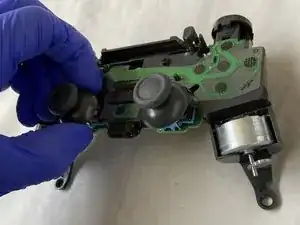
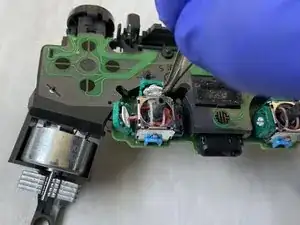
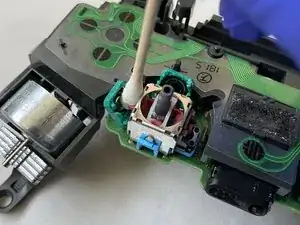
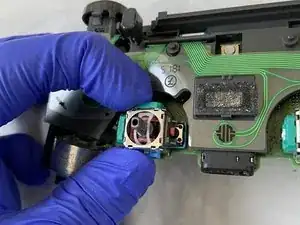
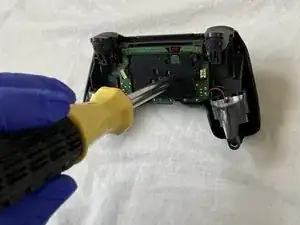
    • Use uma chave de fenda de ponta chata para abrir as câmaras verdes, inserindo a ponta da chave de fenda na abertura e empurrando para dentro.

    • Abra com muito cuidado para que as câmaras verdes não se quebrem ou se soltem da placa de circuito.

  9. OXRaNfQ3WRZr2PDS
    OXRaNfQ3WRZr2PDS
    KOlqqGZOJZJdHFfG
    1UpBoLbcTeVCGCLM
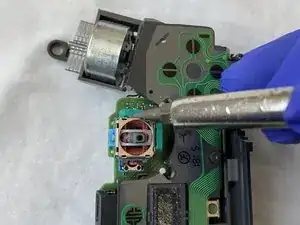
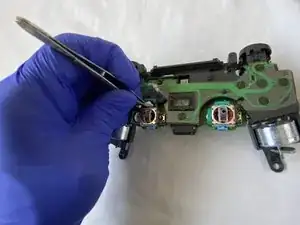
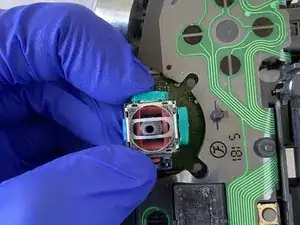
    • Uma vez que as câmaras estejam abertas, use uma pinça para pegar e remover o disco branco de cada uma das câmaras.

    • Pegue um cotonete e mergulhe-o em álcool isopropílico 90%.

    • Use o cotonete embebido para limpar as câmaras completamente.

    • Deixe as câmaras verdes secarem por cerca de 5 a 10 minutos antes de continuar a remontagem.

    The white disk is an intricate part. Each contains 2 semi-circular <0.5 mm thick wires which are exposed and elevated, and serve to relay proportional motion to the motherboard, Do not tug, pull, press or break any of them as that may cause that plane of motion to be permanently disabled / enabled.

    Ming L -

    I just took apart my controller to clean out the analog part because I have a bad drift in my left analog and it's making me crazy. So I have all the screws in one spot and the white disks together in another I'm organized when I do this type of stuff, but when I looked again I only had 3 disks. There are 4 chambers and I'm positive that I took 4 disks out, but now I'm trying to convince myself there were only 3 to begin with which I know is wrong. Can anyone confirm if there are 3 or 4.

    Tommy Levins -

    There are 4. One for vertical and one horizontal for each analog.

    This is why I do them one at a time. No point leaving the chambers open so that dust ir other things can collect in them while you work on the others, plus in just reduces the risk of misplacing or damaging one of the disks.

    Clean one, place disk back in, snap shut, onto the next one. And only bother doing both sticks if both have a problem, don't fix what isn't broken. You want to open these chambers as little as possible as each time you do, the solder gets weaker and weaker from bending. Do this too much and you'll end up having to replace the entire analog stick.

    darkseany223 -

    For that matter, don't even clean both chambers on one analog if it's only Drifting in one single direction.

    For example If it's drifting straight down with no diagonal tilt to it, there's no need to bother with both.

    Just remember that the chamber on the SIDE controls vertical and the chamber on the TOP controls horizontal. So in this case, clean the one on the side as it is the source of the downward drift.

    darkseany223 -

    With my Dualshock 4 controller, the drift problem was not resolved after cleaning the disks and chambers. On a second try, I switched the disks on the joystick (disk from left chamber went into top chamber and vice versa) and that resolved the drift problems for me. Or I cleaned better the second time, could also be.

    Johan -

    Always keep your busted remotes. Never know when a spare part can come in handy. Ribbon cable stop working or fried battery? Thumbstick rubber peeling off? Tried to fix a drifting mote but accidently bent the metal on one of the discs? Snag em from your old dead water damaged remote.

    Frankenstiening motes has saved me hundreds.

    darkseany223 -

    mine had black discs but everything else is the same as shown here. Each disc has delicate contacts that must be cleaned with isopropil alchohol too, but wit great care they can bend easily (happened to me, had to use magnifier and super fine tweezers to repair) Excellent guide btw!

    regislefeuvre -

  10. 6SM5lx6FQtKKsLip
    6SM5lx6FQtKKsLip
    rFWjwvRpACwWp3Ul
    JNHG6Mu3wwhqLxDo
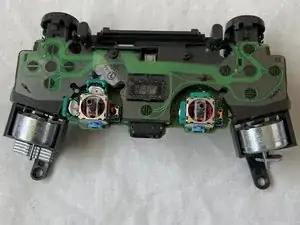
    • Coloque os dois discos brancos de volta nas câmaras verdes usando a pinça.

    • Insert translation here

    When putting those discs back in place be very careful not to bend the semi circular “springs” out of shape. If they get out of shape they will need replacing. Also, make sure that both clips on the disc pass through the hole on the plasic chamber. It may appear to “click” back into place but the chamber won’t sit right and this will affect the efficacy of the repair.

    Richard Donaghue -

    Hello, my discs were black and not white, but it must depend on the version of the controller. However, the circular spring of the disc seems to me to be in bad condition, not quite flat. Is this normal? Also, where can I get some?

    Pierre Toscane -

  11. HeUk2uAjUmZl1wUM
    • Pegue o joystick esquerdo e coloque-o de volta até ouvir um clique, confirmando que o joystick está firmemente fixado.

    But my right joystick has drift stick

    mohamed. el arbaoui -

  12. uxDWRGcUUemNdOZy
    uxDWRGcUUemNdOZy
    AigZfCAhFIElhwIJ
    tBJAK3EPXF3DFAAE
    • Passe o conector do cabo pelo orifício da placa de circuito a partir da carcaça frontal para conectar ambas as partes.

    • Eu pessoalmente usei uma pinça para posicionar o conector do cabo da carcaça frontal na placa de circuito.

    • Coloque o conector no soquete e pressione para baixo para reconectá-lo.

  13. GNUkDEVhkNMImMwU
    GNUkDEVhkNMImMwU
    SPoJArJFEfeVTevO
    16FTVy32ml3CTeO1
    • Coloque o suporte da bateria e alinhe os pinos com os orifícios para o alinhamento correto.

    • Recoloque o parafuso de 6,0 mm no suporte da bateria usando a chave de fenda Phillips #00, para que o suporte da bateria fique firmemente preso à placa de circuito.

  14. HZ3umUKUYYMySqtm
    HZ3umUKUYYMySqtm
    rpIBOimKkv46CSBY
    • Coloque a bateria no suporte.

    • Conecte os fios vermelho e preto da bateria ao soquete pressionando para baixo.

  15. VqegQTxAN1waLdTK
    VqegQTxAN1waLdTK
    oldOZvi1ZQBtMZRD
    • Coloque a fita conectada à carcaça traseira na placa de circuito e pressione para baixo para que ambos os compartimentos fiquem conectados.

    I had a controller where an attempt was made to repair and they replaced this ribbon back to front. Needless to say it wouldn’t work at all. Just make sure the metal bits of the ribbon are on the side of the contacts.

    Richard Donaghue -

  16. JACxTJTm3pXeRmpP
    JACxTJTm3pXeRmpP
    P4Q5WlRYAWnRAqeb
    dT46s5JupL2WXyi4
    • Encaixe a carcaça frontal e a carcaça traseira juntas.

    • Parafuse os quatro parafusos Phillips de 6,0 mm nos suportes de parafuso da carcaça traseira usando a chave de fenda Phillips #00.

    • Seu controle está pronto para uso!

Anubhab Rahman

Membro desde: 17/01/21

2442 Reputação

19 comentários

does this work with the right joystick too?

long tran -

Yes! Both sticks seems to be identical. Did my right one and it fixed the drift.

raltamimi0001 -

i fix my brothers ds4 with your tutorial. Thank you very much.

Bryan Avila -

Thank you so much for this amazingly well made guide. I just fixed my PS4 controller and it surprised me how well it works, absolutely no drift whatsoever. I should note that i’ve done the same steps on the right stick as it’s the one broken for me.

raltamimi0001 -

I just followed the guide and the drift problem is gone! A really throughout guide with all the details and warnings. Thank you for this.

Diego Costa -

This works. Thanks to the poster, bought some really cheap controllers off facebook and repaired them following this. Thank you!

Manu facturer -

dident try but man the comments look pleasing though i wont do it cuz im not ryna break it and i dont havbe 90% isopropyl alcohol but yeh look good enough

Hamza Dardar -

Would regular rubbing alcohol work instead of isopropyl?

heezkd -

Both ethanol and isopropyl are very suitable, although isopropyl will evaporate less quickly and leave less residue. Ethanol is often used to clean glass, while isopropyl is more often used in the production of electronics.

Toon Konings -

Lo hice, y me anduvo muchísimo peor, al punto que lo tuve que tirar. Algo debo haber hecho mal. La guía 10 puntos, igual. Abrazo.

Gaston Gherardi -

Thank you for this tutorial which works perfectly. I managed to make my son's Dualshocks look young again. Be careful, the part where you have to open the green covers is very complicated. Be thorough. In addition to the iso alcohol, I added a special contact product

cyril.blot -

What’s the special contact product you used does it help

Sharon Denise Keef -

What should I do if there is still a drift in my controller even after fixing it like you said

Umamah Shakeel -

Is there away to prevent this from happening to being with

Sharon Denise Keef -

Is there anything that can be gone to prevent this from happening it’s getting old having to do this so often

Sharon Denise Keef -

o meu começou a sair fumaça e cheiro de queimado, arranquei a carcaça e tirei a bateria do conector

Arthur Marques -

easier than it looks, i just fixed my ds4 thanks to this, basically the hardest part was the second step

Simone Corbelli -

my controler now dosnt turn on now

michał cios -

Me funcionó en un DualShock 4 v2 (CUH-ZCT2U), que tenía deriva en el joystick derecho hacia la izquierda, dicho sea de paso. Tuve pequeños problemas con el potenciómetro verde que se encuentra a la izquierda del joystick dañado, no volvía a su lugar pero con cuidado y paciencia lo pude resolver.
Hay que decir que el potenciómetro antes mencionado se encarga del movimiento vertical y el otro (que está arriba) del horizontal y que probablemente no haga falta abrir ambos si el problema se encuentra solo en un eje —como en mi caso—, aunque no es mala idea limpiar ambos.
Así que puedo dar fe de que me funcionó. Muchas gracias por la guía.

Adad G -