Introdução
This guide will show you how to replace the degraded light seals in a Canon A-1 camera to restore image clarity and prevent light leaks. Before beginning the guide, make sure to take the batteries out of the camera and power it off.
Common symptoms of eroded light seals include warm-toned splotches of color or rays of light on one side of, both sides of, or throughout the image. If the light seals erode, light can leak into your film and obscure the images you are trying to capture. The light that enters through the erosions can cause flares, streaks, and fogging in the image, especially in high-contrast lighting.
These seals also ensure the pressure is maintained to keep the film flat and hold the camera's back door tightly closed!
If your light seals are sticky near the camera door edges or the foam is deteriorating to the touch, it is time to replace them. This fix is suitable for beginners.
Before you begin this repair, make sure that your camera is off and you remove the battery.
Ferramentas
-
-
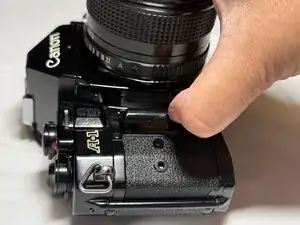
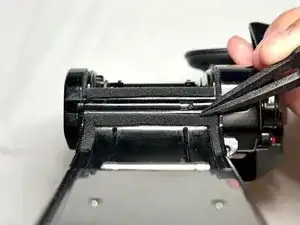
In the front left side of the camera, there is a large black screw. Place your fingernail into the indent going across the screw, and use it as leverage to turn the screw counter-clockwise.
-
Once it loosens, drag your finger downwards against the left side of the screw to quickly unscrew it.
-
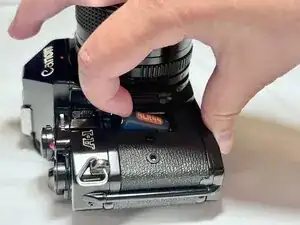
The screw will not fully come out, so once you think it's out of its socket, gently pull the black plastic action grip to the left. It should very easily slide off.
-
-
-
Press the button inward towards the camera's lens.
-
Pull the door up towards you, allowing the battery to be exposed.
-
Remove the battery.
-
-
-
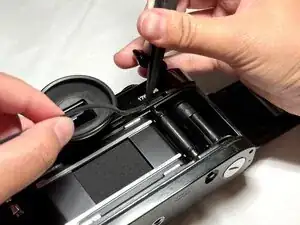
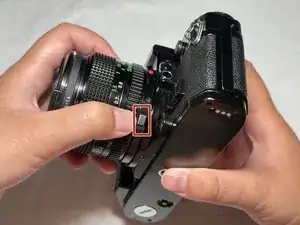
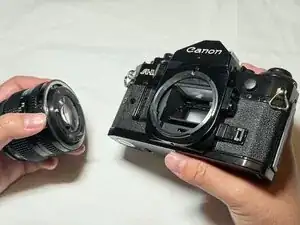
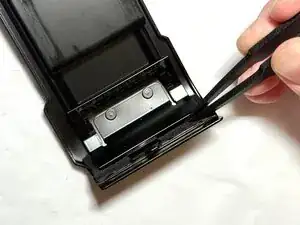
Press and hold the silver button located on the bottom right side of the lens.
-
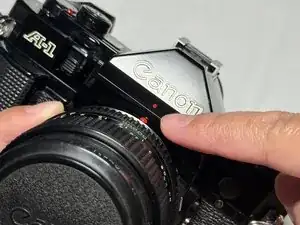
While holding the button, twist the lens counterclockwise until the red dots on the body and the lens on the camera align.
-
Gently pull to remove the lens.
-
-
-
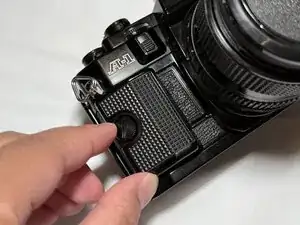
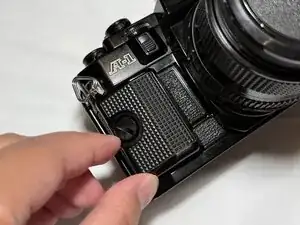
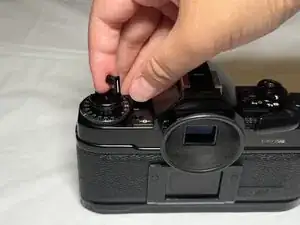
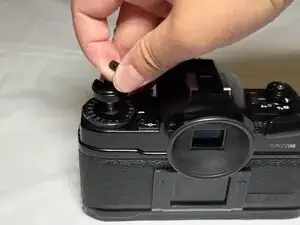
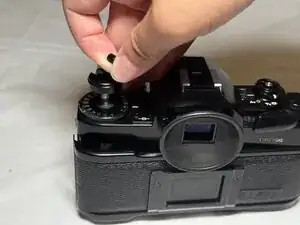
Lift the film rewind crank, and pull it upward until you feel a slight resistance at the first stop.
-
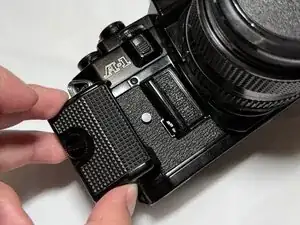
Continue pulling past this stop until the camera door is fully opened.
-
-
-
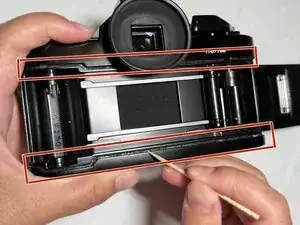
Identify all the areas inside the camera that require light seal replacement.
-
The following sections may need to be cleaned and re-sealed:
-
The top and bottom crevices inside the film chamber.
-
Both sides of the door hinge.
-
The door latch on the opposite side of the door.
-
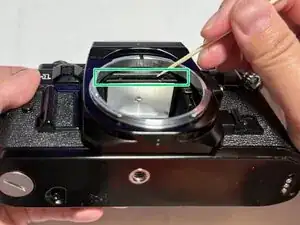
The mirror bumper near the lens mount.
-
-
-
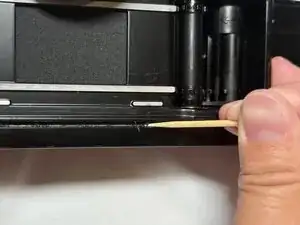
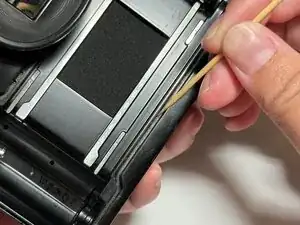
Use a toothpick to gently scrape off the old foam from all areas that need replacement.
-
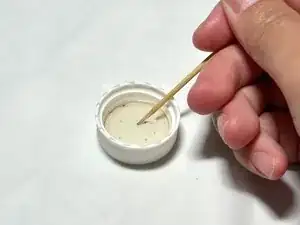
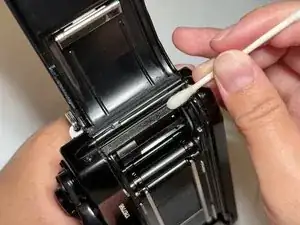
Dip the toothpick in 91% (or greater) isopropyl alcohol (IPA).
-
Use the damp toothpick to loosen and scrape away sticky residue.
-
Repeat the same cleaning process for mirror bumper, door hinge, and any other light seal sections needing replacement.
-
-
-
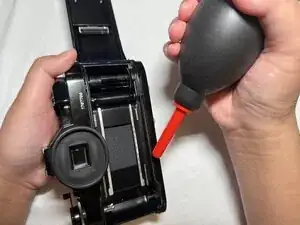
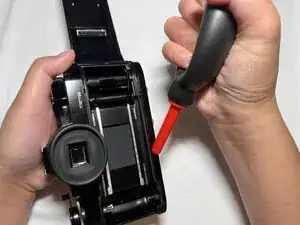
Squeeze the rocket blower to blow away loose foam or any foam particles that may have fallen into the camera. Hold it roughly an inch above the target areas.
-
Repeat as many times as necessary until the debris has been removed.
-
-
-
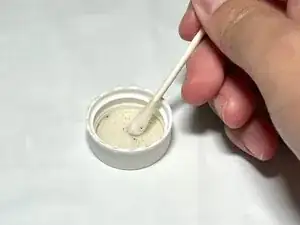
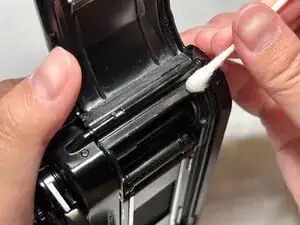
Dip a cotton swap into the isopropyl alcohol.
-
With the cotton swab, wipe across the access areas, like the door hinge, while applying light pressure to remove sticky residue.
-
Repeat as many times as necessary until the camera is clean from any foam and does not feel sticky to the touch.
-
-
-
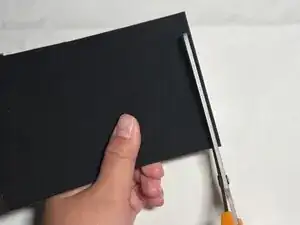
Measure the length of the areas where the new light seals will be placed.
-
Use scissors to cut the measured length of your new high-density foam.
-
Trim the new foam to a width of about 2-3 mm.
-
-
-
Use tweezers to place foam into the top groove in the camera.
-
Press it into the opening until it is flush with the sides of the space.
-
Repeat for the bottom groove, the door hinge, and other areas you are replacing.
-


You're not quite done, yet! Now you need to check if the light seals have been properly replaced.
After completing all steps detailed above, replace the lens by completing step 3 in reverse order. Reinsert the battery.
Open the back of the camera, and insert a new roll of film. Shoot the roll of photos, and develop to see if there are any light leaks still present. High-contrast photos are a good way to test the light seal placement. If there are any remaining light leaks, inspect your foam placement and gently press down each foam strip to maintain full contact in the crevices. Over time, check your light seals during routine cleaning—especially if the camera has been stored in heat or humidity.
If this guide helped you, consider sharing your experience or leaving a comment to help other film photographers in the iFixit community.