
Introdução
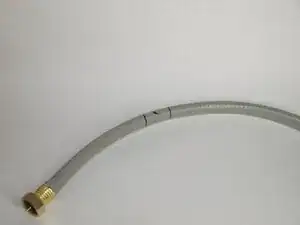
Whether you have a minor kink, a bulging bubble, or a nasty leak, a well-maintained garden hose can keep working for years — and you don’t always have to buy a new one. This guide will walk you, step-by-step, through how to diagnose and repair common hose issues, no matter the size or type of damage. It doesn’t matter if the problem is a stubborn kink, a tiny pinhole leak, or a split somewhere along the length — with a few simple tools and a little patience, you can restore your hose’s functionality.
Follow these instructions carefully, and you’ll learn how to spot trouble early, make smart repairs, and even extend the life of your hose beyond what you thought possible. Your garden — and your water bill — will thank you.
Ferramentas
Peças
-
-
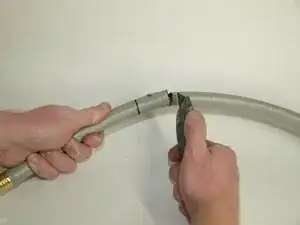
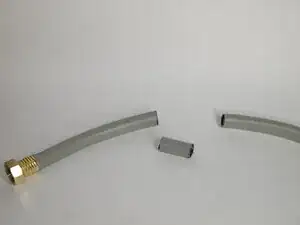
Mark lines to cut along. Make sure to leave at least a half-inch margin on each side of the blemish.
-
-
-
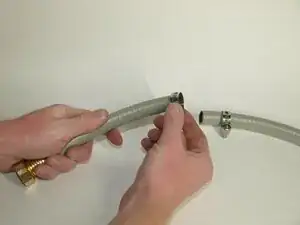
Insert the hose coupler into each end of the hose. Ensure the coupler is fully inserted into each end.
-
-
-
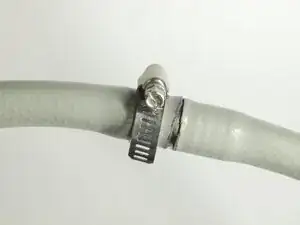
Align the hose clamp so that there is still hose coming out on the cut side, while ensuring the clamp is within the end of the coupler.
-


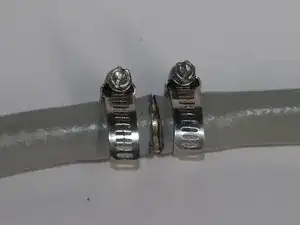
This is a straightforward and inexpensive repair that anyone can do themselves. The two most important things to note in this guide are to ensure the hose is fully seated around the brass coupler and to verify that the hose clamps are sufficiently tightened.