Introdução

This guide disassembles the Beats Studio3 Wireless (A1914) headphones and gains access to the bluetooth board. This part provides all the wireless connections of the headphones including receiving and transmitting audio. If there are any connectivity issues where the headphones aren't receiving or transmitting wireless audio, then the bluetooth board may be the problem.

  1. tULEgkjSnIMaAa6S
    tULEgkjSnIMaAa6S
    oJf4ZQiVMJWfKTAt
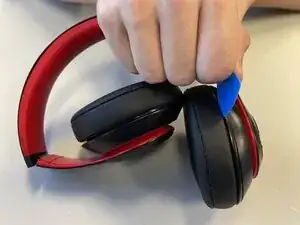
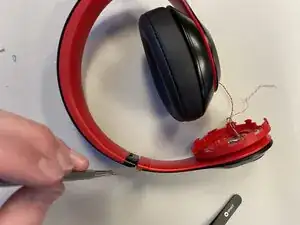
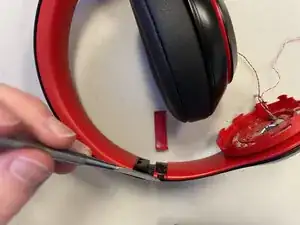
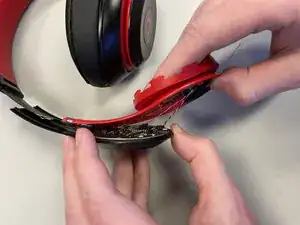
    • Insert an opening pick between the ear pad and the plastic.

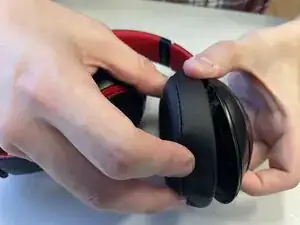
    • Pry with your hands until the two separate completely.

  2. CGKEOVCpG5DGVdbK
    CGKEOVCpG5DGVdbK
    domEsGhcWd1RFc2M
    • Unscrew all seven 5.2mm screws with a Phillips #00 screwdriver.

    • Pull the plastic face off.

  3. KkbHj1Bu42gJo6UU
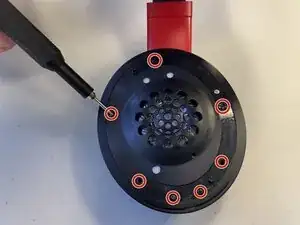
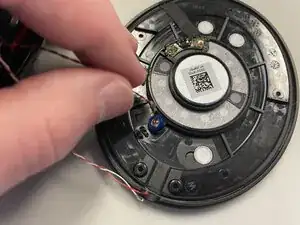
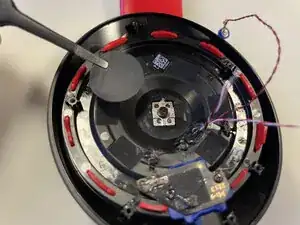
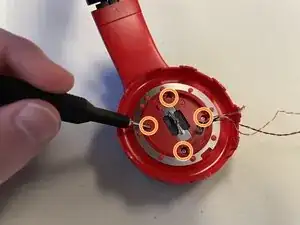
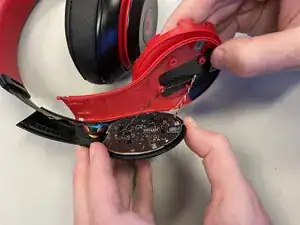
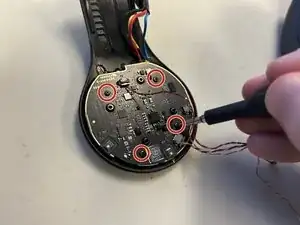
    • Remove all the glue from the loose plastic plate with a soldering iron or heat gun.

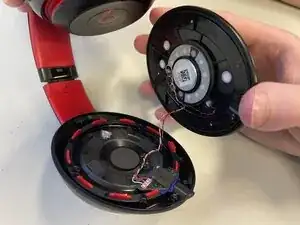
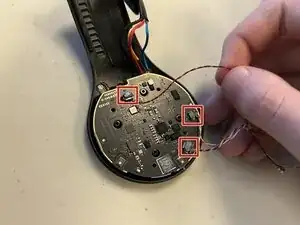
    • Pull all the loosened wires off the loose plastic plate with your fingers.

  4. 1nRwAKVwWCMmfJYL
    • Pull the microphone on the plastic plate out of the holder with your fingers.

  5. s1LEb5xJyLCBbARD
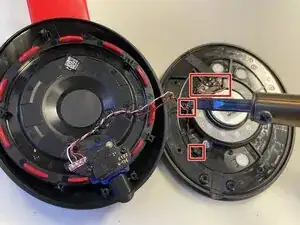
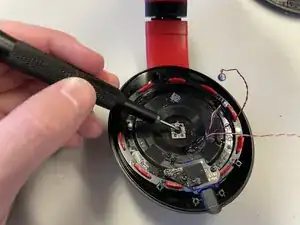
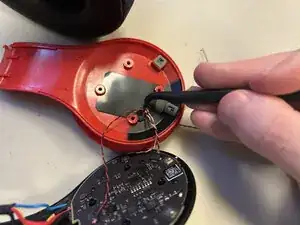
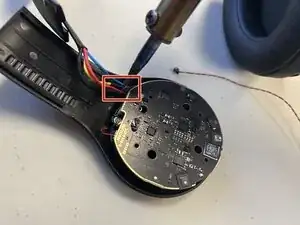
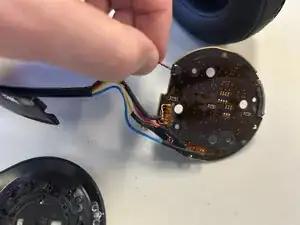
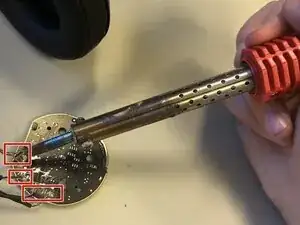
    • Remove all the glue with a soldering iron or heat gun.

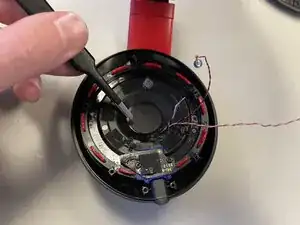
    • Pull all the wires off the headphone with your fingers.

  6. kHCIBiEVyPKtiV43
    kHCIBiEVyPKtiV43
    q5YH5VMqLQVV6cmk
    • Peel the sticker off the middle of the headphone with tweezers.

  7. ewqfBIKEDHrkMvHb
    • Unscrew the 5.2mm screw in the center with a Phillips #00 screwdriver.

  8. OaCVpDc6WbHG1VDR
    OaCVpDc6WbHG1VDR
    r1C3rSjeQON2wOXf
    2CBcTMMFyLTZxUyy
    • Pry the black plastic plate off the red rubber holder with your hands.

  9. qaWUkRohMyPNrHOR
    • Unscrew the four 5.2mm screws on the new red face with a Phillips #00 screwdriver.

  10. eDoHBKPIFSIDCNNk
    eDoHBKPIFSIDCNNk
    DbaaAJfeXULP2MtL
    • Pry the plastic piece with the L written on it off the headband using a spudger.

  11. mcFLPjMutBDIRBMv
    mcFLPjMutBDIRBMv
    QgGaB61iOStRplnC
    DF12IqTZD6Whhpd2
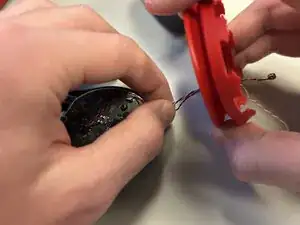
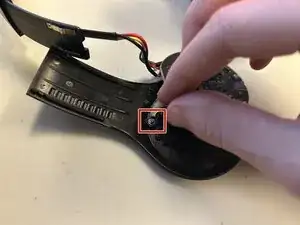
    • Pry and slide the red rubber piece down off the headphone using your hands revealing the black bluetooth board.

  12. mOeDJ5eO1wPELf3j
    • Poke a hole in the black tape large enough for the wires to pass through using a pick.

  13. fVVVHMwfbfCgKkq4
    • Pull the wires through the red rubber piece using your fingers.

  14. uOjqyRVoDaDaLKgP
    • Unscrew the four 5.2mm screws from the bluetooth board using a Phillips #00 screwdriver.

  15. MhJGGeFbtyNjPspK
    • Disconnect the three wires from the bluetooth board using your fingers.

  16. AxTis4eVB2tjFVjn
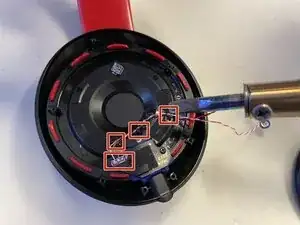
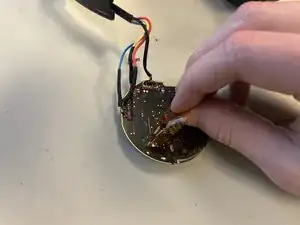
    • Remove the glue holding the wires to the headband with a soldering iron or heat gun.

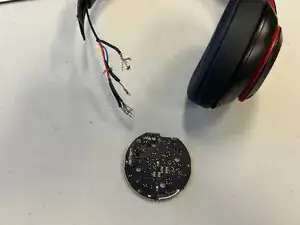
    • Pull the wires and bluetooth board off the plastic they were attached to.

  17. PZFLTSlWHl6Q1VsH
    • Pull the microphone out of its holder with your fingers.

  18. HKGbGKY2PTsWTbPg
    • Disconnect the short wire from the back of the bluetooth board using your fingers.

  19. CLrGoZd1UpyCLrp6
    • Peel the orange-tinted tape from the bluetooth board with your fingers.

  20. NWSaDVWCY4IGbOVS
    NWSaDVWCY4IGbOVS
    owvnbMokH2JkKuIE
    • Desolder the remaining wires.

    • Pull all of the wires off the bluetooth board.

Conclusão

To reassemble your device, follow the above steps in reverse order.
Take your e-waste to an R2 or e-Stewards certified recycler.
Repair didn’t go as planned? Try some basic troubleshooting or ask our Answers community for help.

Charles

Membro desde: 08/09/25

301 Reputação

0 comentários