Introdução
Ferramentas
Peças
-
-
Use your PH1 screwdriver to remove the 4 visible screws holding down both end caps (2 screws per cap).
-
-
-
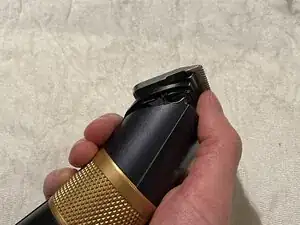
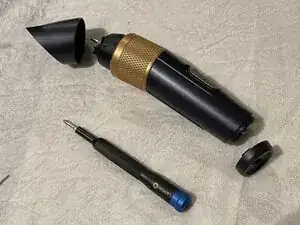
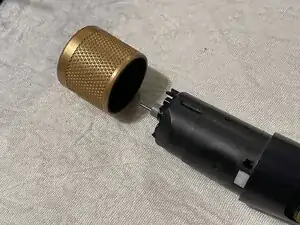
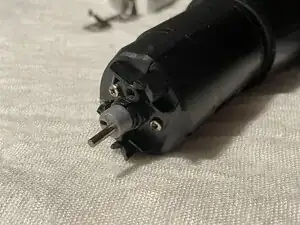
Put the selector on "3 mm" and pull it off the clipper (this requires some force)
-
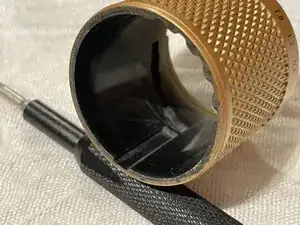
If you look at the second picture, you can see that under the guide that actually selects the trimming length, there is a vertical indent going straight down and atop it a bump between it and the length guide.
-
The reason the ring is hard to pull out is because of this little bump.
-
The vertical indent will also help to reassemble the clippers when you're done.
-
-
-
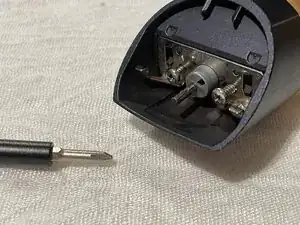
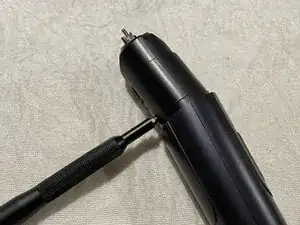
Use your PH1 screwdriver to remove the screw holding the main body parts together as well as the 2 screws on top holding the motor in place.
-
-
-
Pry the body apart starting from the bottom, you can use pry tools or a flat head screwdriver to get some leverage (though the flat head will likely damage your clipper a bit).
-
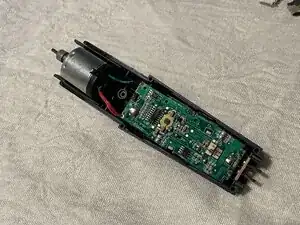
This will expose the insides of the clipper. The battery is attached under the PCB.
-
To remove the PCB, pull the tabs holding it in place near the bottom and it will slide out. The motor was unscrewed in step 4 and will slide out as well.
-
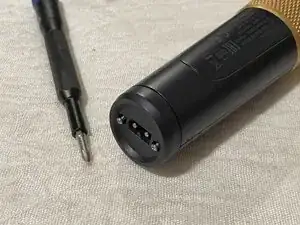
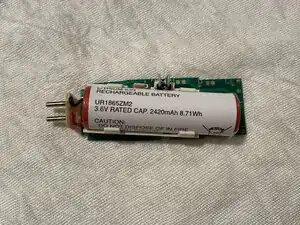
The battery is a standard 3.6V Lithium-Ion battery, you can find them for cheap online.
-
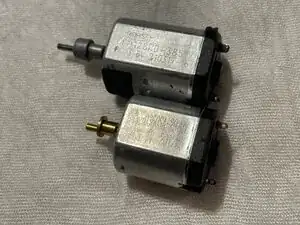
The DC motor is a FF 128PD and the clipper end can be removed. This motor is impossible to find online but you can buy an FF360 instead, it's slightly shorter but the screw spacing is the same and fits this razor.
-
-
-
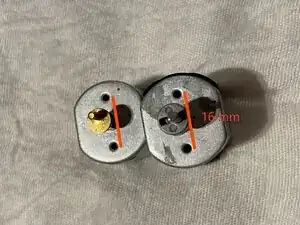
The original motor for these clippers is a 3.6V DC motor with number part FF-128PD. But it is impossible to find online. You need to find a replacement motor with a screw spacing of 16mm and the same or smaller width / depth. The FF-360SA is a suitable replacement apart from the shaft attachment.
-
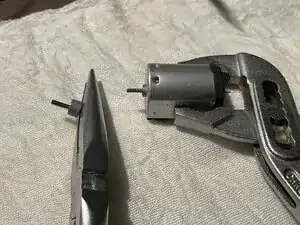
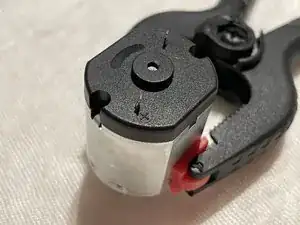
The shaft attachment on the original FF-128PD motor seems to be unique to this model too, so we'll have to remove it from the original motor and put it on the new one before we start soldering. You can use pliers to get leverage on the end shaft.
-
-
-
Follow the existing teardown guide.
-
Unclip the PCB from the body and slide the motor out.
-
De-solder the motor from the PCB (or rip the cables off if you have replacement cables).
-

To reassemble your device, follow these instructions in reverse order.