
Introdução
This is the Asus Chromebook CM1402CM2A-DS44 also known as a chromebook. In this guide you will be able to learn how to fix and replace the trackpad which is what you use when moving the cursor on the screen. Another way I would describe it is the square part of the laptop below the keyboard, that you use instead of a mouse to control where you want to go on the chromebook. Replacing your Asus laptop trackpad with an original Asus part is crucial for a successful and worry-free repair. Original parts guarantee a perfect fit, seamless performance with your laptop's system, and extended lifespan compared to potentially unreliable non-original options. Additionally, using genuine Asus parts reduces the risk of electrical issues or damage to other components. While non-original parts might seem cheaper upfront, the potential downsides can lead to additional repair costs. Choosing original parts from Asus Accessories ensures long-term value, supports Asus, and lets you enjoy the continued quality and functionality you expect from your Asus laptop.
The Asus Chromebook CM1402CM2A-DS44 has three main symptoms that affect the way the device works for some. The first is Power and Charging issues the symptoms for this are when the Chromebook cannot power on, or the battery is not charging (e.g., blinking or red charging light). The next symptom is the system freezing or unresponsiveness which the symptoms of the chromebook locking up, freezing or just stops responding to inputs. Lastly the Asus Chromebook might have DIsplay Problems with symptoms of an abnormal display, screen flickering, or the screen is too dark, bright, or has incorrect colors.
Moreover, regarding warnings for this chromebook they include performance limitations due to its modest specs, a California Proposition 65 warning, and standard battery safety warnings.
Ferramentas
-
-
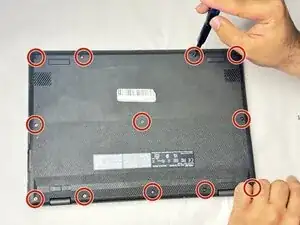
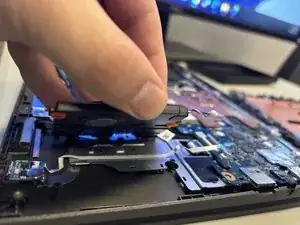
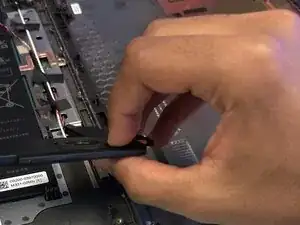
Insert an opening tool or Jimmy into the seam between the lower case and chassis.
-
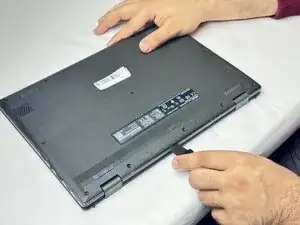
Pry around the entire perimeter until the lower case fully releases.
-
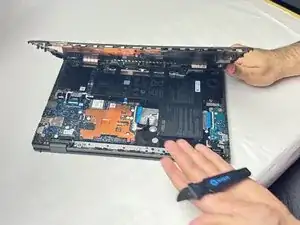
Remove the lower case.
-
-
-
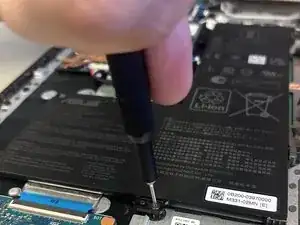
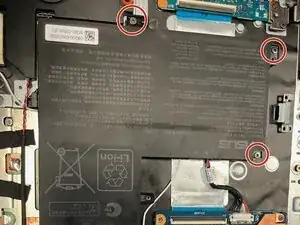
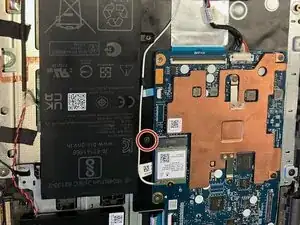
Remove the four 3.4 mm-long screws securing the battery with a Phillips #1 screwdriver.
-
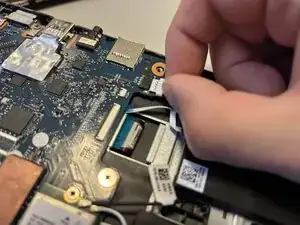
Disconnect the battery connector.
-
Remove the battery.
-
-
-
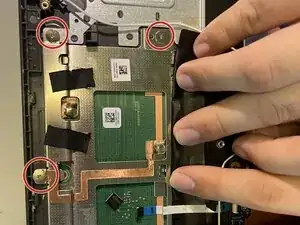
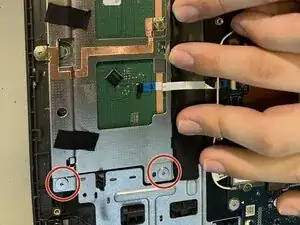
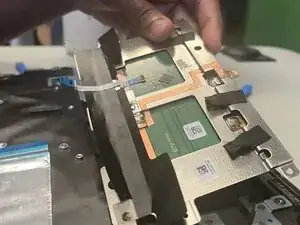
Remove the five 2.4 mm-long screws securing the trackpad with a Phillips #1 screwdriver.
-
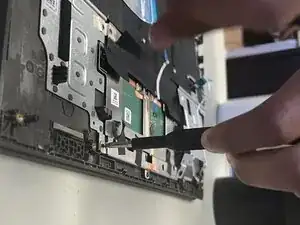
Disconnect the trackpad's motherboard connector.
-
To reassemble your device, follow the above steps in reverse order.
Take your e-waste to an R2 or e-Stewards certified recycler.
Repair didn’t go as planned? Try some basic troubleshooting or ask our Answers community for help.