Introdução

This guide shows how to replace the heatsink of the Acer Swift X N20C12.

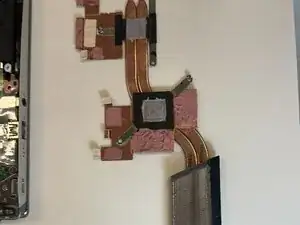
The heatsink moves heat away from important heat generating components like the CPU, GPU, memory modules, etc. The heatsink works together with the fan which blows the hot air out of the laptop.

There are thermal pads and paste on the heatsink and components attached to it, which you may also want to replace if you're experiencing thermal throttling or frequent crashes when doing heavy workloads.

  1. 5wXKAoPohC2uDHiU
    • Use a T5 Torx screwdriver to remove the eleven screws that secure the lower case.

  2. 6NgTgxIHJRS2vCGl
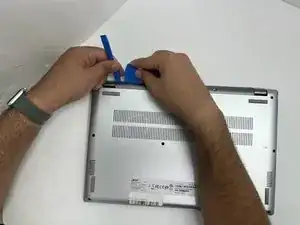
    • Insert an opening pick in the seam between the lower case and chassis.

    • Slide the pick around the perimeter while prying until the lower case releases.

    • Remove the lower case.

  3. MiJicE1NjH2W2CGD
    MiJicE1NjH2W2CGD
    SH3RCBMw3VLYHo1D
    • Use a Phillips #00 screwdriver to remove the five 5 mm screws that secure the heatsink.

    • When reinstalling the heatsink, replace the screws in the numbered order as indicated on the heatsink.

  4. EsTotCjyZHFyQOb5
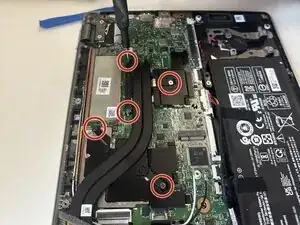
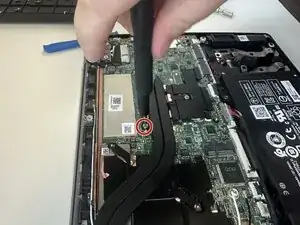
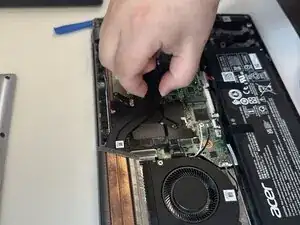
    • Hold the heatsink firmly with your fingers and lift it straight up to remove it from the laptop.

  5. 5BEKFZpUNAVyOlUc
    5BEKFZpUNAVyOlUc
    wuZQCMdtAdJLtwqa
    • Lay the heatsink with the thermal paste up so you don't stain your surface.

    • Instead of replacing, if you want to repaste the laptop, clean the thermal paste and pads off of the heatsink and motherboard components with isopropyl alcohol. Follow this guide for more information.

    • When applying the thermal paste/pads on the motherboard components, making sure not to apply too much or little. Do NOT apply the thermal paste/pads on the heatsink.

Conclusão

To reassemble your device, follow the above steps in reverse order.
Take your e-waste to an R2 or e-Stewards certified recycler.
Repair didn’t go as planned? Try some basic troubleshooting or ask our Answers community for help.

Hector

Membro desde: 17/06/25

427 Reputação

0 comentários