Introdução

If your Acer Chromebook (model CB5-571-C5XU) isn't producing clear audio–distorted, intermittent, or no sound, use this guide to replace the speakers (also known as speaker modules).

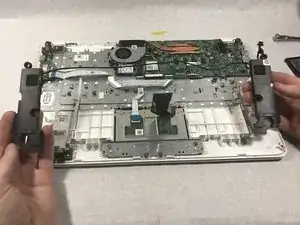
The speaker modules are responsible for audio output and stereo sound, which creates a stereo effect. Faulty speaker modules lead to distorted sound or no sound at all.

Before using this guide, make sure that the sound issue is not software-related by checking the following:

Be sure that you have thoroughly followed the steps of each troubleshooting resolution to the listed software issues on your device to confirm that the issue is faulty speaker modules.

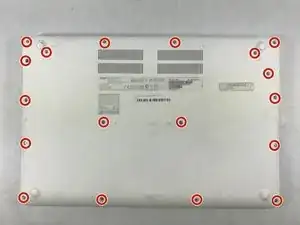
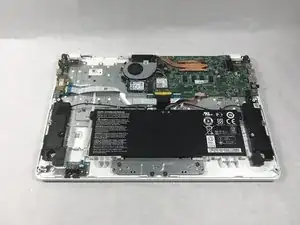
Before beginning, make sure your chromebook is unplugged and shutdown completely to avoid losing files and the risk of electrocution.

  1. eTF6AHwtjftF5S6U
    eTF6AHwtjftF5S6U
    HbMYJg6uyKU2DqvQ
    • Remove the following eighteen screws using a Phillips #0 screwdriver.

    • Make sure the Chromebook is unplugged and shut down, so no files are lost and there is no risk of electrocution.

  2. mBLukD5adMZ1OsSA
    mBLukD5adMZ1OsSA
    bZOx1OomueOPqFiU
    • Using the flat side of the spudger, pry open the bottom case of the laptop.

    • Working from the front to the back, where it connects to the screen, proved to be the easiest way of popping the case off.

  3. SnEY2BJrj5diNcZR
    • Using a Phillips #0 screwdriver, unscrew the screw on right side of the battery placement.

    • Be careful not to lose the screw and have a small container nearby to place it in.

  4. SOk1KgGlHvCvrNOQ
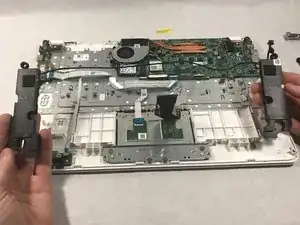
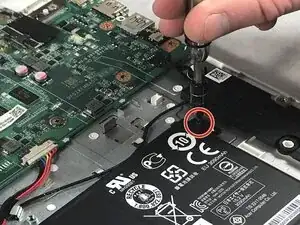
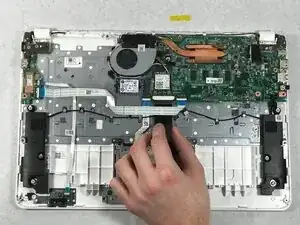
    • Using a plastic opening tool, disconnect the wires connecting the battery to the motherboard.

  5. deypR4re1ypd62Xt
    • Gently lift the battery out and remove it from the laptop casing.

  6. aWqNSSMNJ5wgiCFi
    aWqNSSMNJ5wgiCFi
    DT1fMEHTn65eG6ds
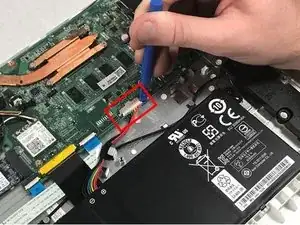
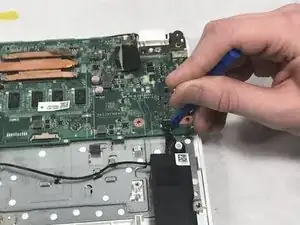
    • Use the plastic pry tool to unlatch the two tabs on either side of the black ribbon.

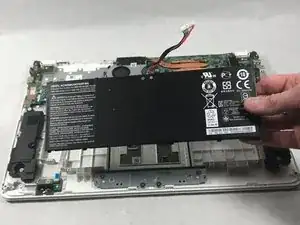
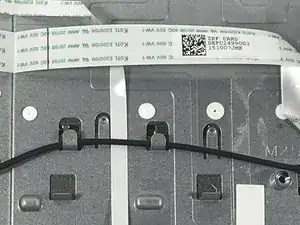
    • Gently slide the black ribbon out from its socket and under the white ribbon.

  7. nEaMMTxFZRtayCJm
    • Carefully remove the smaller black ribbon from the motherboard using the opening tool.

    • Be careful when prying the connector loose, its small size can make it difficult to grasp a corner of the connector.

  8. QIa5XMB3AOGeTOIy
    • Weave the black wire connecting the two speakers out of the small metal hooks.

    • It might be helpful to take a picture of how the wire is wrapped around the hooks, as this layout is important when the wire is put back.

  9. 65OPDKjOMjlbNLcg
    • Simply lift upwards on both speakers, and they will remove from their position.

Conclusão

To reassemble your device, follow these instructions in reverse order.

️Gaetan Charles

Membro desde: 26/10/17

119 Reputação

0 comentários