Introdução
Before performing any repairs, make sure the laptop is fully powered off and disconnected from its charger. This guide will show you how to remove and replace your fan. Replacing the fan involves first removing the keyboard, battery and the motherboard.
Ferramentas
-
-
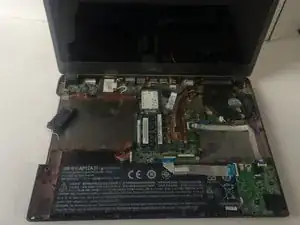
With the laptop closed and powered off, place the laptop screen side down.
-
Turn the laptop so that the hinges are closest to you.
-
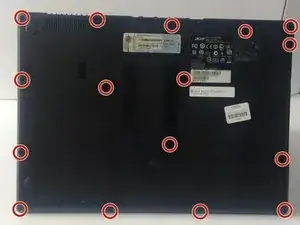
Remove sixteen 6 mm screws from the bottom of the laptop with the Phillips #00 screwdriver.
-
-
-
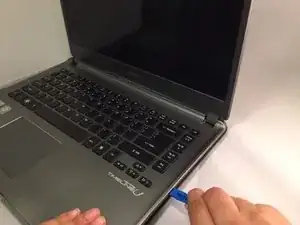
Flip the laptop over and open the lid.
-
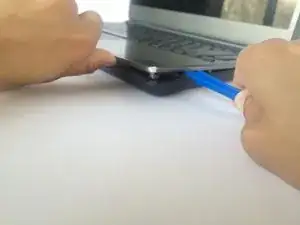
Use the plastic opening tool with the half centimeter wide tip to gently separate the bottom case of the laptop from the keyboard.
-
Gently pull the keyboard upwards to a 45 degree angle.
-
-
-
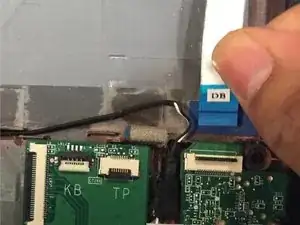
Hold the keyboard open with one hand to extend the three cables (white, black and copper) still connecting the bottom of the keyboard to the back case.
-
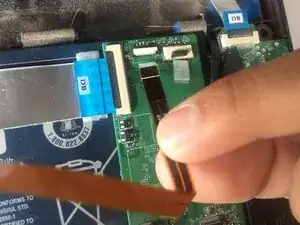
Use your fingernail to flip up the small retaining flap of each zero insertion force connector and then gently pull each ribbon cable out one at a time.
-
-
-
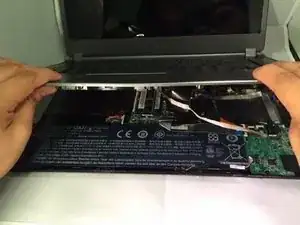
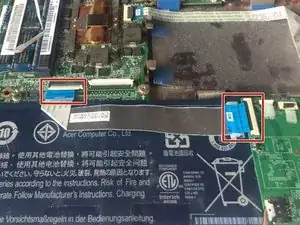
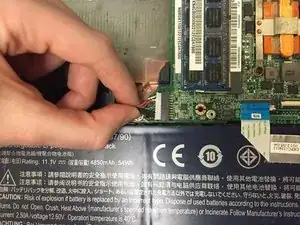
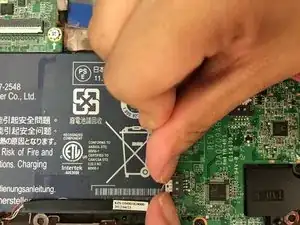
Gently disconnect the silver cable that stretches over the battery by using your fingernail to flip up the small retaining flaps on both sides of the zero insertion force connector.
-
-
-
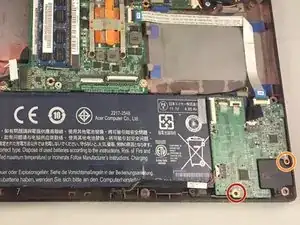
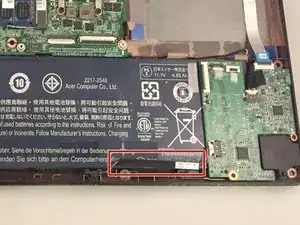
Remove one 3 mm screw from the side closest to you on the motherboard with a JIS #1 screwdriver.
-
Remove one 4 mm screw from the right side of the motherboard with a JIS #1 screwdriver.
-
-
-
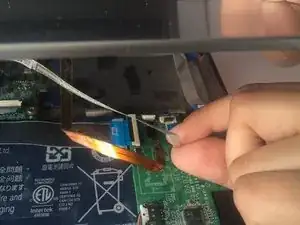
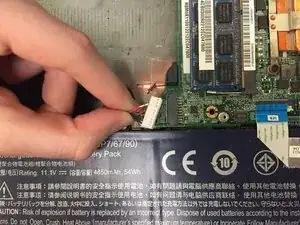
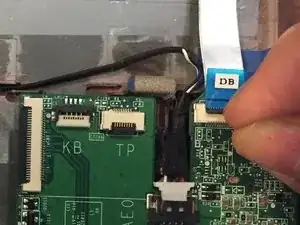
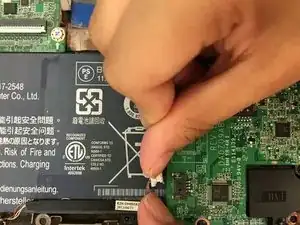
Use your fingernail to flip up the small retaining flap of the zero insertion force connector and then gently pull out the silver ribbon cable.
-
-
-
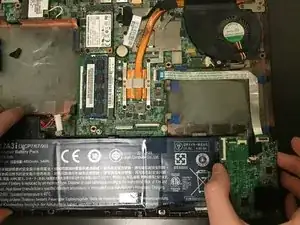
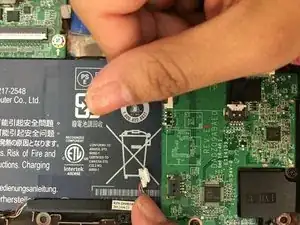
Gently disconnect the six bundled cables (red, black, and green) attached to both the battery and motherboard by pinching them with your thumb and forefinger. Pull with moderate force towards the left to disconnect.
-
-
-
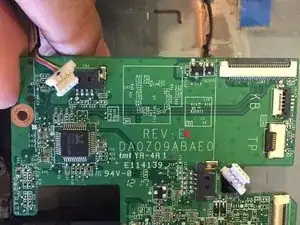
Gently lift up the black-covered cables that remain connected to the motherboard at the bottom left of the laptop base.
-
Move the cables toward the bottom edge of the laptop closest to you without disconnecting them.
-
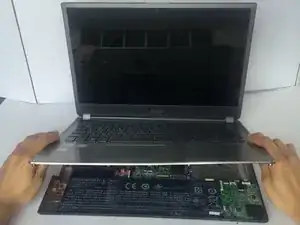
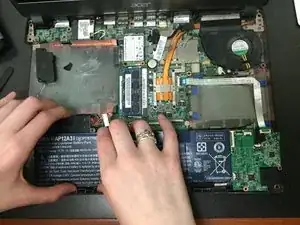
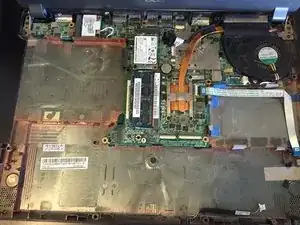
Carefully lift up the motherboard and slide the battery to the left to pull it out.
-
-
-
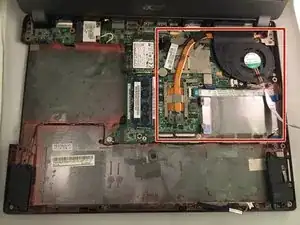
Use your fingernail to flip up the small retaining flap of zero insertion force connector and then gently out pull the silver ribbon cable.
-
-
-
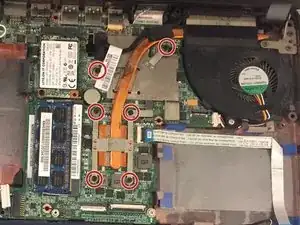
Use the #J1 Phillips head screwdriver to unscrew six #J1 Phillips head screws but do not remove the screws.
-
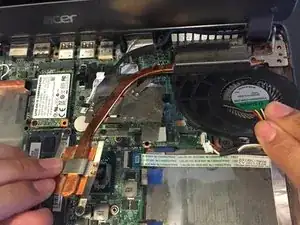
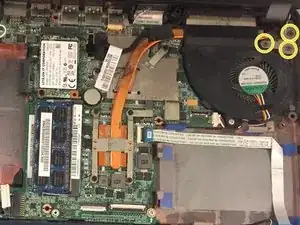
Use the #J1 Phillips head screwdriver to unscrew one 5mm #J1 Phillips head screw from the side of the fan closest to you.
-
Use the #J1 Phillips head screwdriver to unscrew three 7 mm #J1 screws from the top corner of fan.
-
-
-
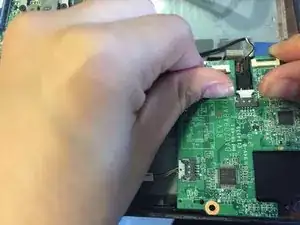
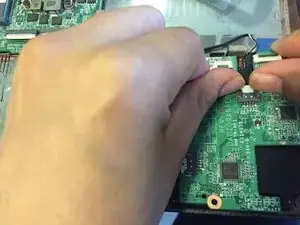
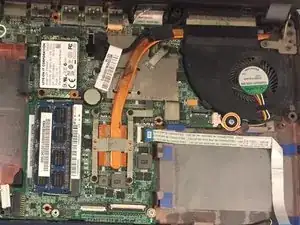
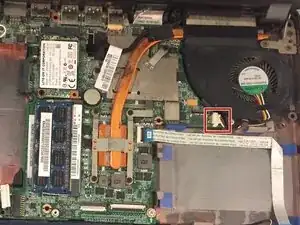
Use your fingers to pinch the fan connector and release it from the socket on the motherboard.
-
If that doesn't work, use the point of a spudger to push on alternating sides of the connector to "walk" it out of its socket.
-


To reassemble your device, follow these instructions in reverse order. Take your e-waste to an R2 or e-Stewards certified recycler.